Introduction
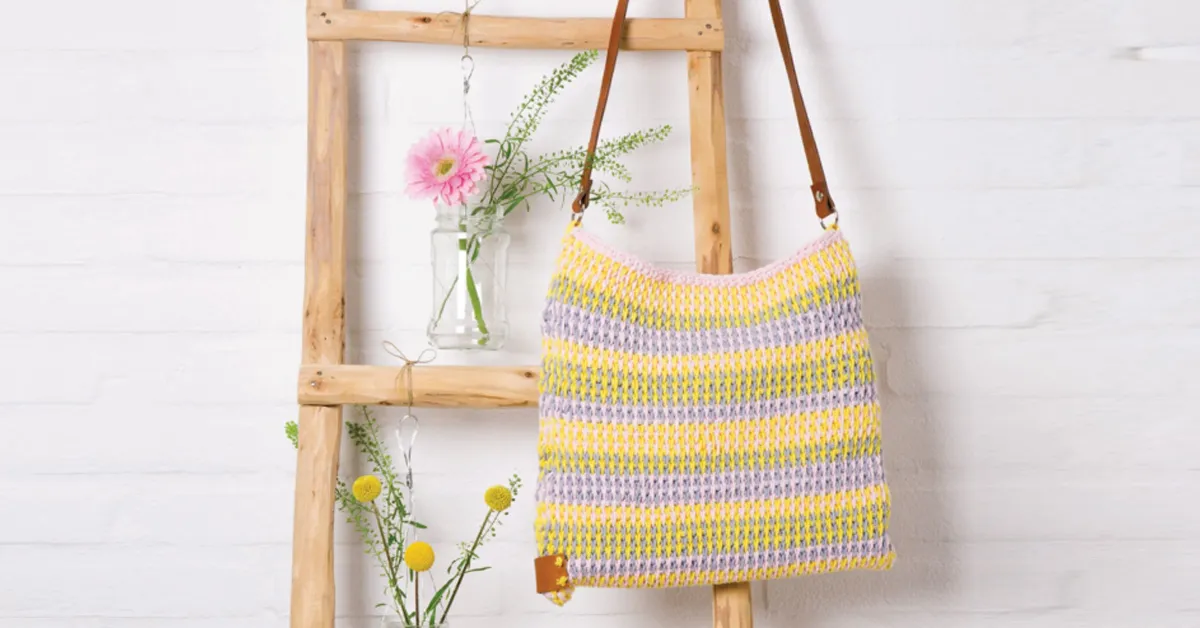
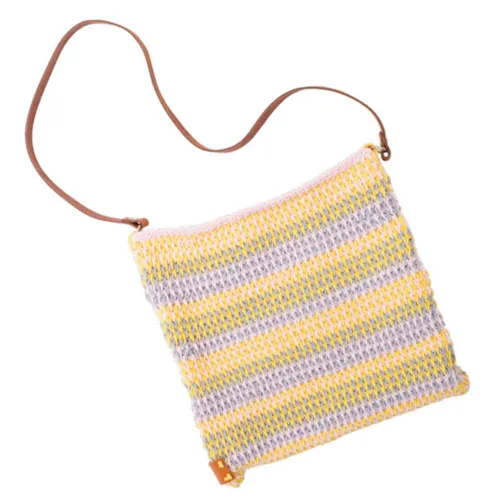
There’s something truly special about carrying a handmade bag, especially when it’s crafted in soft pastel shades that scream style and personality. Whether you’re heading out for a coffee date or hitting the local market, a crochet bag adds a unique, charming touch to any outfit. If you’re on the hunt for a fun and modern project, this tunic crochet bag pattern might be just what you need.
This design isn’t just pretty—it’s also practical. Made with durable macramé yarn and worked in the versatile tunic stitch, this stylish crochet bag pattern offers both strength and structure. Plus, with its leather handle and polished look, it’s a fashionable accessory you’ll love showing off.
What makes this project even more exciting is the stitch itself. The tunic crochet technique—often compared to knitting—creates a beautifully textured fabric that looks intricate but is easy to master with a bit of practice. It’s perfect for crocheters who want to level up their skills and try something new.
Ready to dive into your next favorite DIY crochet accessory? This pattern will guide you through every step to make a bag that’s as functional as it is fabulous.
Table of Contents
- Introduction
- What Is a Tunic Crochet Stitch?
- Materials Needed
- Why Macramé Yarn Works for Bags
- Step-by-Step Instructions
- Finishing Touches
- Styling and Usage Ideas
- Final Tips & Troubleshooting
- Conclusion
What Is a Tunic Crochet Stitch?
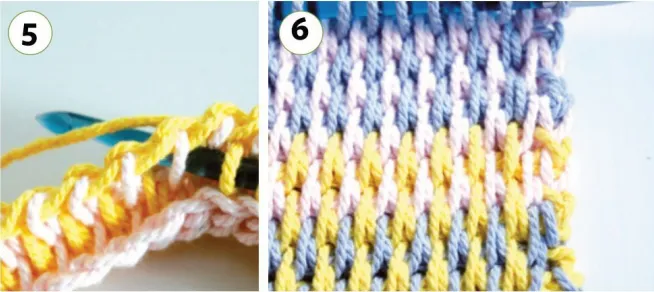
The tunic crochet stitch—also known as the Afghan stitch—is a unique technique that blends the beauty of knitting with the ease of crochet. Unlike traditional crochet, where you complete each stitch one at a time, tunic crochet involves picking up multiple loops on your hook across a row before working them off in a return pass. This creates a structured, woven-like fabric that feels rich and sturdy in your hands.
In a typical crochet tunic stitch tutorial, you’ll notice how all the loops stay on the hook, much like knitting needles, giving the fabric a tight and uniform appearance. This method is excellent for projects that need more body and resilience, like bags, home décor, or garments with clean stitch definition.
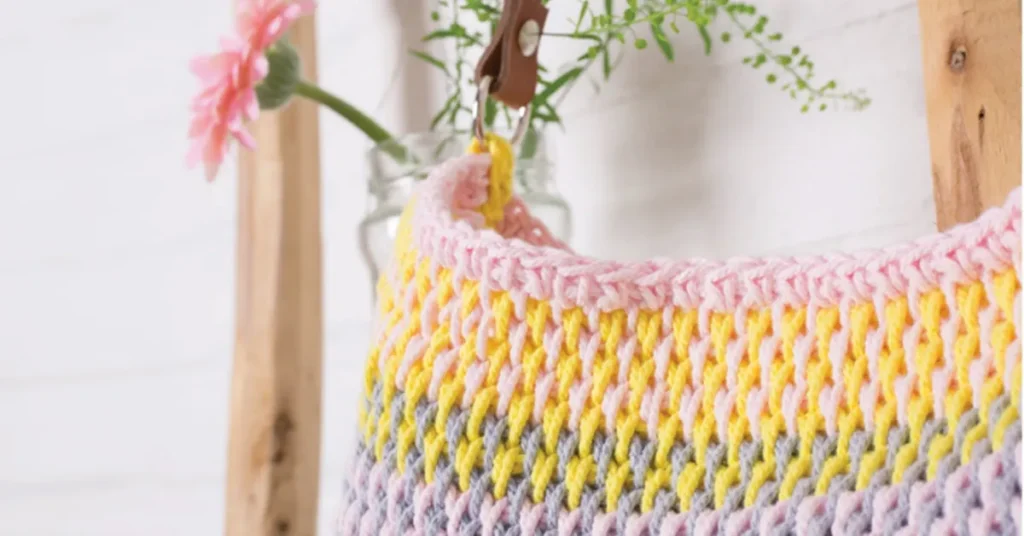
One of the standout advantages of using this stitch in a bag project is that it naturally forms a dense texture. Because you crochet in open spaces rather than between traditional stitches, the result is a solid fabric that usually doesn’t require any lining. That means less finishing work and more time to enjoy your creation!
Whether you’re new to this technique or looking to sharpen your skills, the tunic stitch is a fun and satisfying way to take your crochet to the next level.
Materials Needed
Before you dive into this beautiful tunic crochet bag pattern, make sure you have the right materials on hand to bring your project to life. This stylish shoulder bag uses sturdy yarn, a special crochet hook, and some elegant finishing touches to achieve its polished look.
You’ll Need:
- Durable macramé yarn – 2 balls of each color: light pink, bright yellow, and light gray
- 5.5 mm to 6.5 mm tunic crochet hook – choose the size that suits your tension
- Leather handle – for a professional and durable finish
- Leather label – adds a chic, handmade touch to your final piece
We recommend using Durable Yarn, known for its quality and vibrant pastel shades. You can find it online at DurableYarn.com or at local yarn shops that carry macramé-friendly fibers.
Whether you’re working with crochet hooks for the first time or you’re already a seasoned pro, gathering these materials ensures a smooth start to creating your very own bag with a modern, sturdy finish.
Why Macramé Yarn Works for Bags
When it comes to making bags that hold their shape and last through daily use, macramé yarn is a top choice. This thick, sturdy fiber offers excellent structure, making it ideal for crochet projects that need to stand up on their own, like totes and shoulder bags. One of the best parts? You can skip the lining! Thanks to its dense texture, crocheting with macramé yarn naturally creates a solid fabric that’s functional and stylish.
Another reason to love it: the color range. Brands like Durable Yarn offer macramé yarn in a variety of trendy pastel shades, perfect for adding a soft, modern look to your accessory collection. From light pink to sunny yellow and cool gray, your bag will look both chic and cheerful.
If you’re looking for durable yarn for crochet bags that brings both beauty and strength, macramé yarn is the way to go.
Step-by-Step Instructions
Now that you’ve gathered your materials, it’s time to start making your tunic crochet shoulder bag. If you’re new to the tunic crochet technique, don’t worry—this step-by-step breakdown will guide you through each part of the process. It’s an easy crochet bag for beginners who are ready to try something a little more advanced and rewarding.
Make the Foundation Chain
Begin by chaining the desired width of your bag. Since this is a shoulder bag, you might start with around 40–50 chains, depending on how large you want it. The number of chains determines the bag’s width.
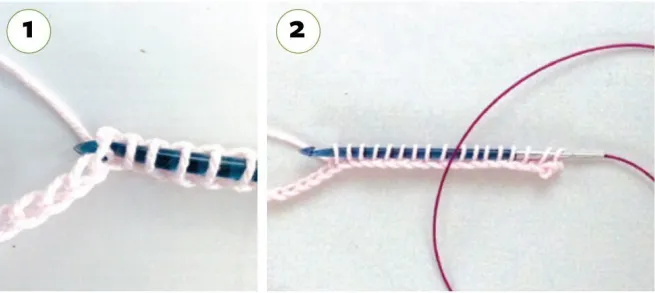
Pull Up Loops
In the first row, you’ll work from right to left, inserting your hook into each chain and pulling up a loop—but leave the loops on your hook. Once you’ve worked across the row, your hook will be full of loops, just like in knitting.
Work the Return Pass
To return, yarn over and pull through two loops at once, working your way across the row until only one loop remains on the hook. This completes your first row in the tunic crochet technique.
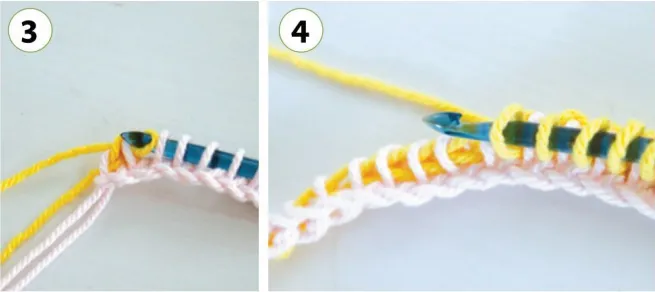
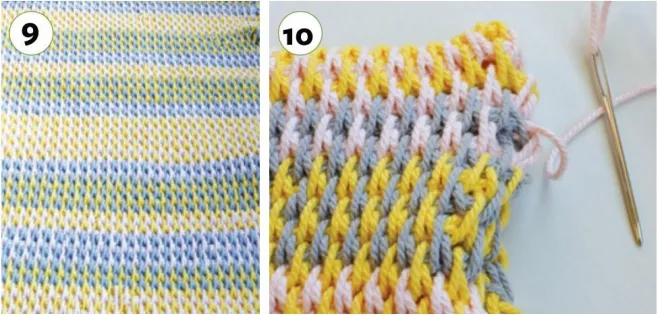
Crochet into Open Spaces

For the next rows, instead of inserting your hook into the stitch tops, crochet into the open vertical bars or spaces formed by the loops from the previous row. This helps maintain the structure and clean look of the tunic stitch.
Continue repeating Steps 2–4 until you achieve the desired height for your bag.
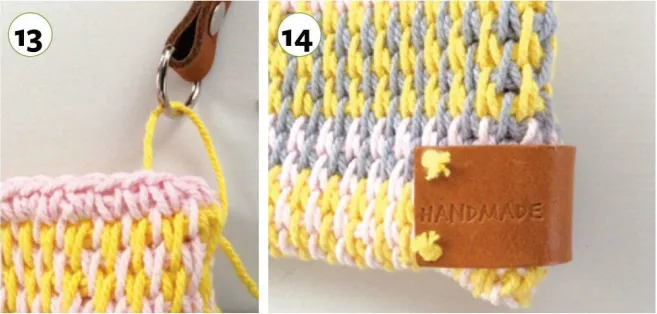
Shaping and Finishing
Once both the front and back panels are complete, sew the sides and bottom together using whip stitch or single crochet. Attach your leather handle securely, and sew on the leather label for that stylish finishing touch.
Tips for Beginners
- If you find your fabric getting too stiff, switch to a larger hook size (up to 6.5 mm).
- Keep your tension relaxed when pulling up loops, so the rows stay even.
- Consider practicing the stitch on a swatch first before starting your bag.
Optional: Add a Lining
While it’s not necessary due to the density of the stitch and macramé yarn, you can add a fabric lining for extra polish. Choose a lightweight cotton in a complementary color for a clean interior finish.
Once you’ve mastered this method, you’ll know how to crochet a shoulder bag that’s both sturdy and stylish—all with your own two hands!
Finishing Touches
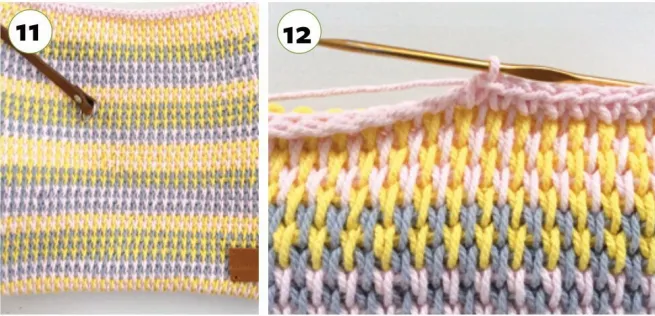
Once the body of your bag is complete, it’s time to give it that final polished look with a few simple but impactful additions. Start by attaching the leather handle—this not only adds durability but also transforms your project into a true, stylish crochet bag. You can sew the handle directly onto the top edges of the bag using strong thread or small rivets for extra security.
Next, stitch on a leather label to one side of the bag. It’s a small detail that adds a professional, boutique-quality touch to your finished piece. It’s these thoughtful extras that elevate your work from homemade to handmade chic.
Want to personalize your bag even more? Consider adding a magnetic button closure, a soft fabric lining, or fun tassels to the sides. These little flourishes give your handmade crochet bag pattern a custom vibe that reflects your personal style.
Don’t be afraid to experiment—finishing touches are where your creativity can really shine!
Styling and Usage Ideas
This modern crochet bag pattern design is as versatile as it is beautiful. With its roomy interior and sturdy structure, it makes the perfect summer companion—use it as a beach bag, a lightweight market tote, or your go-to everyday shoulder bag. The relaxed shape and texture pair effortlessly with casual denim, flowy dresses, or boho-inspired outfits, making it a standout accessory for sunny days.
The soft pastel crochet bag palette—featuring light pink, bright yellow, and cool gray—adds a fresh, feminine vibe to any look. Whether you’re headed to brunch or browsing a local artisan market, this bag brings the perfect mix of charm and functionality.
Best of all, it’s a reflection of your own creativity. With this piece, you’re not just carrying a bag—you’re showcasing your love for DIY crochet fashion in the most stylish way possible.
Final Tips & Troubleshooting
As with any crochet project, a few helpful tips can make all the difference. First, be mindful of your tension—tunic crochet can easily become stiff if your stitches are too tight. If you find it challenging to insert your hook effortlessly, consider switching to a 6.5 mm hook for enhanced flexibility and comfort.
Keep an eye on your stitch height to maintain an even, professional-looking fabric. The loops you pull up should all be about the same length to avoid a wavy or uneven texture.
For the best results, always use a quality macramé yarn and avoid tugging too tightly as you work. When your bag is complete, spot clean it with a damp cloth or gently hand wash it in cool water. Avoid machine washing or wringing, as it can distort the shape.
With just a little care, your handmade bag will look fresh and fabulous for seasons to come!
Conclusion
The tunic crochet bag pattern is a must-try for any crocheter looking to create something stylish, functional, and truly unique. With its textured stitch, modern shape, and soft pastel colors, this project perfectly blends creativity with everyday practicality. Whether you’re making it for yourself or as a handmade gift, this bag is sure to turn heads.
We’d love to see your finished work! Share your photos and tag us so the Crochetex community can admire your creation. Don’t forget to explore more fun and inspiring patterns at Crochetex.com—we’re always adding new ideas to keep your hooks busy.
Planning to try this project later? Don’t forget to pin it on Pinterest for easy access whenever you need it!
Ready to make your own stylish macramé crochet bag? Let’s get started!