Introduction
Amigurumi, the art of crocheting small, stuffed yarn creatures, has taken the crafting world by storm. With its roots in Japan, this fun and addictive craft has grown in popularity worldwide, captivating both beginners and seasoned crocheters alike. Whether you’re creating cute animals, characters, or fantastical creatures, amigurumi offers endless possibilities for creativity.
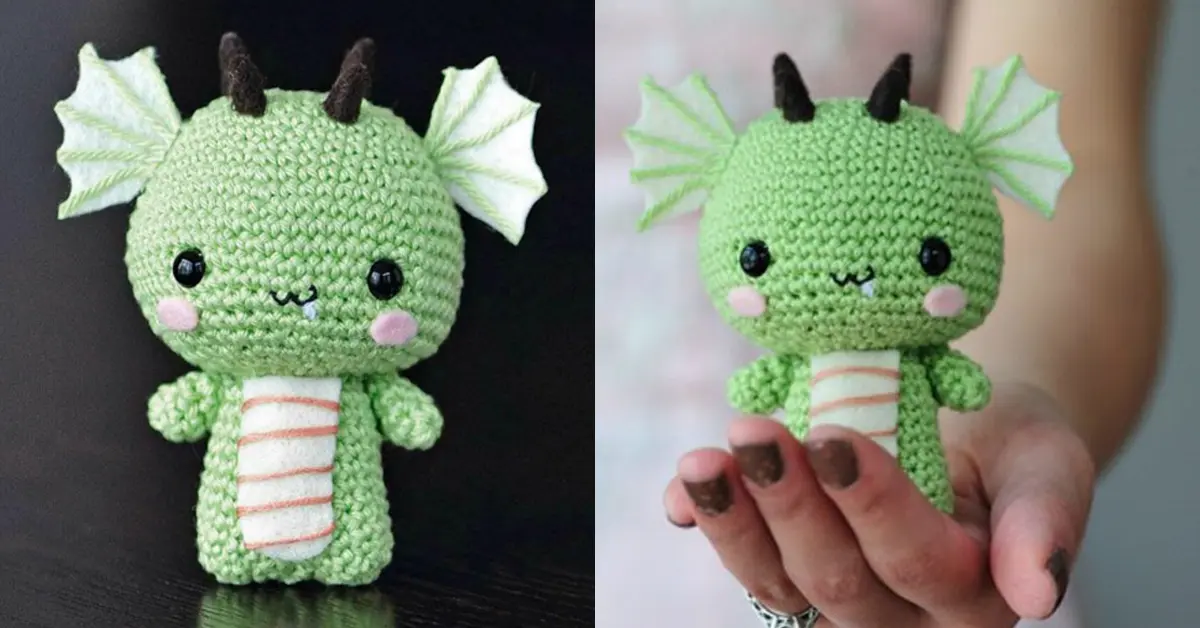
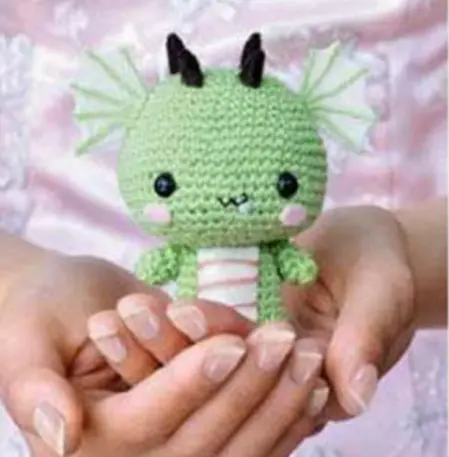
One such charming creation is Stephanie’s crochet dragon amigurumi, a perfect project for beginners. This easy crochet dragon is not only adorable but also simple to make, making it an excellent choice for those new to amigurumi. With its friendly face, tiny wings, and playful charm, it’s a delightful creature that will soon become your favorite handmade toy.
In this guide, you’ll learn everything you need to create your own dragon. From the materials required to step-by-step instructions, we’ll cover all the techniques and tips to help you succeed. By the end, you’ll have a beautifully crafted dragon that’s ideal for gifting or enhancing your collection of crochet creations. Let’s jump into this beginner-friendly amigurumi pattern and bring your crochet dragon to life!
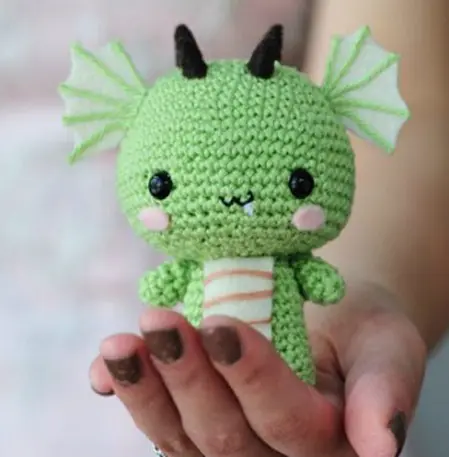
Table of Contents
- Introduction
- What is Amigurumi?
- Tools & Materials You’ll Need
- Stitches & Techniques to Know Before Starting
- Step-by-Step Crochet Dragon Amigurumi Pattern
- Assembly Instructions & Finishing Touches
- Customization Ideas
- Tips for Beginners
- Why This Dragon Makes a Great Gift
- Conclusion
What is Amigurumi?
Amigurumi is a delightful Japanese craft that involves crocheting or knitting small, stuffed toys, often featuring whimsical characters and creatures. The word itself combines ami, meaning “crocheted or knitted,” and nuigurumi, meaning “stuffed doll.” These adorable creations can range from animals and fantasy creatures to food, plants, and even miniature characters. Amigurumi has captured the hearts of crafters around the world thanks to its charm, simplicity, and creative freedom.
One of the most enjoyable aspects of making an amigurumi toy is how each piece comes to life stitch by stitch. Most patterns are made by crocheting in spiral rounds, which means you work in continuous loops without joining at the end of each round. This technique helps keep the shape smooth and seamless — perfect for round heads, bodies, and limbs.
Another reason amigurumi is so addictive is the satisfaction of turning a few balls of yarn into something so full of personality. With just a small hook, some stuffing for amigurumi, and a few basic stitches, you can create a unique toy that brings joy to both the maker and the receiver. Whether you’re a beginner or an experienced crocheter, there’s something truly magical about creating your own soft, handmade creatures.
Tools & Materials You’ll Need
To bring your crochet dragon amigurumi to life, you’ll need a few key materials and tools. Each item plays an important role in shaping, decorating, and assembling your dragon. Here’s a complete list to guide you:
Yarn & Felt
- Patons Fab DK in Lime 02317 – 100% acrylic, 25g/68m
This soft and durable yarn is perfect for beginners. You can find Patons Fab DK in most craft stores or online. - Beige felt – for wings and the scaled body
- Dark brown felt – for the dragon’s horns
- Pink felt – to make cute little cheeks
Threads & Embellishments
- Black embroidery floss – used to stitch the mouth
- White embroidery floss adds a small, fierce fang
- Tan embroidery floss – for wrapping around the felt to create a scaled look on the body
Tools
- 2mm crochet hook (US 4 steel) – ideal for creating tight, even stitches for small details
- Yarn needle – This is essential for weaving in loose ends and stitching different parts together securely.
- 7.5mm safety eyes – perfect safety eyes for amigurumi, giving your dragon that expressive, wide-eyed look
- Polyester toy stuffing – essential for shaping your dragon and giving it a soft, plush feel
- Fabric glue & glue gun – used to attach felt details, horns, and wings securely
The right materials and tools will make your project smoother and more enjoyable. Don’t forget to prep your space and gather everything before you begin your magical crochet journey!
Stitches & Techniques to Know Before Starting
Before diving into your crochet dragon amigurumi, it’s helpful to know a few basic crochet techniques for beginners. Don’t worry — they’re easy to learn and will set you up for success with this fun project!
- Magic ring: This technique starts your project with a tightly closed circle — perfect for making neat, round shapes like the dragon’s head or limbs. It helps avoid that little hole sometimes left when you chain to start.
- Double crochet (dc) (UK terms): This is the main stitch used in this pattern. If you’re used to US terms, this is equivalent to a single crochet (sc). Most amigurumi patterns use this tighter stitch for a firm, solid shape.
- dc2tog: This is a decrease stitch where two double crochets are worked together into one. It helps shape the body and head by reducing the stitch count in a round.
- Working in continuous rounds: Also called spiral crochet, this method skips the slip stitch join at the end of each round. It creates smooth, seamless shapes — great for that round dragon head!
- Using a stitch marker: Since you’re working in a spiral, a stitch marker helps you keep track of where each round begins — essential for staying on track.
Step-by-Step Crochet Dragon Amigurumi Pattern
In this section, we’ll break down the process of creating your crochet dragon amigurumi step by step. Each part of the dragon will be tackled separately, and I’ll provide tips and tricks to help make the process smooth and fun. Follow along, and soon enough, you’ll have your very own cute dragon!
Head
Chain, Rounds, and Increasing
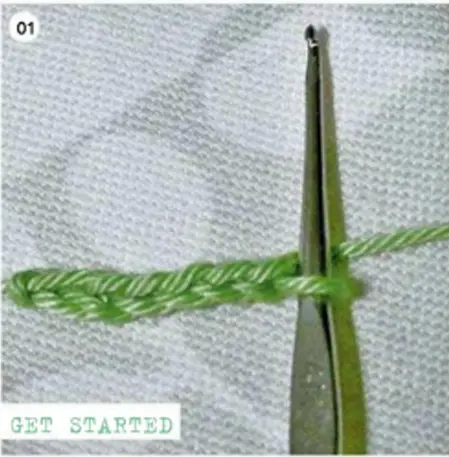
- Start by chaining 7 with the green yarn.
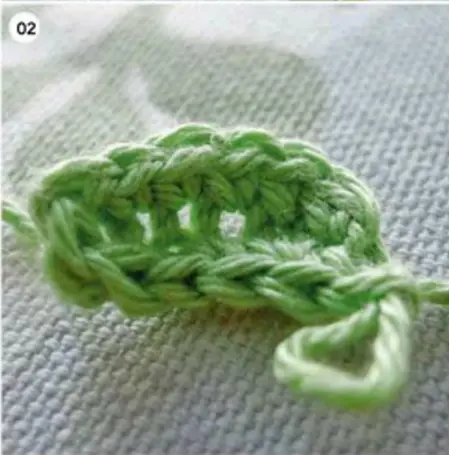
- Insert your hook into the second chain from the hook and crochet 6 double crochets (dc) into that chain. Turn and crochet 6 dc along the other side of the foundation chain, creating an oval shape. [12 sts]
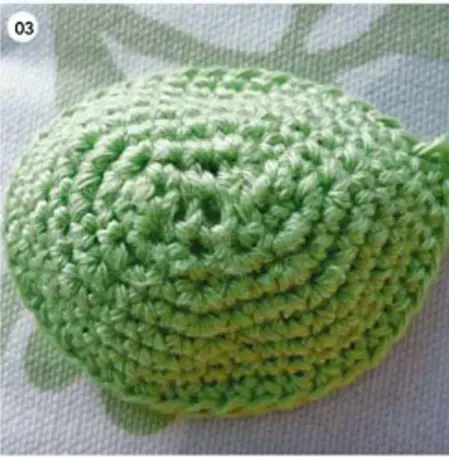
Shaping the Oval Head
3. Continue to increase in each round to form the dragon’s head:
- Round 2: (1 dc, 2 dc in next dc) 6 times [18 sts].
- Round 3: (2 dc, 2 dc in next dc) 6 times [24 sts].
- Round 4: (3 dc, 2 dc in next dc) 6 times [30 sts].
- Continue working rounds with dc increases until you reach round 11 for a total of 54 sts.
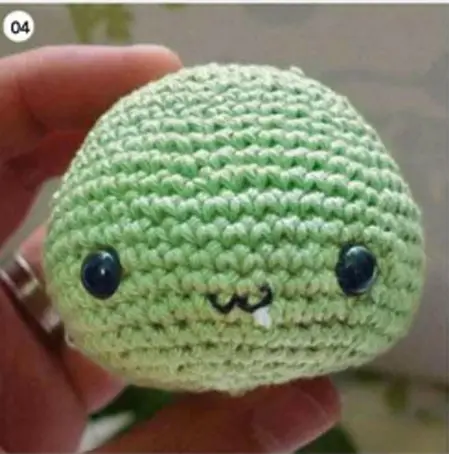
Placement of Safety Eyes
4. At round 19 (when there are 40 sts), place the safety eyes for crochet toys where you want them on the head. Space them evenly apart, typically about 6-7 stitches apart for a cute, wide-eyed look. Be sure to secure the back of the safety eyes tightly.
Embroidering the Face (Mouth and Fang)
5. Using black embroidery floss for the amigurumi, embroider a simple curved mouth below the safety eyes. Then, using white embroidery floss, add a small fang to one side of the mouth.
Add Pink Felt Cheeks
6. Cut out two small ovals from pink felt and glue them to the face just below the eyes to give your dragon that extra cute factor.
Tip: Use a stitch marker to track the start of each round to ensure your rounds stay even and you don’t lose your place.
Horns (Make 4)
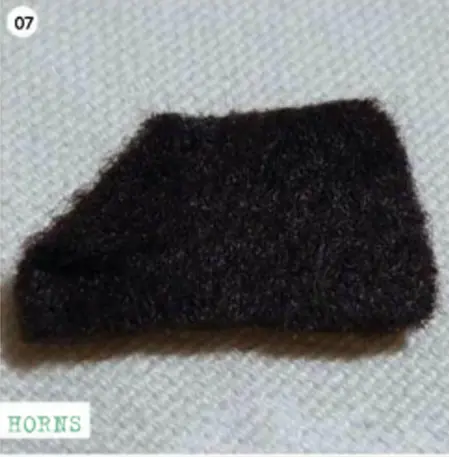

Creating Small and Large Cones with Dark Brown Felt
- Cut two larger and two smaller cone shapes from dark brown felt. These will form the dragon’s horns.
- Roll each piece of felt into a cone shape and secure it with fabric glue.
Rolling into Shape and Gluing Securely
3. Once the cones are shaped, glue the edges together to form a sturdy cone. Allow the glue to dry completely before attaching them to the dragon’s head.
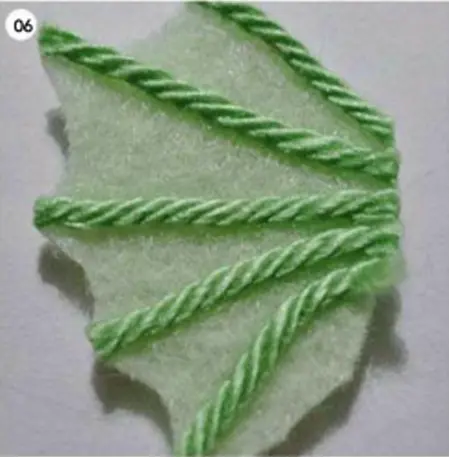
Wings (Make 2)
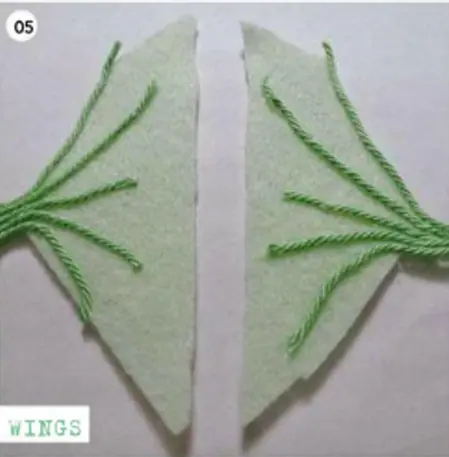
Beige Felt Triangles
- Cut two isosceles triangles from beige felt to form the base of each wing.
Splaying Yarn Pieces and Gluing
2. Using the green yarn from the head, cut 5 small pieces for each wing. Splay the yarn pieces outward from the tip of the triangle and glue them securely to the felt with fabric glue.
Scalloping Edges for Realistic Dragon Wing Effect
3. Once the yarn pieces are glued down, trim the edges of the felt to create a scalloped, wing-like shape, giving your wings a more natural, textured look.
Legs & Body
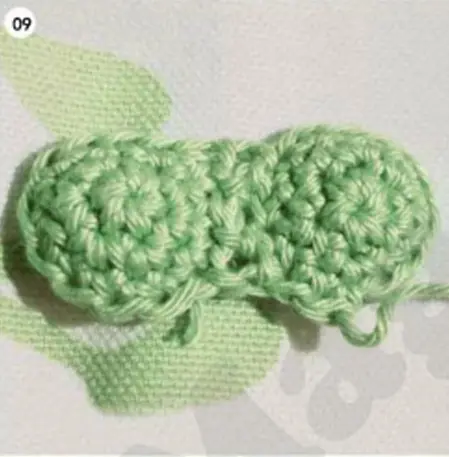
Magic Ring, Rounds, and Leg Joining Technique
- Begin by creating a magic ring for the legs.
- Round 1: Make 6 double crochets (dc) in a magic ring (total: 6 stitches).
- Round 2: 2 dc in each dc around (12 sts).
- Round 3: 12 dc.
- For the first leg, fasten off. For the second leg, continue without cutting the yarn and join it to the first leg using a slip stitch.
Building Up the Dragon’s Chubby Body
3. Work in rounds to create the dragon’s body:
- Round 4: Work 8 dc around the first leg, 3 dc evenly across the join, 8 dc around the second leg, and 3 dc across the join (22 sts).
- Rounds 5-12: Work 22 dc evenly in each round to build up the body.
Arms (Make 2)
Simple Magic Ring and a Few Rounds
- Using the same green yarn, start with a magic ring.
- Round 1: Make 6 double crochets (dc) in a magic ring (total: 6 stitches).
- Rounds 2-4: Make 6 double crochets (dc) in each round (total: 6 stitches per round).
- Fasten off and leave a long tail for sewing. Repeat for the second arm.
Attaching to Body
3. Sew the arms onto either side of the body at a point near the middle. Make sure the arms are positioned symmetrically to give the dragon an adorable, balanced look.
Tail
Magic Ring Start, Building Up Rows
- Start the tail with a magic ring.
- Round 1: Work 4 double crochets (dc) into a magic ring (total: 4 stitches).
- Rounds 2-3: 4 dc in each round (4 sts).
- Round 4: (1 dc, 2 dc in next dc) 2 times (6 sts).
- Round 5: Work (2 double crochets (dc), 2 dc in next dc) 2 times (total: 8 stitches).
- Work a few more rounds until the tail is the desired length.
Positioning for Balance or Fire-Breathing Pose
3. Attach the tail at the bottom-back of the dragon, angling it slightly upward for a fire-breathing effect or keeping it straight for balance.
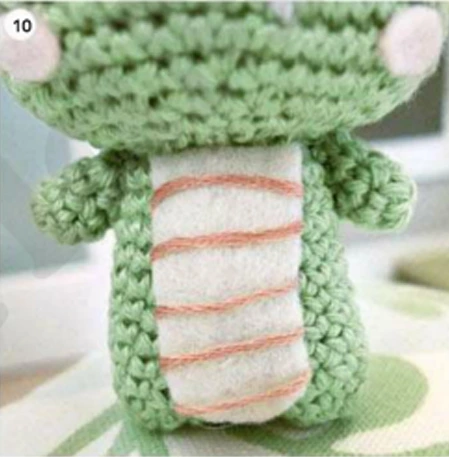
Scaled Body Detail
Beige Felt Piece with Tan Embroidery Floss Wrapped Around
- Cut a piece of beige felt to fit the dragon’s body.
- Using tan embroidery floss detailing, wrap the floss around the felt, applying glue dots to secure the floss in place as you go.
Gluing It to Dragon’s Back for Texture
3. Once the embroidery floss is attached, glue the felt piece securely to the back of the dragon to create a textured, scaled effect.
With these step-by-step instructions, you’ll be well on your way to completing your amigurumi dragon pattern! As you work through each section, remember to take your time, enjoy the process, and add your personal touches to make your dragon unique. Happy crocheting!
Assembly Instructions & Finishing Touches
Now that all the pieces of your crochet dragon amigurumi are ready, it’s time to assemble the dragon and give it its final touches! Here’s a step-by-step guide to putting it all together:
- Attaching the Arms, Legs, and Tail
- Start by positioning the arms on either side of the dragon’s body. Attach them firmly with a yarn needle or stitch them in place using a long tail of yarn.
- The legs should be sewn to the bottom of the body, ensuring they’re evenly spaced for balance.
- For the tail, attach it to the bottom-back of the dragon’s body. If you want your dragon to appear as if it’s about to breathe fire, angle the tail slightly upward.
- Wings Placement
- Position the wings on the back of the dragon, just behind the arms. Make sure they’re aligned symmetrically for a well-balanced look. Secure them with a glue gun or sew them in place.
- Using the Glue Gun Safely for Felt Attachments
- For the felt wings and other felt accessories (such as the cheeks and scaled body), use the glue gun carefully. Apply a small amount of glue to avoid over-application and press the pieces gently into place. Be cautious not to burn yourself.
- Final Stuffing and Shaping Advice
- Once everything is attached, ensure your dragon is stuffed firmly but not overly tight. Use polyester toy stuffing to fill in the body, arms, and legs. Lightly stuff the head for a more defined shape.
Now, your amigurumi dragon is assembled! Take a step back, admire your creation, and add any final tweaks to make it uniquely yours. Enjoy your new little dragon friend!
Customization Ideas
One of the best things about creating an amigurumi dragon is how easily you can personalize it to suit your style or make it a special gift. Here are some fun customization ideas to take your cute dragon crochet pattern to the next level:
- Color Variations
- Experiment with different colors for your dragon. You could go for pastel dragons with soft pinks, blues, and purples for a cute, gentle vibe, or make a rainbow dragon using bright, bold colors for a fun and playful design.
- Adding Glitter Felt for Magical Effects
- Enhance the magic of your dragon by using glitter felt for the wings or body details. It will add a sparkly, enchanting look, making your dragon appear even more mystical!
- Using Different Eye Sizes or Embroidered Eyes
- For a personalized touch, you can try using different sizes of safety eyes or even opt for embroidered eyes for a unique, softer look. This is great for adding character to your little dragon.
- Embroidered Initials or Hearts
- Make your personalized amigurumi gifts even more special by embroidering initials, names, or cute designs like hearts or stars on the body or wings of your dragon. This creates a truly one-of-a-kind piece.
Feel free to get creative with your dragon! These customizations are a great way to give your creation a personal touch.
Tips for Beginners
Starting your amigurumi dragon can be a lot of fun, but as a beginner, there are a few tips to help you along the way and make the process smoother:
- Take Your Time
- Don’t rush through each section. It’s easy to get excited, but taking your time will help you get neat, even stitches. Remember, patience is key to making your cute dragon crochet pattern come to life!
- Use Stitch Markers Religiously
- Stitch markers are a beginner’s best friend. Use them to mark the beginning of each round and to help you keep track of increases and decreases. This will help prevent confusion and keep your work neat.
- Don’t Overstuff
- Especially in the arms and tail, avoid overstuffing your dragon. Too much stuffing can make it hard to sew parts together and can result in a bulky look. A light, even stuffing will help keep the proportions right.
- Keep Safety Eyes Secure
- If you’re using safety eyes, make sure they are tightly secured. If you’re making this project for a baby, consider embroidering the eyes instead, as they are safer and just as cute.
- Practice Horns and Wings First
- Before working with your final felt, practice creating the horns and wings with scrap felt. This will help you get the hang of shaping and gluing before applying them to your dragon.
Following these beginner crochet tips will help you feel more confident and make your dragon even more adorable!
Why This Dragon Makes a Great Gift
Looking for a unique and heartfelt present? This crochet dragon amigurumi is one of the best crochet gift ideas out there. Its adorable design and handmade charm make it a thoughtful and personal gift for all ages.
Whether you’re crafting for a child or a fantasy lover or celebrating a special birthday, this handmade fantasy toy is sure to bring smiles. Its soft, huggable body and whimsical features make it an instant favorite. For babies or toddlers, simply replace the safety eyes with embroidered ones to make it safe and baby-friendly—perfect for baby showers.
One of the best parts? This amigurumi gift for kids is highly customizable. You can tailor the colors and details and even add special features like initials or themed accessories to reflect the personality of the recipient. Want to make a rainbow dragon for a vibrant little one or a soft pastel version for a dreamy gift? The options are endless.
Handmade gifts show care and effort—and this dragon is no exception. It’s more than just a toy; it’s a keepsake made with love and creativity.
Conclusion
Congratulations—you’ve just completed your very own crochet dragon amigurumi! 🎉 Whether it’s your first or your fiftieth, there’s nothing quite like finishing a cute and cuddly creature made with your own hands. This easy crochet project is not only fun and satisfying but also perfect for beginners who want to explore the magical world of amigurumi.
We’d love to see your finished dragons! Share your version of this free amigurumi pattern on social media and tag us, or drop a photo in the comments below. Every dragon has its own personality, and we can’t wait to see yours!
If you enjoyed learning how to crochet a dragon, don’t stop here. Check out our other beginner-friendly patterns and subscribe to the blog for more magical makes, tips, and tutorials. Happy crocheting, and keep bringing your yarn to life!