Introduction
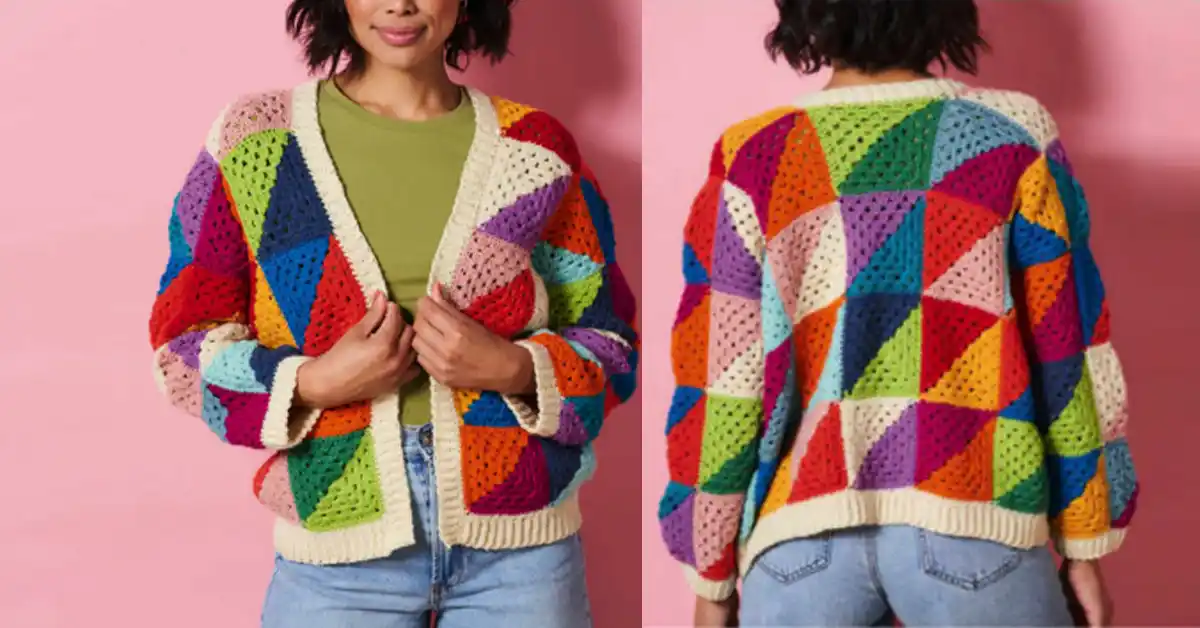
If you’ve been keeping an eye on the latest crochet trends, you might have spotted a fresh favorite making waves: the crochet triangle cardigan. With its bold angles, playful colors, and relaxed fit, this modern twist on the classic cardigan is making waves among crafters and fashion lovers alike. Whether you’re dressing it up or keeping it casual, a triangle cardigan adds a splash of personality to any outfit.
What makes this cardigan even more special? It’s built using granny squares—but not just any granny squares. This version uses a fun and creative twist: the half-and-half granny square. Each square is worked in two contrasting colors, giving your finished cardigan a dynamic and eye-catching look. It’s a project that’s as satisfying to make as it is to wear.
In this tutorial, we’ll guide you through the process of crafting your own triangle cardigan step by step. The design we’re following is by Cassie Ward, originally featured in Simply Crochet magazine, and it’s perfect for those who want a balance of style, warmth, and creativity in their wardrobe. Plus, it’s a great way to use up those leftover yarn scraps!
So grab your hook and yarn—this DIY crochet cardigan is about to become your next favorite project.
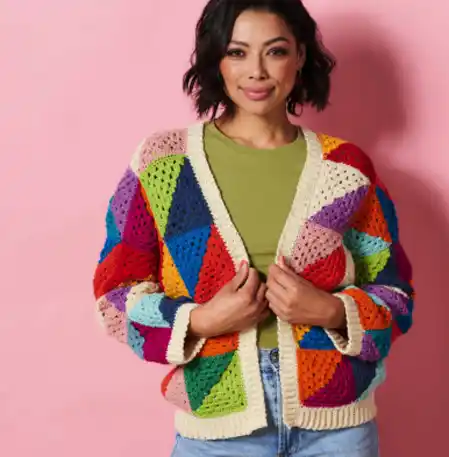
Table of Contents
- Introduction
- Materials You’ll Need
- Understanding the Triangle Cardigan Construction
- Step-by-Step Instructions: Crochet the Granny Square Motifs
- Joining the Motifs
- Working on the Sleeves
- Edging and Ribbing
- Finishing Touches
- Tips and Tricks
- Conclusion
Materials You’ll Need
Before you begin stitching your crochet triangle cardigan, it’s important to gather the right materials. This project uses DK yarn and is perfect for experimenting with color—whether you want bold contrasts or soft blends.
Yarn Options:
For the exact look from the original Simply Crochet design by Cassie Ward, use West Yorkshire Spinners Colour Lab DK. This 100% wool yarn is available in a wide range of vibrant shades. Some popular choices include:
Looking for a more budget-friendly option? Yarnsmiths DK is a great alternative that still delivers beautiful stitch definition and a soft finish. Just make sure to check crochet tension and yarn yardage if you’re switching brands.
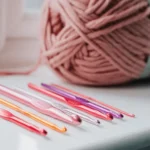
Hook and Tools:
- 4mm hook (US G/6) – ideal for DK yarn
- Yarn needle – for sewing in ends and seams
- Stitch markers – essential for tracking your rows and joins.
- Scissors
- Blocking board – for shaping each square to the correct size
Gauge:
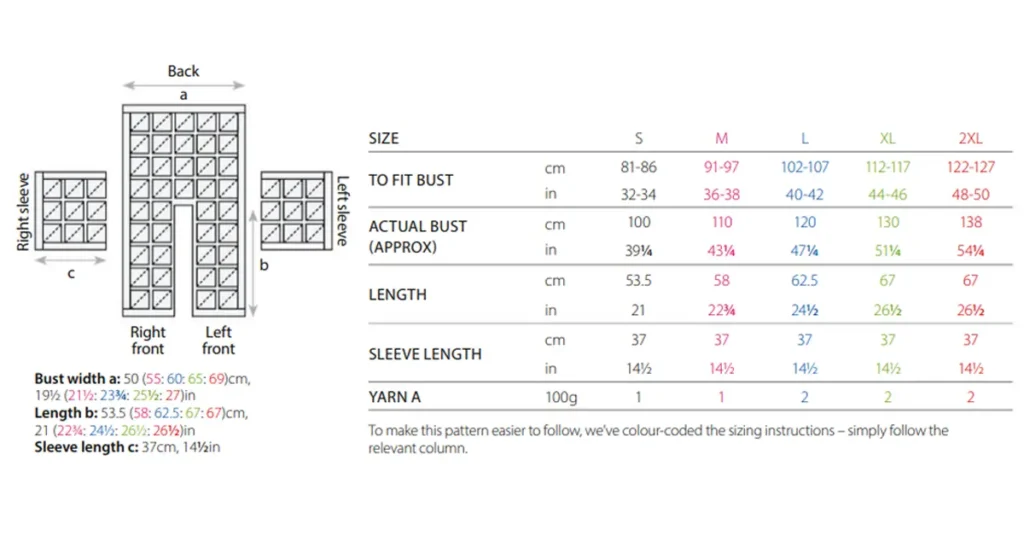
Each half-and-half granny square should measure approximately 10–13 cm (depending on size) once blocked. Achieving the right gauge will ensure your crochet triangle cardigan with sleeves fits beautifully.
With these supplies ready, you’re all set to start crocheting your triangle cardigan!
Understanding the Triangle Cardigan Construction
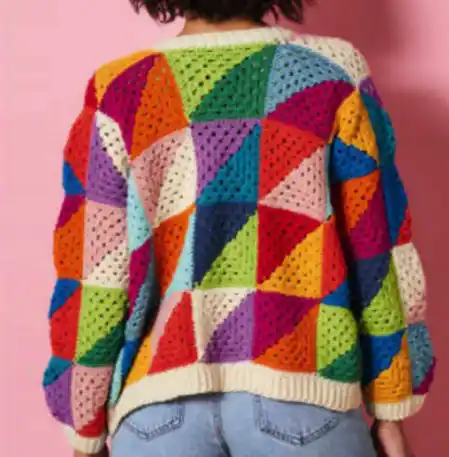
At the heart of this crochet triangle cardigan is a clever twist on a classic favorite: the half-and-half granny square. Instead of working a single color in rounds, each square alternates between two contrasting shades. This creates a striking triangle motif crochet effect, adding bold geometric flair to the overall design. When assembled together, the triangles form a colorful mosaic that’s both modern and playful.
The cardigan is made up entirely of these granny square motifs, stitched together like puzzle pieces. For the front and back panels, you’ll crochet 40 motifs total, arranged to shape the body of the cardigan. The sleeves are formed from 18 motifs, with nine motifs making up each sleeve. It’s an intuitive layout that keeps the construction simple and approachable, even if this is your first crochet garment.
One key step that shouldn’t be skipped is blocking the motifs. Once you’ve completed each square, use a blocking board and pins to shape them to the correct size. This step ensures consistency across your motifs, making it much easier to assemble the cardigan evenly. It also helps the finished piece drape better and look more polished.
Keep in mind that the weight of the yarn and the garment itself causes the cardigan to stretch slightly when worn. This is especially important when checking your size and gauge before final assembly. The original design accounts for this, so blocked measurements will still provide a cozy yet relaxed fit.
With a smart layout and fun use of color, this granny square pattern is a joy to work on. You’ll find that combining structure with creativity is what truly brings this triangle cardigan to life.
Step-by-Step Instructions: Crochet the Granny Square Motifs
The foundation of this triangle cardigan is the half-and-half granny square—a colorful, eye-catching motif that’s both fun and satisfying to make. Each motif uses two contrasting shades, which gives the square its signature triangle block appearance.
Follow the steps below to create your easy granny square motifs. For best results, make one square first, block it, and measure to check your size before continuing with the full set.
Round 1 (Right Side):
- Using your first color, ch 4 and join with a slip stitch to form a ring.
- (Ch 3, 2 tr, ch 2, 3 tr) into the ring.
- Change to your second color: ch 1 with the new shade, (3 tr, ch 2, 3 tr) into the ring.
- Finish with a chain 2, then slip stitch into the top of the beginning chain-3. Turn your work.
🧶 You now have 4 clusters of 3 treble stitches and 4 corner ch-2 spaces. Each half is worked in a separate color.
Round 2 (Wrong Side):
- Continue with the second color.
- Sl st into the corner, then ch 3, 2 tr in the same corner.
- (3 tr, ch 2, 3 tr) In the next corner, 3 tr in the third corner.
- Change back to the first color: ch 1 with the new shade, 3 tr in the last corner, (3 tr, ch 2, 3 tr) in the next corner, 3 tr in the first corner, ch 2, and sl st to join. Turn.
Repeat rounds, alternating colors each time:
- Round 3: Add more 3-tr clusters between previous ones, maintaining corner increases.
- Round 4: Continue in the same pattern, changing colors halfway through.
- Round 5: Final expansion round, making sure all 4 corners are maintained and each side grows evenly.
DC Round for Some Sizes:
For sizes M, L, XL, and 2XL, you’ll work a DC (double crochet) round to expand the motif:
- With the current color, dc in each treble, and (dc, ch 2, dc) in each corner.
- Change color halfway through for the signature half-and-half finish.
Color Tips:
- Pair bold shades (like Electric Blue with Cerise Pink) for a vibrant look.
- Use yarn scraps for a patchwork-style cardigan.
- Keep a consistent contrast between light and dark tones to enhance the triangle effect.
By following this crochet triangle block method, you’ll quickly build up a set of stunning motifs that are both structured and dynamic. Once you get the rhythm down, making these half-and-half motifs becomes a relaxing and creative process.
Joining the Motifs
Once you’ve finished crocheting your half-and-half granny squares, it’s time to start joining the motifs—and that begins with blocking.
How to Block Each Motif
To ensure your cardigan pieces fit together evenly, block each square to the correct size. Use a blocking board, pins, and a gentle steam or spritz of water to shape each square. Let them dry completely before seaming. This process helps define the triangle edges and keeps your layout clean and uniform.
For reference, blocked motifs should measure approximately 10 to 13 cm square, depending on your size.
Layout & Schematic Overview
The cardigan is assembled by arranging:
- 40 motifs for the front and back panels
- 18 motifs for the sleeves (9 per sleeve)
Lay out the motifs according to the schematic (as shown in the Simply Crochet pattern). The squares form rectangles for the front and back, and the sleeves are shaped by assembling a 3×3 block of motifs.
Be mindful of color placement—you can create symmetry or embrace a totally random, colorful vibe.
Seaming Best Practices
When seaming granny squares, aim for even, light tension. Whip stitch or mattress stitch are both great options for a neat, flexible join. Avoid pulling too tightly, which can distort the square shape and make the seams stiff.
This step in your crochet cardigan assembly brings all your hard work together—literally! Take your time and enjoy the transformation.
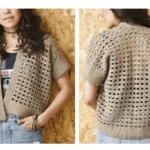
Working on the Sleeves
The sleeves of your crochet triangle cardigan are made entirely from granny square motifs, just like the body. Each sleeve is formed by joining 9 motifs together in a 3×3 square layout, creating a unique patchwork-style sleeve full of color and texture.
Once all your sleeve motifs are blocked to size, lay them out and seam them neatly, just as you did with the body panels. Keep your stitch tension even for a smooth finish.
Adjusting for Larger Sizes
If you’re making size L, XL, or 2XL, you’ll need to add rows to increase the armhole depth. After joining the motifs, you’ll work additional rows of treble stitches along the length of the sleeve. Here’s how:
- With the right side facing, join your yarn in the corner space.
- Work a row of treble stitches across, turning at the end.
- Sizes XL and 2XL may require one or two extra rows, depending on the pattern.
This ensures a comfortable fit under the arm without pulling or bunching.
Underarm Seam Tips
When attaching the sleeve to the body, match the underarm seam to the side seam of the cardigan. It helps to mark the center of the sleeve motifs and align it with the shoulder seam. Secure the sleeve with pins before stitching to prevent any twisting.
Your granny square sleeves should now be complete—structured, colorful, and ready to keep you cozy!
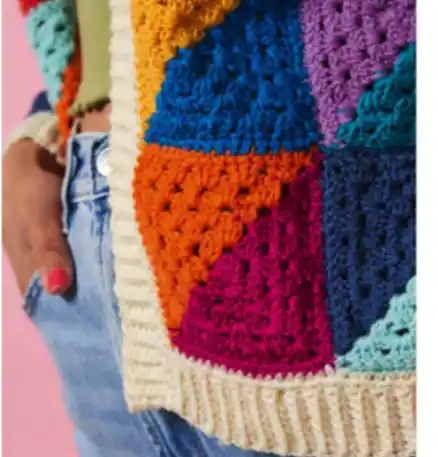
Edging and Ribbing
Adding ribbing and edging is the finishing touch that brings your crochet triangle cardigan together. It gives the garment structure, shape, and that polished handmade feel. You’ll work on three main areas: the cuffs, the hem, and the front edges.
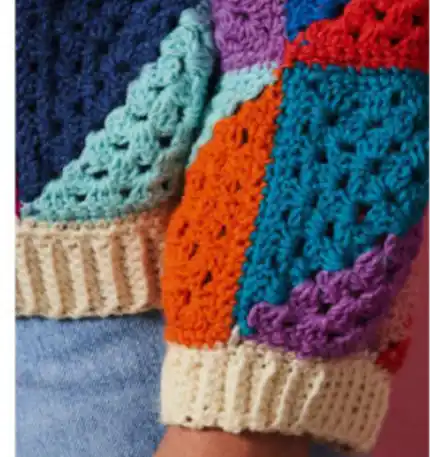
Cuffs
Start by working a dc (double crochet) round around the base of each sleeve. For larger sizes, you’ll place 2 dc stitches on the edge of each widening row; for smaller sizes, 1 dc per row is enough. This creates a solid foundation for the ribbing.
To make the ribbing:
- Ch 6, then turn.
- Work 1 dc into the second chain from the hook and into each of the next 4 chains.
- Slip the stitch into the next 2 dc stitches from the cuff round.
- Turn and work back down the ribbing by making 1 dc in the back loop only of each stitch.
Repeat these rows around the entire cuff. The result is a stretchy, textured crochet cardigan cuff that hugs your wrist gently.
Hem Ribbing
Next, add ribbing to the bottom edge of the cardigan. Attach your yarn at the side seam with the right side facing out, then proceed to work a setup double crochet round similar to what you did for the sleeves.
To make the crochet hem edging:
- Ch 9, then turn.
- Dc in the second chain from the hook and in the next 7 stitches.
- Slip the stitch into the next 2 dc on the base row, and repeat as you go across the hem.
This adds a firm, decorative finish that balances the colorful body of the cardigan.
Front Edging
Finally, create a smooth edge along the front openings. Work a set-up dc round up one front side, around the neckline, and down the opposite side.
Then, like the other sections:
- Chain 7, then create your ribbing by working in the back loops only.
- Continue this process evenly until you’ve covered the entire front edge.
When you’re done, use a whip stitch to join the ends of the ribbing together for a neat finish. The result? A snug, cozy trim frames the cardigan beautifully and gives it a professional look.
Finishing Touches
You’re almost done! Before you slip on your cozy new cardigan, take the time to give it a clean, polished finish.
Begin by threading a yarn needle to weave in all the loose ends securely. Be sure to secure them well, especially at color changes, to keep your cardigan sturdy and tidy over time.
Next, give your cardigan a final blocking. This step is essential for setting the shape, smoothing out seams, and helping the garment drape naturally. For wool yarns like West Yorkshire Spinners Colour Lab DK, lightly steam or wet block the cardigan—just be careful not to stretch it too much. Blocking will also help even out your crochet ribbing and motifs.
If you’d like to personalize your DIY crochet cardigan, consider adding buttons, toggles, or even a belt. While the original design is open-front, fasteners can offer extra style and functionality.
Lastly, be gentle with care. Hand-wash your cardigan in cool water using a wool-safe detergent, then lay it flat to dry.
With these final touches, your blocking crochet cardigan project is complete—and ready to show off or gift with pride!
Tips and Tricks
Here are a few helpful tips to make your crochet triangle cardigan even more fun and frustration-free to create:
Play with color combos. Want a bold, modern look? Pair high-contrast shades like Electric Blue and Cerise Pink or Zesty Orange and Aqua Green. For a softer, vintage vibe, try muted pastels or earth tones. Mixing scraps from your yarn stash also gives it a charming patchwork feel.
Adjust sizing with ease – If you’re between sizes or want a looser fit, simply add more rows to your motifs or insert an extra column of motifs in the body panels. Remember that the cardigan stretches slightly when worn, so keep that in mind when measuring.
Avoid twisted seams – When seaming motifs or sleeves, always lay the pieces flat and check the orientation before sewing. It’s easy to twist a row if you’re not careful.
Use stitch markers – These are your best friend for keeping sleeve and side seams lined up, especially when joining front, back, and sleeve sections.
With these little tricks, your crochet experience will be smoother—and your finished cardigan even more fabulous!
Conclusion
And there you have it—your own cozy, colorful crochet triangle cardigan made with simple granny square motifs and a touch of creativity! This cardigan is a perfect blend of comfort and style, making it a great layering piece for any season.
We’d love to see how your cardigan turns out! Whether you went bold with your colors or soft and subtle, tag your photos or share them in the comments below.
If you enjoyed this tutorial, be sure to leave a comment and follow for more crochet patterns