
Amigurumi, the Japanese art of crocheting small, stuffed yarn creatures, has become incredibly popular among crochet enthusiasts worldwide. These adorable handmade creations range from animals and dolls to imaginative characters like robots, making them a fun and rewarding project for both beginners and experienced crocheters.
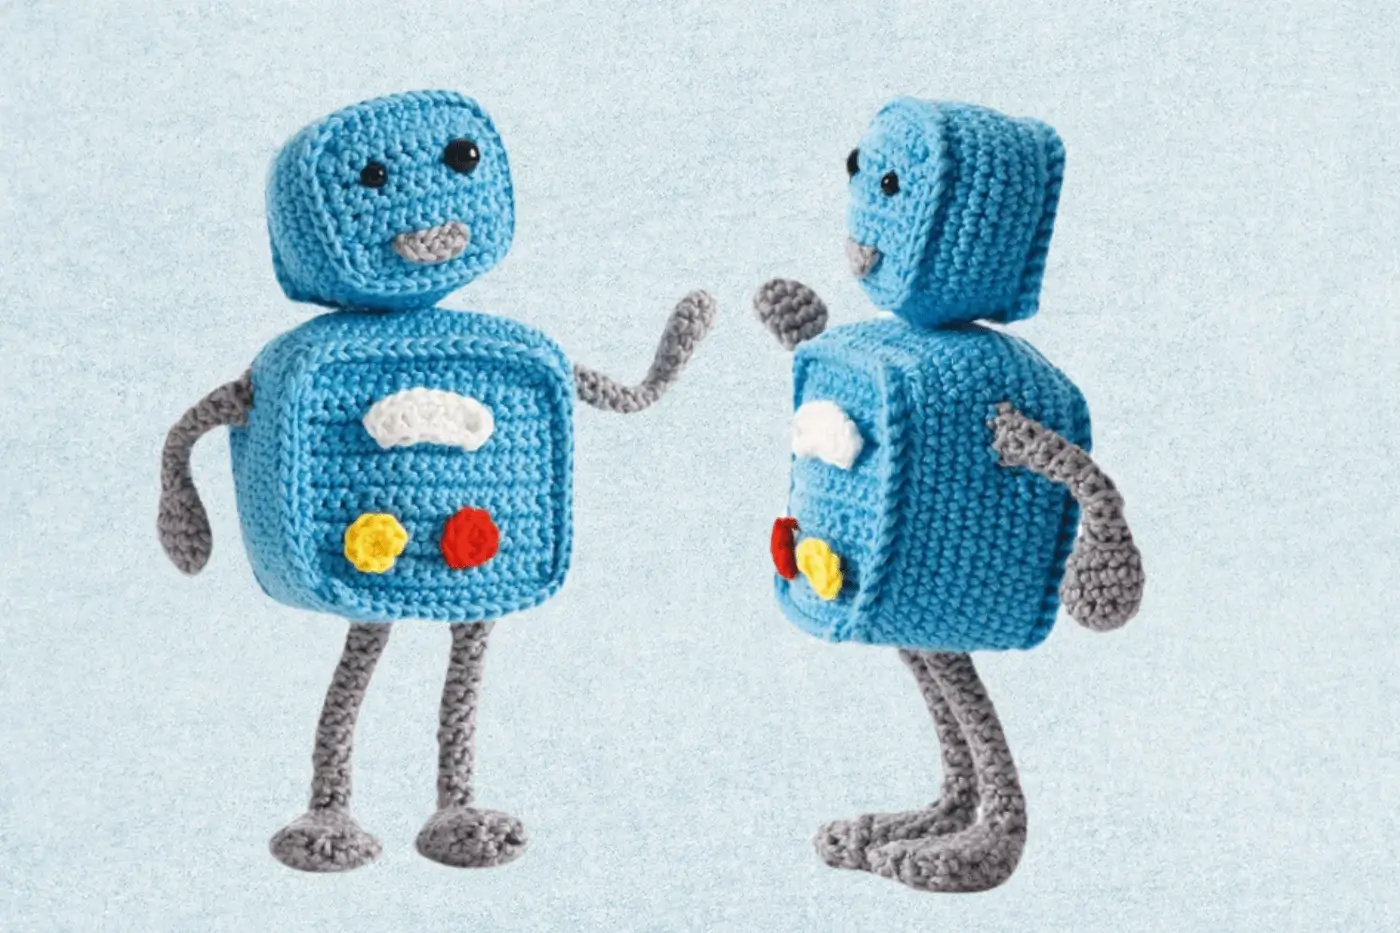
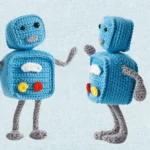
One particularly charming Amigurumi project is the Robbie Robot, a cute and customizable crochet robot plushie. With its structured shape, bright colors, and fun details, it’s an exciting piece to add to your collection or gift to a loved one.
In this guide, we’ll walk you through the step-by-step process of crocheting Amigurumi Robbie Robot, covering everything from essential materials and techniques to detailed assembly instructions. Whether you’re new to Amigurumi or looking for your next creative challenge, this tutorial will help you bring your very own Robbie Robot to life!
Table of Contents
- What You Need to Crochet Robbie Robot
- Step-by-Step Instructions to Crochet Robbie Robot
- Additional Tips for Crocheting Amigurumi Robbie Robot
- Caring for Your Crochet Amigurumi Robot
- Conclusion
What You Need to Crochet Robbie Robot

Essential Materials
Yarn Types
Choosing the right yarn is crucial for achieving the perfect look and feel for your Amigurumi robot. The best options include:
- Cotton Yarn: Provides excellent stitch definition and durability, making it ideal for detailed Amigurumi projects.
- Acrylic Yarn: Soft, lightweight, and budget-friendly, but may stretch over time.
- Worsted Weight Yarn: A versatile choice that works well for most Amigurumi patterns, offering a balance of durability and softness.
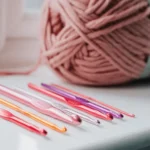
Recommended Crochet Hooks
Using the right crochet hook ensures tight, uniform stitches for a well-structured Amigurumi. Some of the best hook brands include:
- Clover Amour – Comfortable grip and smooth glide for easy crocheting.
- Tulip Etimo – Soft ergonomic handle, great for reducing hand fatigue.
- Furls Crochet Hooks – Stylish, handcrafted options that offer a luxurious crocheting experience.
For Amigurumi projects, smaller hook sizes work best to create tight stitches that prevent stuffing from showing through. Recommended sizes:
- 2.5 mm – 3.5 mm for worsted-weight yarn
- 2.0 mm – 2.5 mm for fine cotton yarn
Fiber Stuffing Options
Stuffing gives your crochet robot its shape and structure. Some great choices include:
- Polyfill Fiber Stuffing: Lightweight, affordable, and easy to shape.
- Wool Stuffing: Natural and eco-friendly, offering a firmer feel.
Be sure to stuff evenly and firmly to maintain the robot’s shape while keeping it soft and huggable.
Facial Details: Safety Eyes & Embroidery Thread
- Safety Eyes: These plastic, snap-in eyes give the robot a professional and polished look. Choose 6 mm to 10 mm sizes depending on your preference.
- Embroidery Thread: Used for adding extra facial features like a smile or eyebrows. A contrasting color will make the details pop!
Assembly Tools: Stitch Markers & Darning Needles
- Stitch Markers: Essential for keeping track of rounds and ensuring symmetrical shaping.
- Darning Needles: Used for sewing parts together, weaving in ends, and attaching details like buttons or facial embroidery.
we used on this tutorial
Durable Coral Mini yarn: 1 ball
each of Ivory 326, Grenadine 2193, Bright yellow 2180
Durable Coral yarn: 1 ball each of Sky 294, Light Grey 2232 3 mm crochet hook
Fiberfill stuffing
Darning needle
Safety eyes, Ø5 mm and 8 mm
Iron wire (optional)
With these materials in hand, you’re ready to begin crocheting your Amigurumi Robbie Robot!
Step-by-Step Instructions to Crochet Robbie Robot
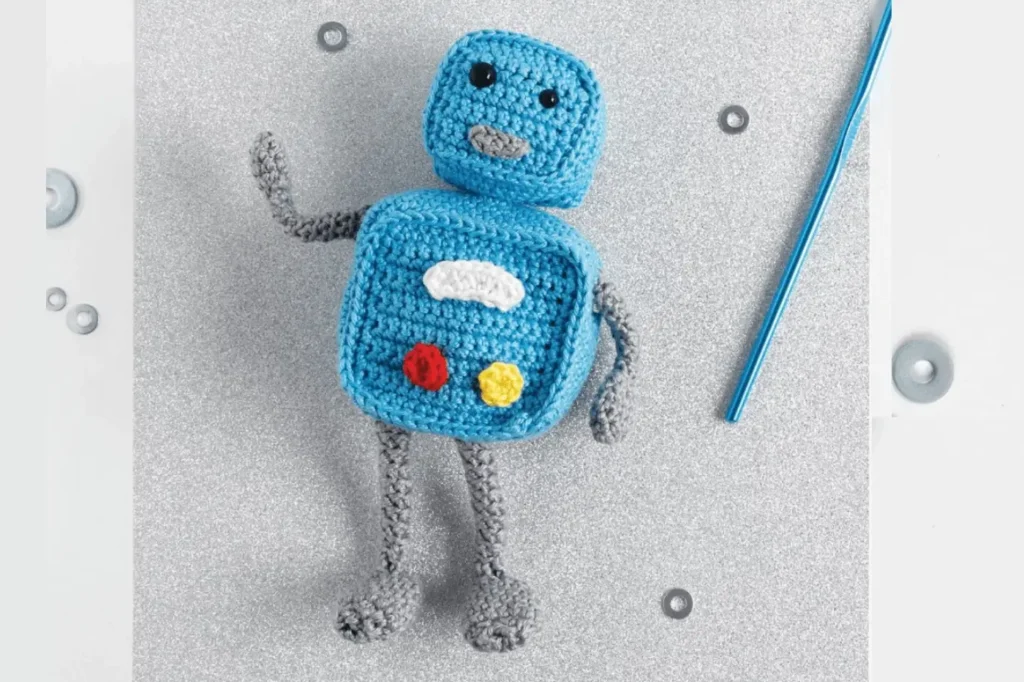
Creating your own Amigurumi Robbie Robot is a fun and rewarding project. Follow this step-by-step guide to bring your crocheted robot to life!
ABBREVIATIONS AND SYMBOLS
These are the most commonly used abbreviations and symbols:
| Abbreviation/Symbol | Meaning |
|---|---|
| Rnd 1 | Round 1, etc. |
| ○= ch | Chain |
| ×= sc | Single crochet |
| ● =sl st | Slip stitch |
| MR | Magic ring |
| next | Next |
| dec | Decrease |
| inc | Increase |
| tog | Together |
| skip | Skip |
| ┬= esc | Extended single crochet |
| T= dc | Double crochet |
| T= hdc | Half double crochet |
| ┼= cl | Cluster |
| T= tr | Treble crochet |
| T =dtr | Double treble crochet |
| [ ] | Work everything between the brackets into the same stitch |
| RS | Right side |
| WS | Wrong side |
| FL | Front loop |
| BL | Back loop |
| post stitch | Post stitch |
| FPdc | Front post double crochet |
| BPdc | Back post double crochet |
| FPEdc | Front post extended double crochet |
This table organizes the abbreviations and symbols for better readability. 😊
Arms (2X)
Rnd 1: make a MR and work 6 sc into it.
Rnd 2: 2 x (2 sc, inc) (= 8).
Rnd 3: 2x (3 sc, inc) (= 10).
Rnd 4: 10 SC.
Rnd 5: 2x (3 sc, dec) (= 8).
Rnd 6: 2 x (2 sc, dec) (= 6).
Rnds 7-13: 6 sc in the BL. Fasten off.
Legs (2X)
Rnd 1: make a MR and work 6 sc into it.
Rnd 2: 2 x (2 sc in 1 sc) (= 12).
Rnd 3: 6 x (1 sc, inc) (= 18).
Rnd 4: split the stitches along the circle
into 6 sc and 12 sc. Continue across the
6 sc (= 6).
Rnds 5-13: 6 sc in the BL.
Foot (2X)
Rnd 1: join the yarn with 1 sl st and make
1 sc in the same stitch (= start). Make
11 SC (= 12).
Rnds 2-7: 12 SC.
Rnd 8: 6 x sc2tog (= 6).
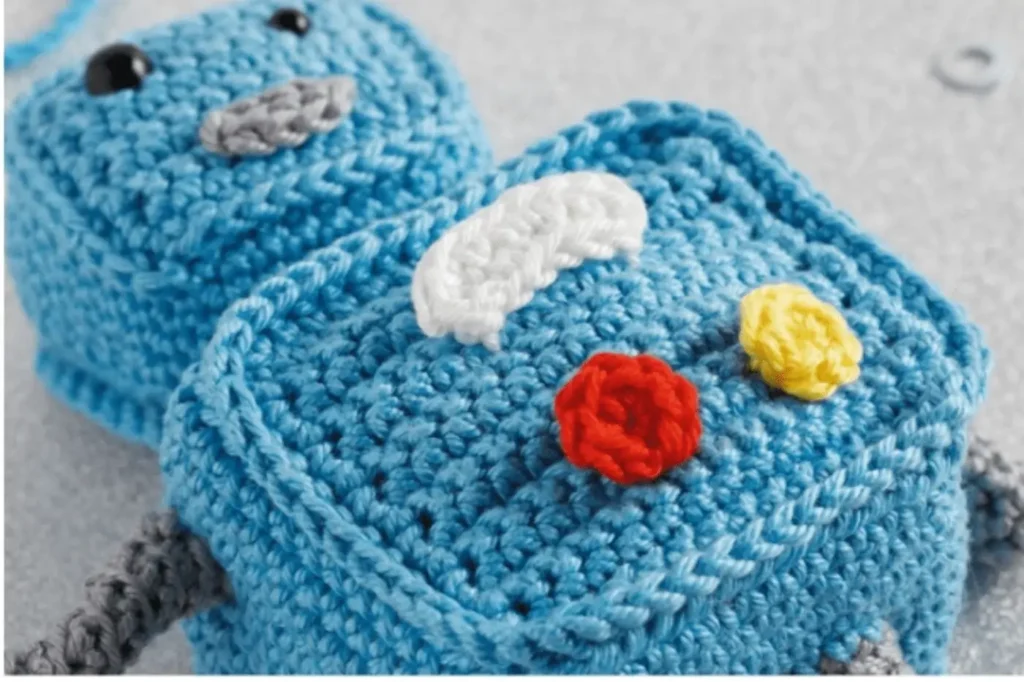
BUTTONS
Make 1 with yellow and 1 with red yarn.
Rnd 1: make a MR and work 8 sc into it. Make 1 sl st in the 1st sc of the circle and
cut the yarn. Leave a long tail.
MOUTH
Crochet 5 ch, work 3 sc back across and
1 sl st. Fasten off. Sew the mouth onto the front of the head.
DETAIL WHITE
Crochet 7 ch, work 6 sc back across and 6 sc on the other side. You now have an oval with 14 sc all around. Fasten off. Sew the detail onto the front of the body.
HEAD
Rnd 1: crochet 11 ch, the 11th ch is a tch.
Rnd 2: work 10 sc back across + 1 tch.
Rnds 3-10: 10 SC + 1 tch.
Rnd 11 : work 28 sc around the square (Rnd 10 start of
Rnd 11 and gives a total of 38 sc).
Rnd 12: 38 sc in FL.
Rnd 13: 38 sc in the BL of Rnd 11.
Rnds 14-18: 38 sc.
Fasten off, leaving a long tail.
BACK OF HEAD
Rnd 1: 11 ch, the 11th ch being a tch.
Rnd 2: work 10 sc back across + 1 tch.
Rnds 3-10: 10 SC + 1 tch.
Rnd 11: work 28 sc around it.
Rnd 12: 38 sc in FL. Cut the yarn and fasten off.
BODY
Rnd 1: crochet a chain of 16 ch, the 16th ch being a tch.
Rnds 2-13: work 15 sc back across the
chain + 1 tch.
Rnd 14: work 57 sc around the square.
Rnd 15:57 sc in the FL.
Rnd 16: 57 sc in the BL of Rnd 14.
Rnd 17-19: 57 SC.
Rnd 20: 8 sc, attach one arm by working
3 sc through the arm as well, make 17 sc. Attach the other arm with 3 sc, make 12 sc. Attach the 1st leg with 3 sc, make 3 sc.
Attach the 2nd leg, make 3 sc.
Rnd 21: 57 sc (across arms and legs).
Rnds 22-24:57 SC.
Fasten off and cut the yarn, leaving a long tail.
BACK OF THE BODY
Rnd 1: crochet a chain of 16 ch
(the 16th ch = tch).
Rnds 2-13: work 15 sc back across the
chain + 1 tch.
Rnd 14: work 57 sc around the square.
Rnd 15:57 sc in the FL.
Fasten off.
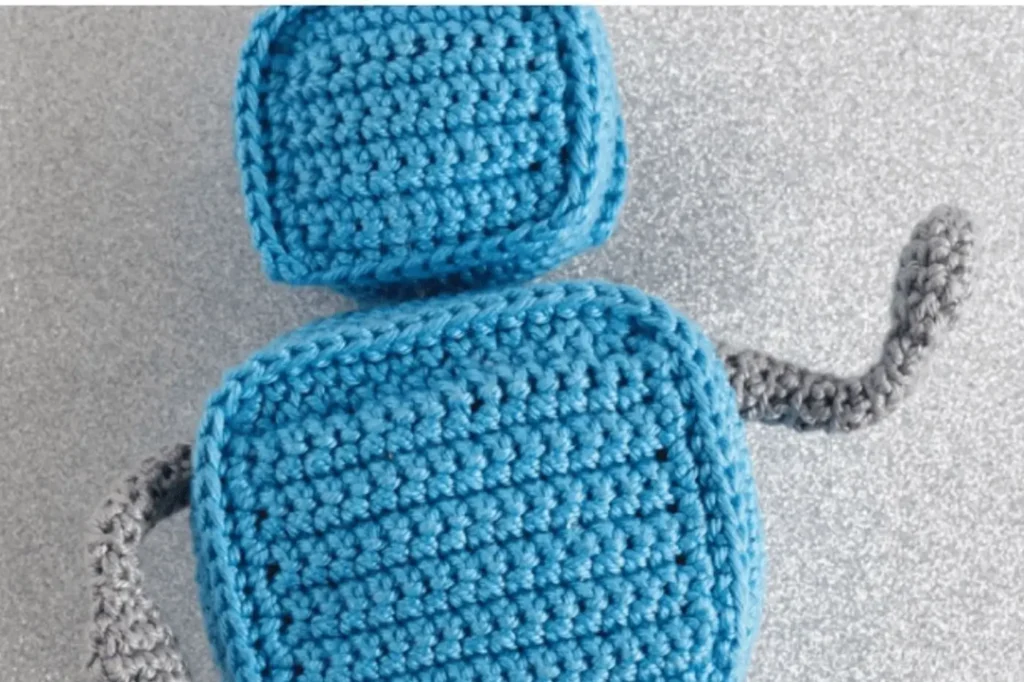
ASSEMBLY
The arms and legs are already attached to the body. Now join the back sides of the body and head to the front parts. Using an embroidery needle, weave the thread from the front part through the BL of the back. Pull the thread tightly. Stuff the body or head when you have sewn up
3 sides. Attach the head centered on top of the body by passing the thread through both the head and body several times. Make sure the head is on straight..
Additional Tips for Crocheting Amigurumi Robbie Robot
Choosing the Right Yarn for a Sturdy Structure
Selecting the right yarn is crucial for achieving a well-defined and sturdy Amigurumi robot. Here are some key factors to consider:
- Best Yarn Brands for Amigurumi Durability
- Cotton Yarn: Brands like Scheepjes Catona, Paintbox Cotton DK, and Lily Sugar’n Cream offer excellent stitch definition and a firm hold.
- Acrylic Yarn: Red Heart Super Saver and Bernat Baby Soft are budget-friendly options with a soft feel.
- Blended Yarn: WeCrochet Brava Worsted offers a mix of structure and softness.
- How Yarn Weight Affects the Final Look and Feel
- Thicker yarn (Worsted weight) results in a larger plushie with a chunkier appearance.
- Lighter yarn (Sport or DK weight) creates a more detailed and compact design.
- Comparing Cotton vs. Acrylic for Structure and Ease of Use
- Cotton Yarn: Stiff, holds shape well, excellent for beginners who want neat stitches.
- Acrylic Yarn: Softer and more flexible but may stretch over time.
How to Avoid Common Amigurumi Mistakes
Many beginners and even experienced crocheters run into issues while making Amigurumi. Here’s how to prevent them:
- Preventing Gaps in Stitches for a Seamless Finish
- Use a smaller hook size than recommended for your yarn to create tight, uniform stitches.
- Maintain consistent tension to avoid loose stitches that reveal stuffing.
- Consider using invisible decreases instead of standard decreases to keep fabric smooth.
- Ensuring Limbs Are Evenly Placed and Securely Attached
- Pin the arms, legs, and head in place before sewing to check alignment.
- Use stitch markers to track where each limb should go.
- Sew with a long tail and go through multiple stitches to strengthen attachment.
- Tips for Maintaining Consistent Tension Throughout Your Project
- Practice holding yarn in a comfortable grip to avoid overly tight or loose stitches.
- Take breaks if your hands start to cramp—consistent tension is key to even stitches.
- Work in continuous rounds rather than joining rounds to avoid a noticeable seam.
Making Your Robot Poseable
Adding poseability can make your Amigurumi Robbie Robot more interactive and fun!
- Using Iron Wire for Flexible Arms and Legs
- Use a pliable but sturdy iron wire (such as floral or armature wire).
- Bend the ends into loops and wrap them with soft yarn or fabric to prevent poking through stitches.
- Insert the wire before closing the limbs and body, ensuring it’s well-positioned.
- How to Safely Insert and Secure the Wire Inside the Crochet Piece
- Cover the wire with pipe cleaners or an extra layer of yarn to prevent sharp edges.
- Make sure the wire does not move freely inside—stitch around it if necessary.
- Alternatives to Wire for a Kid-Friendly, Soft Version
- Use felt or foam stuffing inside the limbs for some flexibility without sharp edges.
- Add Velcro or snap-on buttons to let the arms and legs move without needing wire.
- Create a weighted base by adding plastic pellets or stuffing beads to the bottom for stability.
Caring for Your Crochet Amigurumi Robot
Taking care of your Amigurumi Robbie Robot properly will help it last longer and stay in great shape. Here’s how to clean, store, and repair your crochet creation.
Washing and Storing Your Amigurumi
- Best Ways to Clean and Dry Your Crochet Toy
- Hand-Washing:
- Fill a bowl with lukewarm water and a small amount of mild detergent or baby shampoo.
- Gently submerge your Amigurumi and squeeze it lightly without twisting.
- Rinse thoroughly with clean water.
- Spot Cleaning:
- Use a damp cloth or a soft toothbrush with soapy water to clean small stains.
- Drying Tips:
- Press out excess water with a towel.
- Reshape and lay flat on a dry towel in a well-ventilated area.
- Avoid direct sunlight and heat sources like dryers, as they may cause the yarn to shrink or distort.
- Hand-Washing:
- Proper Storage to Prevent Dust Buildup
- Store in a sealed container or a breathable fabric bag to keep dust away.
- If displaying on a shelf, dust regularly using a soft cloth or a small vacuum with a brush attachment.
- For long-term storage, place silica gel packets inside to absorb moisture and prevent mold.
Repairing Worn-Out or Loose Stitches
- Fixing Loose Arms or Legs
- If an arm or leg becomes loose, use a darning needle and matching yarn to reinforce the stitches.
- Sew through multiple stitches for extra durability.
- If necessary, remove and reattach the limb using the original pattern instructions.
- Reinforcing Safety Eyes and Seams
- If a safety eye starts to loosen, use a small amount of fabric glue behind the eye to secure it.
- If the seams begin to stretch, use a tight whipstitch around the area to reinforce it.
- Stuffed areas that have lost shape can be restuffed by carefully opening a seam, adding more fiberfill, and sewing it back securely.
Conclusion
Crocheting your own Amigurumi Robbie Robot is a fun and rewarding experience that lets you bring a unique, handmade plushie to life. From choosing the right yarn and tools to assembling the final details, every step is a chance to express your creativity.
Don’t be afraid to experiment with different colors, textures, and custom features to make your robot truly one-of-a-kind. Whether you add buttons, embroidery, or even tiny accessories, small details can make a big difference!
We’d love to see your finished Robbie Robot creations! Share your projects on social media or drop a comment with your experience and any tips you’ve discovered along the way. Happy crocheting! 🧶🤖✨