Introduction
There’s something so satisfying about creating something beautiful and functional with your own hands, and that’s exactly why I’m always on the lookout for exciting DIY crochet projects. When I came across this stylish designer crochet bag pattern, I knew it was too good not to share! Not only does it look like something you’d spot in a trendy boutique, but you can make it yourself at home, for free.
This bag ticks all the boxes: it’s fashionable, functional, and totally budget-friendly. Whether you’re heading to the market, meeting friends, or simply want to add a handmade touch to your outfit, this bag will quickly become your go-to accessory.
What really makes this design stand out is the corner-to-corner (C2C) crochet technique. It’s a fun and visually striking method that lets you build your bag piece by piece, literally from the corner out. If you’ve been looking to try something new or level up your crochet game, this is the perfect project to dive into.
Table of Contents
- Introduction
- Why You’ll Love This Crochet Designer Bag
- What You’ll Need – Tools & Materials
- Understanding the Corner-to-Corner (C2C) Technique
- Step-by-Step Instructions Overview
- Finishing Touches – Assembling the Bag
- Tips for Customizing Your Bag
- Conclusion
Why You’ll Love This Crochet Designer Bag
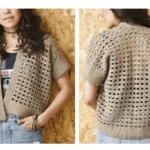
This isn’t just any crochet bag—it’s a statement piece. With its bold graphic design and clean lines, this project is the perfect blend of handmade charm and modern style. If you’re someone who loves putting a unique spin on everyday accessories, this graphic crochet bag is sure to turn heads wherever you go.
One of the things I love most about this design is how it introduces you to the corner-to-corner (C2C) crochet technique in a simple, approachable way. It might look intricate, but once you get the hang of building blocks diagonally, it becomes incredibly satisfying—and even a little addictive! It’s a fun way to experiment with shapes, colors, and visual texture.
And let’s talk materials—using Durable Macramé yarn adds both structure and style. The finished bag feels strong and sturdy, making it perfect for daily use. Plus, the yarn’s slight sheen gives the bag a polished, boutique-worthy finish. Whether you’re a beginner or a seasoned crocheter, this C2C crochet bag pattern is a refreshing and rewarding project you’ll be proud to show off.
What You’ll Need – Tools & Materials
Before you get started on your stylish crochet bag, let’s make sure you have everything you need to bring this design to life. The original pattern uses Durable Macramé yarn, which is ideal for this project because of its strength and smooth texture, perfect for structured bags.
Here’s what you’ll need:
- 4 balls of Durable Macramé yarn in Brick
- 1 ball of Durable Macramé yarn in Black
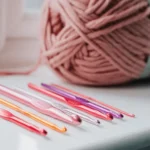
- 4.5 mm crochet hook
- 1 black bag strap
- 3 D-rings
- 1 sliding buckle
You can find the yarn and accessories at Durableyarn.com or through stockists like coloursoflife.nl, which even offers kits with everything included. If you’re unable to find the exact materials, feel free to get creative—any sturdy macramé yarn for crochet or t-shirt yarn in similar colors will do the trick.
For the strap and hardware, many craft stores carry crochet bag straps and D-rings individually or in sets. You could also upcycle an old belt or purse hardware for a sustainable twist! The key is choosing materials that offer both durability and style, so your finished bag looks and feels fabulous.
Understanding the Corner-to-Corner (C2C) Technique
If you’ve never tried corner-to-corner crochet (also known as C2C), don’t worry—it’s easier than it looks and incredibly rewarding once you get the hang of it. This technique is exactly what it sounds like: you start in one corner of your project and work diagonally toward the opposite corner, building it block by block.
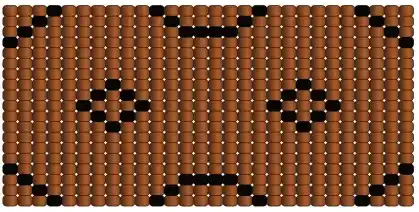
Each “block” is typically made up of 3 double crochet (dc) stitches and is connected to the previous blocks with slip stitches (sl st). As you continue, your work begins to form a staircase-like shape that grows outward from the starting point. It’s a brilliant method for creating squares, rectangles, and even detailed pixel-style graphic crochet patterns.
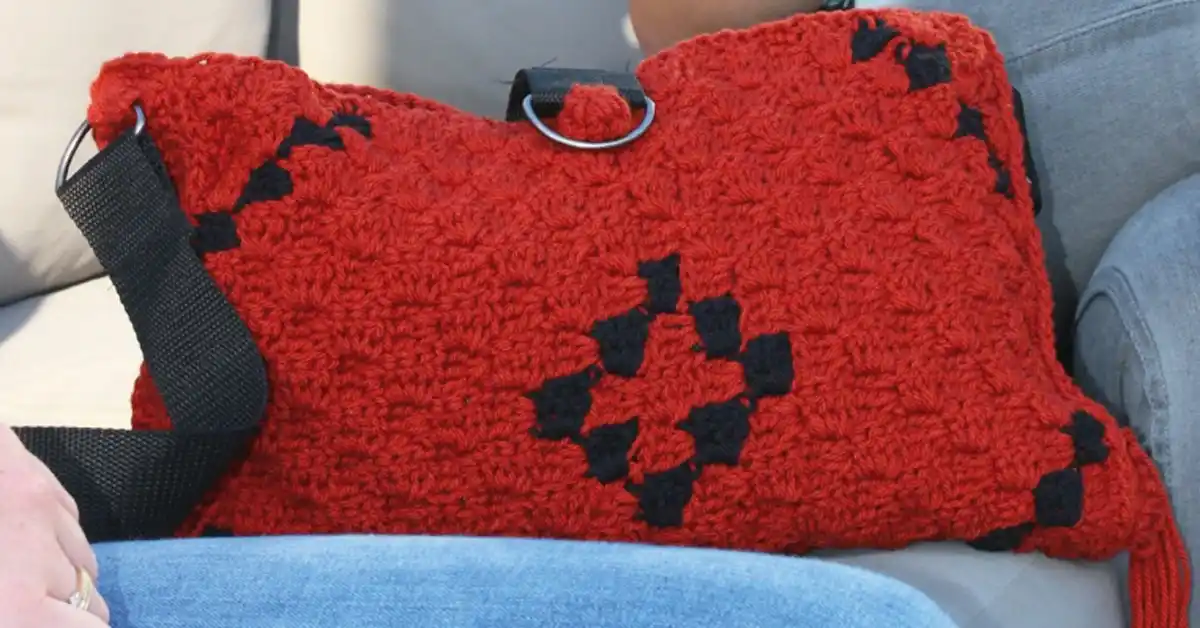
In this particular bag design, C2C really shines. The color changes—switching between Brick and Black yarn—are strategically placed to form bold, eye-catching graphics. It adds a stylish, modern edge to the bag while giving you a fun new technique to master.
If you’re a visual learner, there’s a helpful video tutorial available on aandehaak.nl/cornertocorner that walks you through the basics of the C2C technique step by step. Whether you’re new to crochet or just haven’t tried C2C before, this is a great project to start with!
Step-by-Step Instructions Overview
Now that you’re familiar with the C2C crochet technique, let’s walk through a high-level overview of how to make this beautiful crochet graphic bag. Don’t worry—this pattern may look intricate, but it’s totally beginner-friendly once you break it down.
You’ll begin by using your Brick-colored Durable Macramé yarn and chaining 6 stitches. In the 4th chain from the hook, work a double crochet (dc), followed by two more dc stitches—this forms your first “block.”
As you continue, each new row begins with 6 chains and builds 3 dc blocks diagonally across your work. To join the blocks, you’ll use slip stitches (sl st) at the tip of the previous block. This helps keep everything neat and connected as your bag panel grows.
The design features a color alternation between Brick and Black, forming a bold geometric pattern. The color changes are what give this bag its modern, graphic look—just be sure to switch colors by drawing the new yarn through the last slip stitch of the current block. It might help to use stitch markers to keep track of where each color section begins and ends, especially if you’re new to working with color changes in crochet.
You’ll work two main panels for the bag, each built diagonally from corner to corner. Once complete, they’ll be sewn together and finished with a strap and hardware. While this is just a simplified walkthrough, you can find the full pattern and row-by-row instructions in the original source: Fun Crochet Magazine, Bag Special Edition.
This DIY crochet accessory is a fun, practical project that lets you explore both shape and color in crochet. Take your time, enjoy the process, and don’t be afraid to make it your own!
Finishing Touches – Assembling the Bag
Once your two main panels are complete, it’s time to bring your stylish crochet handbag to life with some final assembly steps. Begin by sewing the panels together along the sides and bottom using a sturdy whip stitch or slip stitch seam. Be sure to align the corners neatly for a clean, symmetrical shape.
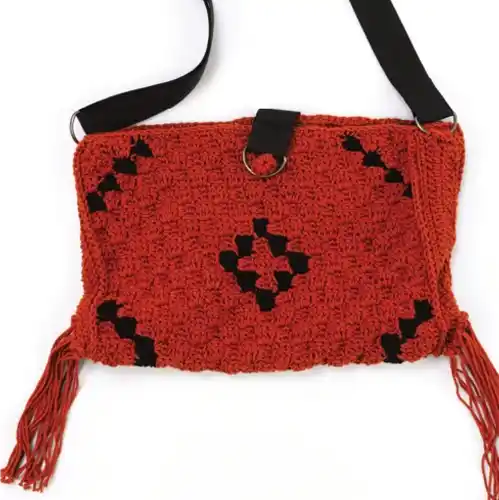
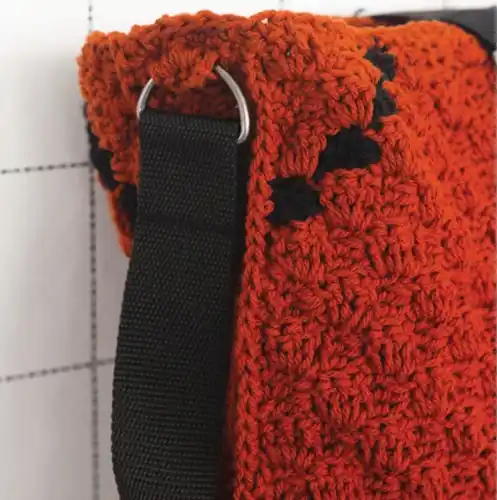
Next, attach the D-rings to the upper corners of the bag—these will anchor your strap. If you’re using a sliding buckle, thread it through the crochet bag strap first, then secure each end to a D-ring using tight, reinforced stitches or by sewing the strap around the ring. This gives you an adjustable crochet crossbody bag or shoulder bag, depending on your preference.
For extra polish, consider lining the inside with fabric—this will not only protect the yarn but also help the bag hold its shape. Choose a fabric that complements your yarn colors and hand-sew or machine-stitch it into place.
Want to add some flair? Try attaching a handmade tassel, a leather or cork tag with your initials, or a custom label that makes your bag truly one-of-a-kind. It’s those little touches that turn a great bag into a favorite accessory.
Tips for Customizing Your Bag
One of the best things about this modern crochet bag design is how easy it is to customize and make your own. You can completely change the vibe of the bag just by switching up the color palette. Go with neutral tones like beige and cream for a classic look, boho shades like mustard and olive for an earthy feel, or lean into bold combos like coral and teal for a pop of personality. If you love a soft, feminine aesthetic, pastels like blush pink and sky blue work beautifully too.
You’re not limited to macramé yarn either. Try cotton yarn for a lighter texture, jute for a rustic, natural finish, or even recycled yarns for a more eco-conscious choice. Just be sure the yarn you pick has enough structure to hold the bag’s shape.
Want to turn this into a handmade crochet tote or a cute clutch? Just adjust the number of rows—add more for a roomier tote, or scale back for a compact clutch. It’s super versatile!
And let’s not forget—making your own bag isn’t just fun, it’s sustainable. Choosing DIY crochet accessories over mass-produced items means less waste and a more meaningful finished product.
Conclusion
You can make this designer-style crochet bag—and you’ll be amazed at how rewarding it feels to carry something you crafted with your own hands. Whether you’re new to the C2C crochet bag pattern or just looking for a fresh project, this one is the perfect blend of beauty, function, and creativity.
I’d love to see your version! If you make this bag, be sure to share it on Instagram or Pinterest and tag @Crochetex so I can feature your beautiful work. 🌟
For the full instructions and color chart, you can access the original pattern by clicking here to download the printable version I’ve formatted for easier use.
And don’t forget—if you enjoyed this project, sign up below for more free crochet bag patterns, tutorials, and cozy DIY inspiration delivered straight to your inbox!