Introduction
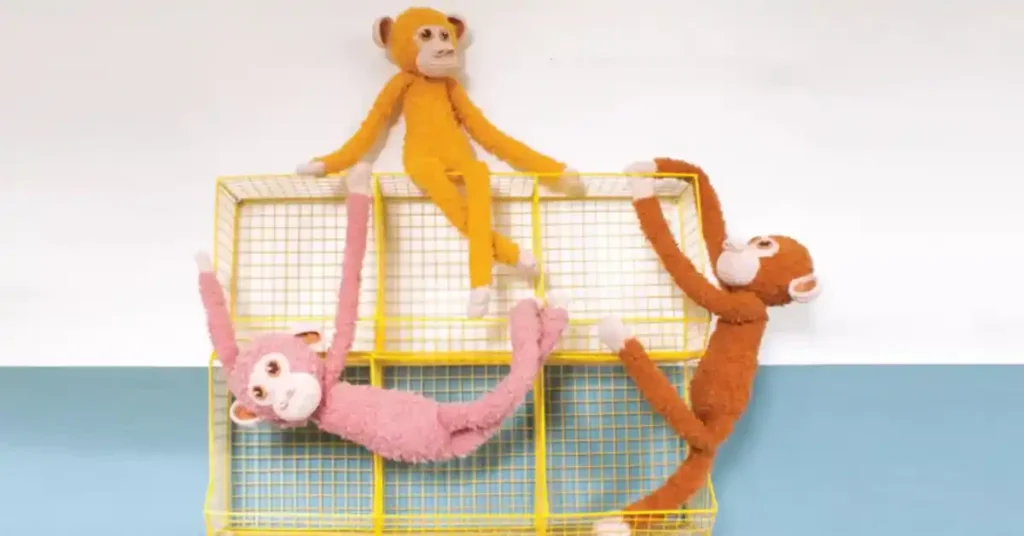
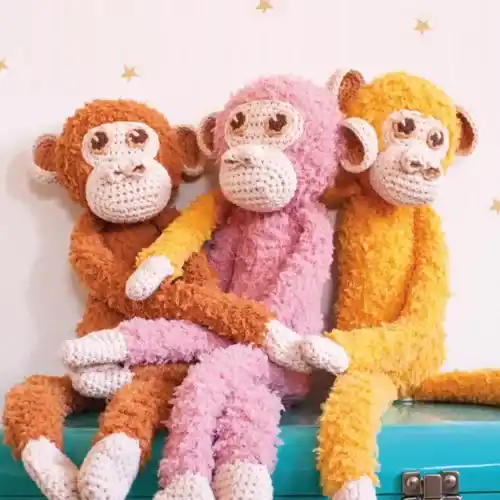
There’s something irresistibly charming about crochet stuffed animals — they have a special way of bringing smiles and warmth wherever they go. And when you create one that can hang around just like a real spider monkey, the joy multiplies! Crochet soft toys aren’t just for kids; they’re wonderful decorations, playful companions, and thoughtful handmade gifts that everyone can appreciate.
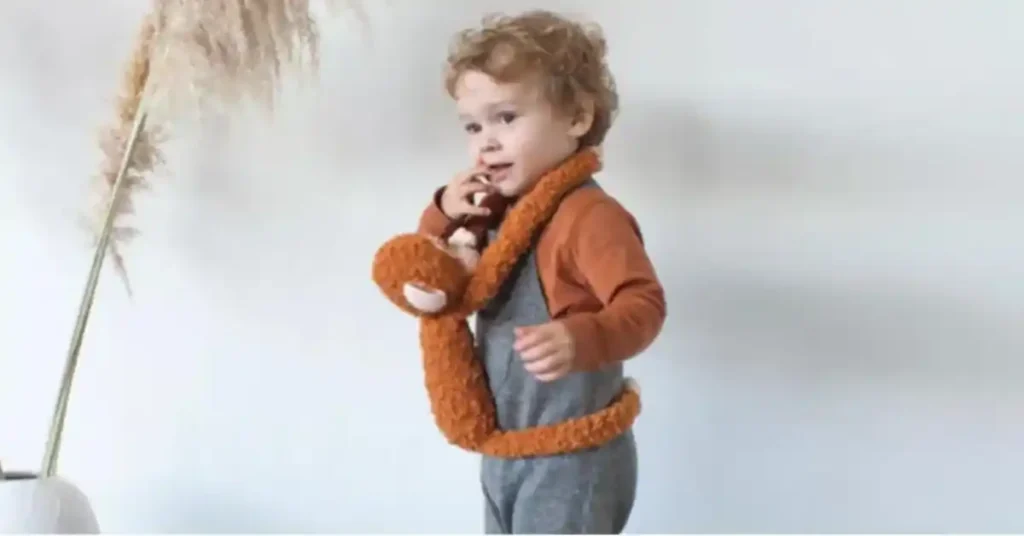
Today, we’re diving into an exciting project: a crochet spider monkey that’s not only cuddly and adorable but also interactive! This little friend features hidden magnets in its hands and feet, allowing it to cling to furniture, backpacks, or even give hugs. Whether you’re making it for a child, a playful home accessory, or simply as a delightful crochet challenge, this spider monkey is sure to capture hearts.
In this step-by-step tutorial, I’ll guide you through everything you need to create your very own crochet spider monkey. You’ll find a complete list of materials, detailed crochet instructions for every part — from the head and body to the arms, legs, and those cute little ears — plus handy tips to help your project come together smoothly. Get your yarn and hook ready — a fun, hanging friend is just a few stitches away!
Table of Contents
- Introduction
- Materials Needed
- Step-by-Step Crochet Spider Monkey Tutorial
- Tips for Success
- Creative Ideas for Your Crochet Spider Monkey
- Final Thoughts
Materials Needed
Before we dive into the fun part — crocheting your cuddly spider monkey — let’s make sure you have all the necessary supplies ready. Gathering everything beforehand will make the process smoother and more enjoyable. Here’s what you’ll need:
- Durable Teddy Yarn (Honey 2179): This exceptionally soft and plush yarn is ideal for crafting the monkey’s huggable body and charming head, ensuring a delightful tactile experience. Its fluffy texture adds a warm, inviting touch to any creation, making it a perfect choice for cuddly toys.
- Durable Cosy Fine yarn (Coffee 385, Camel 2209, Pale Pink 2192): These smooth, fine yarns add contrast and color for the eyes, face, and limbs.
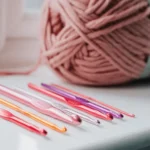
- 4.5 mm crochet hook: Ideal for achieving the right tension and a cozy, tight stitch that holds the stuffing firmly.
- Scissors: A sharp pair will make cutting your yarn quick and precise.
- Darning needle: Essential for weaving in ends and sewing different parts of your monkey together neatly.
- Fiberfill stuffing: This lightweight and soft material brings your crochet stuffed animal to life, giving it shape and cuddly volume.
- 6 magnets or Velcro: Inserted into the hands and feet, these allow your spider monkey to hang and cling just like a real one!
All the yarns mentioned can be conveniently found at DurableYarn, making it easy to get started on your project. Having the right crochet stuffed animal supplies, like quality yarn, fiberfill stuffing, and magnets for crochet toys, ensures that your finished monkey will be adorable and durable.
Step-by-Step Crochet Spider Monkey Tutorial
1. Body
Start by crocheting the body of your monkey using the Durable Teddy Honey yarn. Begin with a chain of 9 stitches. Form an oval shape by working single crochets around the chain and increasing at the ends. Continue to expand your oval base by making increases in each round, following the pattern carefully.
Once you reach the widest point (36 stitches), work even rounds to build up the body’s length. Then, begin decreasing evenly to taper the body shape. As you decrease, stuff the body gradually with fiberfill stuffing, ensuring it holds a soft but firm shape. Finish by closing the opening tightly with single crochet decreases.
This forms the cuddly center of your crochet monkey tutorial — a strong foundation for a delightful soft toy crochet pattern that children and adults alike will love!
2. Base for Eyes
To create the base for the eyes, use the Durable Cosy Fine Pale Pink yarn. Start with a chain of 9 stitches and work around it in an oval, just like you did for the body. Increase at the ends to maintain a smooth shape without curling.
Neat, even stitches are crucial here since these bases will be visible beneath the monkey’s actual eyes. After three rounds, you’ll have a perfectly shaped foundation ready for the detailed eye pieces.
3. Eyes
Now it’s time to craft the expressive eyes. Begin with a magic ring using Coffee yarn and crochet six single crochets into it. Then, switch to Camel yarn and work slip stitches around for a subtle two-tone effect.
Embroider two small lines with Pale Pink yarn at the upper left of each eye for added life and sparkle. Attach the eyes onto the pink bases carefully, making sure a rim of the pink base shows at the top and outer edge.
This detailed section adds charm to your amigurumi spider monkey and brings personality to your monkey crochet toy.
4. Head
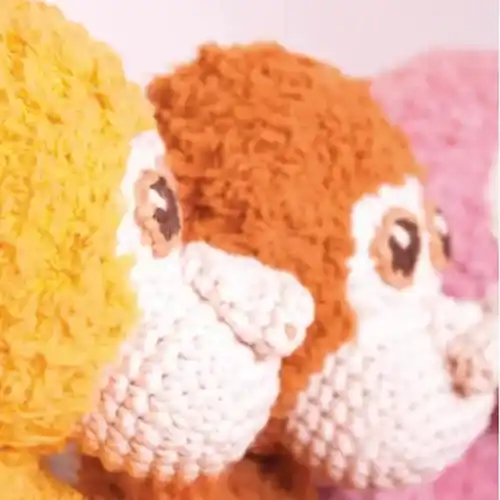
The head starts with a magic ring using Teddy Honey yarn, then builds outward with steady increases to form a wide, rounded shape. Work multiple rounds without increases to create depth before beginning gradual decreases.
When you’re about halfway down, sew the eye bases onto the front of the head, placing them symmetrically and just above the center. Continue crocheting the head, making sure to gently stuff it with fiberfill stuffing as you go. This technique helps maintain a round and cuddly shape, ensuring the head is soft and huggable. Take your time to evenly distribute the stuffing for a smooth finish, allowing the adorable features of your creation to come to life.
Finally, close the head with tight decreases. Your DIY crochet monkey now has a charming face and a soft, squishable head!
5. Snout and Nose
The snout is crocheted separately using Pale Pink yarn, beginning again with a chain and forming a rounded oval. Add a few rounds of single crochet to deepen the snout, enhancing its charm and dimension.
For the nose, crochet a small flat piece, gradually increasing and shaping it row by row to achieve a perfect form. Then switch yarn colors to Camel and crochet along the back loops for extra texture.
Fold the nose slightly for a natural shape, stitch it neatly together, and sew it centered onto the snout. Finally, attach the completed snout just below the eyes, allowing it to overlap slightly with the bottom of the eye bases.
6. Ears (Inner and Outer)
To create the ears, crochet two sets: inner ears with Camel yarn and outer ears with Pale Pink yarn. Each part is shaped with an oval construction similar to the snout and eye bases.
Place the inner ear piece onto the outer ear, and crochet them together by matching stitches around the edge. This gives the ears a double-layered, plush look.
Securely sew each ear onto the side of the head at an even height, so they sit slightly back from the eyes for a natural, adorable appearance.
7. Arms
The arms begin with a magic ring using Pale Pink yarn to create the hand, gradually widening for the palm, and shaping the fingers with subtle increases and decreases. Once the hand shape is finished, transition to Durable Teddy yarn for the elongated arms, adding a touch of softness and warmth to your creation.
Before crocheting too far, insert a small magnet inside each hand and stuff lightly with fiberfill. Ensure the magnets are snugly fitted and centered to prevent any shifting, providing stability and enhancing the overall design.
Continue crocheting even rounds to form the arms’ full length. These arms let your crochet monkey with magnets easily hang, hug, and play, just like a real hanging crochet monkey!
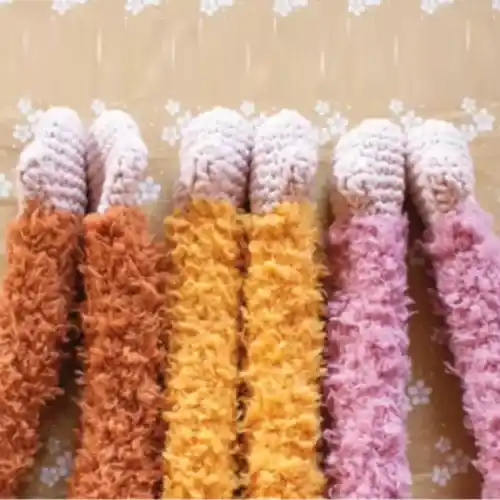
8. Legs
The legs are crocheted similarly to the arms but are slightly wider and sturdier to support the monkey’s playful poses. Begin with a Pale Pink magic ring for the feet, shaping the toes and broadening into the leg.
Switch to Teddy Honey yarn after forming the foot, insert a magnet into each foot, and lightly stuff it to maintain structure without making it too bulky.
Continue with uniform rounds along the legs until you achieve your desired length, creating a sleek and polished finish. Attach the legs securely to the lower sides of the body, making sure they’re positioned evenly for perfect balance and playful posing!
Tips for Success
When working with magnets inside your crochet spider monkey, wrap each magnet in a small piece of fabric or yarn scrap before inserting it. This helps prevent the magnets from poking through the stitches over time and keeps them securely in place.
Maintaining even tension is essential, especially when working with Durable Teddy yarn. Because of its fluffy texture, it can be tricky to see each stitch clearly. Try to feel your stitches rather than relying solely on sight, and check your stitch count often to avoid accidental increases or decreases.
For a perfectly cuddly finish, stuff your monkey gradually as you go, using small tufts of fiberfill stuffing. Overstuffing can stretch the stitches, while understuffing can leave the toy looking saggy. Aim for a soft yet firm shape that holds well.
These beginner crochet animal tips will ensure your monkey turns out adorable, durable, and full of personality!
Creative Ideas for Your Crochet Spider Monkey
Once you’ve mastered the basic crochet spider monkey pattern, you can easily personalize your creation with fun twists! Try using different color combinations—think bright blues, soft pastels, or even rainbow yarns—for a playful, one-of-a-kind look.
You can also add accessories like a tiny crochet backpack or a mini scarf to give your monkey extra character. These little touches make your monkey even more special and great for gifting.
If you’re making the monkey for small children, consider using Velcro instead of magnets for the hands and feet. Velcro is a safer alternative that still allows your monkey to “hang around” and play, just like the magnetic version.
Get creative and let your imagination turn this project into a true cuddly masterpiece!
Final Thoughts
Creating your own crochet spider monkey is not just a fun project — it’s a wonderful way to craft a cuddly companion full of personality and charm. From the soft yarn to the playful magnets, every stitch brings this adorable monkey to life.
Feel free to personalize your spider monkey with unique colors, accessories, or special touches to make it truly yours. Let your creativity shine!
We’d love to see your creations! If you try this crochet spider monkey pattern, leave a comment below or share your finished monkey on social media — and don’t forget to tag us. Happy crocheting!