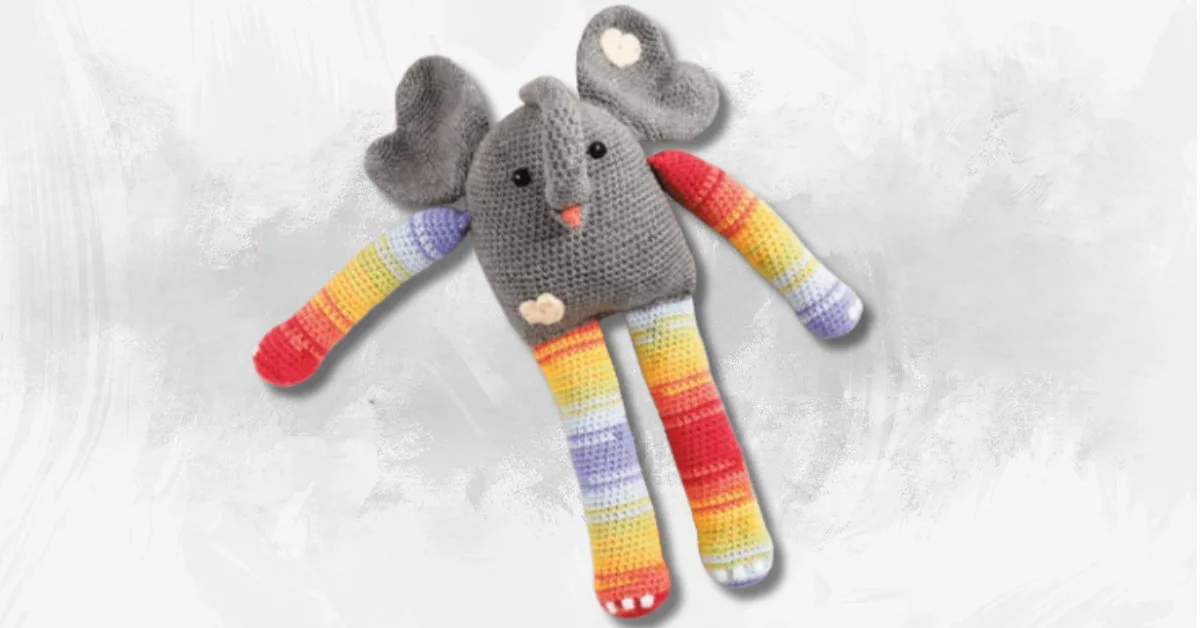
Crocheting an elephant is a delightful and rewarding project that combines creativity with the joy of crafting. This crochet elephant pattern is perfect for beginners who want to create an adorable amigurumi elephant from scratch. It’s a simple yet satisfying project that allows you to practice your crochet skills while making a fun and huggable toy.
In this step-by-step guide, you’ll be walked through the process of crocheting each part of the elephant: the head, body, ears, trunk, and mouth. Whether you’re just starting with crochet or have some experience, this pattern is designed to be easy to follow with clear instructions and helpful tips. You’ll also learn techniques like creating a magic ring, working in rounds, and attaching pieces, which are essential for mastering amigurumi.
By the end of this tutorial, you’ll have a completed crochet elephant that you can proudly display, gift to someone special, or add to your collection of handmade treasures. So grab your yarn, hooks, and let’s get started on this fun and rewarding crochet adventure!
Table of Contents
- Why Crochet an Elephant?
- Materials You’ll Need
- Step-by-Step Crochet Elephant Instructions
- Finishing Touches
- Tips for Beginners
- Customizing Your Crochet Elephant
- Caring for Your Crochet Elephant
- Conclusion
Why Crochet an Elephant?
Why Elephants?
Elephants are not only fascinating creatures, but they also carry a deep symbolic meaning. Known for their strength, wisdom, and loyalty, elephants represent qualities that make them a thoughtful and meaningful project to crochet. By crafting your very own crochet elephant, you’re not just making a cute toy—you’re creating something that symbolizes resilience and intelligence.
Crochet elephants also make fantastic gifts for special occasions such as baby showers or birthdays. Their endearing appearance and soft, squishy texture make them perfect for cuddling, and they’re a charming addition to any nursery or child’s room. Whether placed on a shelf, used as a soft companion for a child, or given as a heartfelt gift, a crocheted elephant is sure to bring joy.
Benefits of Amigurumi
Amigurumi, the art of crocheting small, stuffed animals, has become a global trend because of its ability to create unique, personalized, and adorable items. By crocheting amigurumi, you’re not only making something cute and functional, but you’re also honing your crochet skills.
Working on an amigurumi project like this crochet elephant will help you develop your technique in several ways: from mastering the magic ring, improving your ability to crochet in the round, to enhancing your skills in shaping and joining pieces. Plus, there’s something incredibly satisfying about making a handcrafted stuffed animal that’s completely your own. Whether you’re crafting for yourself or someone else, making an amigurumi elephant is a rewarding experience.
Materials You’ll Need
To create your crochet elephant, you’ll need the following supplies to ensure your project turns out perfectly. Here’s a breakdown of the materials:
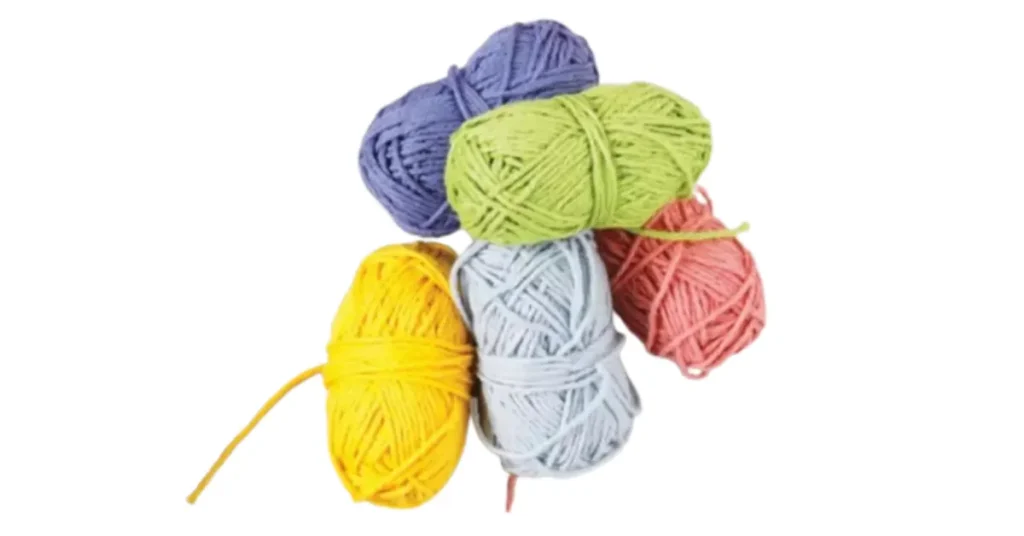
Yarn
- Durable Coral Yarn in Black (325): This will be used for the elephant’s trunk and mouth. The black color will give these features a realistic and sharp contrast against the rest of the body.
- Stylecraft Special DK Yarn in Grey (1099): This soft grey yarn will form the body, head, and other major parts of your elephant. It’s a perfect choice for creating a sturdy yet soft base for your amigurumi elephant.
- Stylecraft Wondersoft Merry-go-Round DK Yarn in Pastel Rainbow (3154): This yarn is ideal for adding a fun, colorful touch. You can use it for decorative elements such as a scarf or any other personal flair you want to add to your crochet elephant.
- Scrap of White Yarn: This will be used to embroider or crochet the eyes of your elephant, giving it a lively and cute appearance.
Crochet Hooks
- 2mm Crochet Hook: This size hook is perfect for the smaller details of the elephant’s features, like the trunk and mouth.
- 3.5mm Crochet Hook: The main crochet hook you’ll use for the body and other larger parts of the elephant. It’s comfortable for working with the DK yarn and ensures your stitches are tight and neat.
Additional Supplies
- Scissors: Essential for cutting your yarn once you’ve finished each section or need to switch colors.
- Darning Needle: This needle will be used for sewing the pieces of the elephant together. A darning needle with a large eye is perfect for threading yarn and making seamless joins.
- Stuffing: To give your crochet elephant its soft, cuddly form, you’ll need some stuffing material. Polyfill or cotton batting are both great options for creating the plush look and feel.
Step-by-Step Crochet Elephant Instructions
1. Crochet the Head and Body
- Magic Ring (MR): Start by making a magic ring with your grey yarn and work 6 single crochet (sc) stitches into it.
- Increase Rounds: Continue increasing in each round following this pattern:
- Round 2: 2 sc in each stitch (12 sc)
- Round 3: 2 sc in every 2nd stitch (18 sc)
- Round 4: 2 sc in every 3rd stitch (24 sc)
- Continue increasing every few stitches in subsequent rounds until you reach Round 11, which should have 66 sc.
- Crochet Rounds 12-41: Continue working 66 sc in these rounds to form the body, creating a cylindrical shape.
- Shaping the Body: Once you reach Round 42, start decreasing to shape the elephant’s body. The decreases will gradually taper the body, starting from:
- Round 42: Decrease every 10th and 11th stitch (60 sc)
- Round 43: Decrease every 9th and 10th stitch (54 sc)
- Round 44: Decrease every 8th and 9th stitch (48 sc)
- Finish by fastening off, leaving a long tail for attaching the head and body together later.
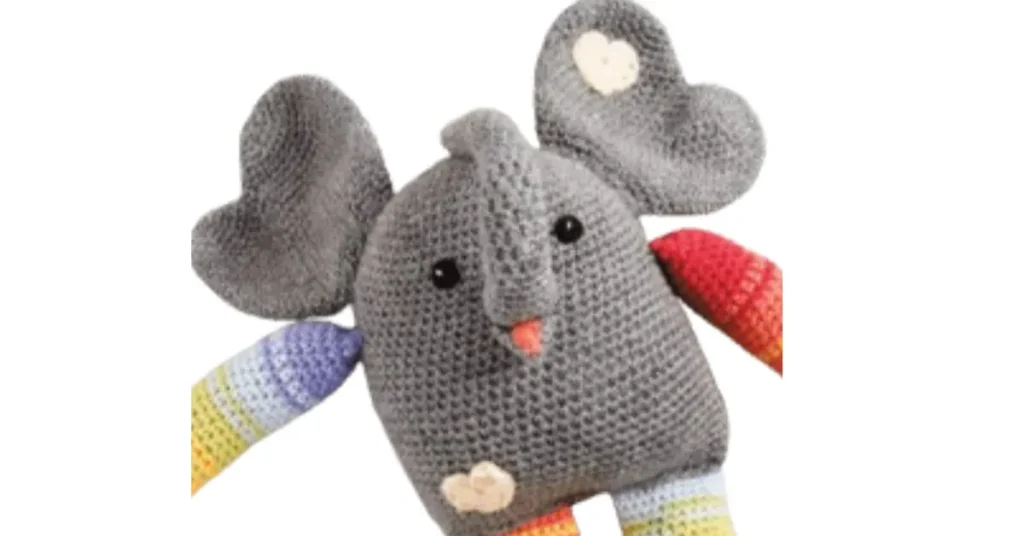
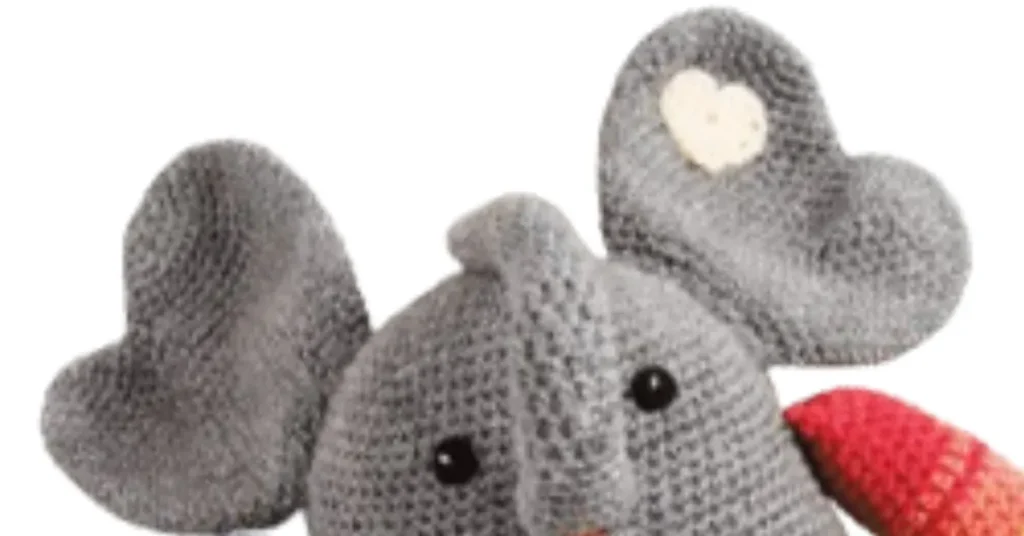
2. Making the Ears (Repeat for 2 Ears)
- Part 1 (Ear Base): Start by creating a magic ring with grey yarn and increase as follows:
- Round 1: 6 sc in the MR (6)
- Round 2: 2 sc in each stitch (12)
- Round 3: 2 sc in every 2nd stitch (18)
- Round 4: 2 sc in every 3rd stitch (24)
- Round 5: 24 sc in total (Fasten off, leaving a long tail for sewing later).
- Part 2 (Ear Shape): Create a second ear using the same method, but at Round 6, crochet in a circular shape to form the ear’s larger structure.
- Connecting the Ears: Now, take the first ear’s last stitch and join it with the second ear’s first stitch, continuing to crochet in the round to join the two pieces. This creates the full circular ear shape.
- Sew the ears onto the head, positioning them symmetrically.
3. Creating the Trunk
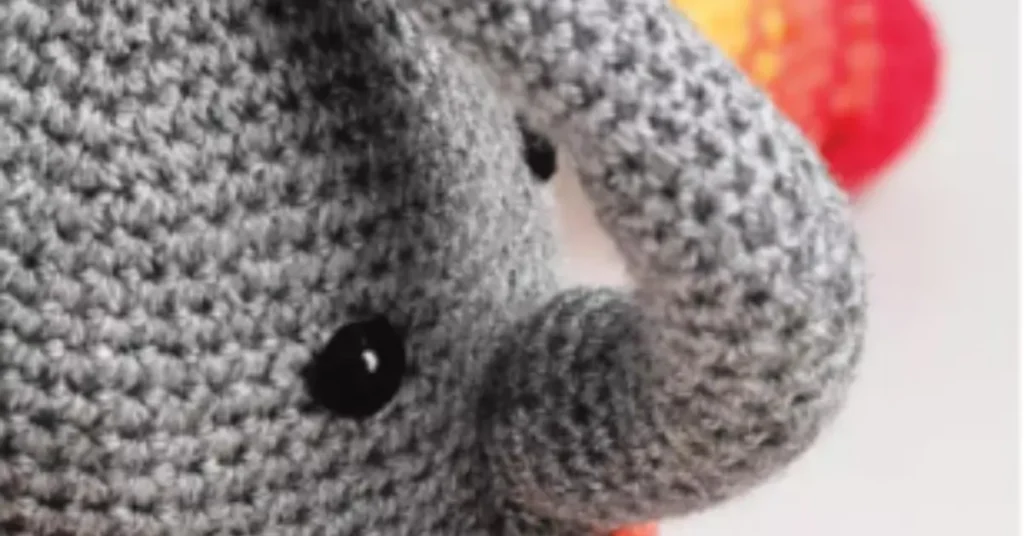
- Start the Trunk: Create a magic ring and work 6 sc stitches into it to form the base of the trunk.
- Shape the Trunk: Gradually increase to create the trunk’s shape:
- Round 2: 2 sc in each stitch (12)
- Round 3: 2 sc in every 2nd stitch (18)
- Continue increasing until Round 19 for the desired trunk length and shape.
- Attaching the Trunk: Once you’re happy with the shape of the trunk, attach it to the front of the elephant’s head, ensuring it’s centered and stitched securely.
4. Crocheting the Mouth
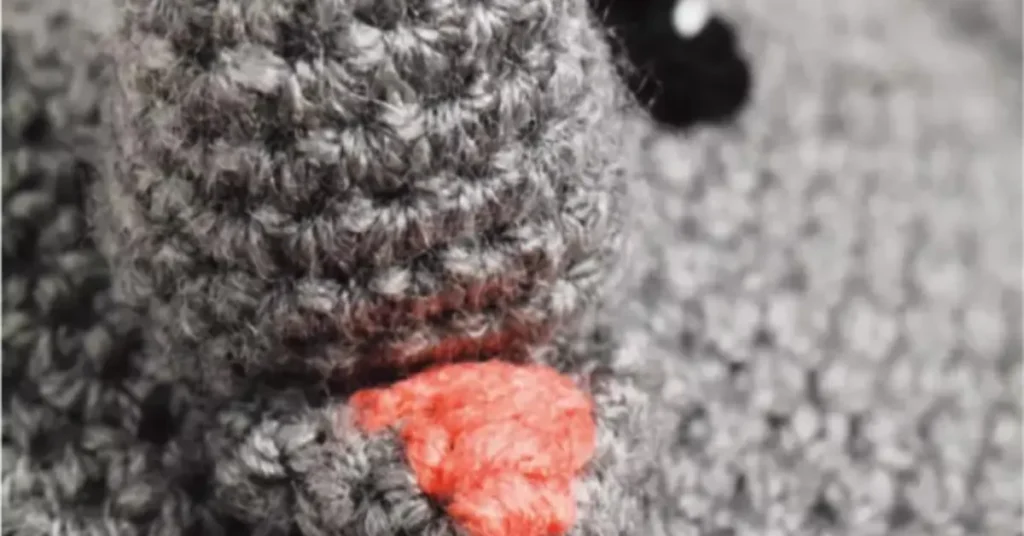
- Mouth Shape: Start by creating a small magic ring and work 4 sc stitches.
- Round 1: 4 sc in the MR
- Round 2: Increase in each stitch (8)
- Round 3: 2 sc in every 2nd stitch (12)
- Shape the mouth to match the proportions of the elephant’s face. Attach it to the front of the trunk for a cute, expressive look.
Finishing Touches
5. Adding the Eyes
- Embroidery: To give your crochet elephant its adorable, expressive eyes, use the white scrap yarn to embroider two small circles onto the face. Start by stitching a simple oval or round shape for each eye, using a backstitch or French knots for added texture.
- Alternatively, you can use safety eyes if you prefer a cleaner, more polished look. Safety eyes are easy to attach and give the elephant a finished, professional appearance, especially if you’re making it for a baby or young child.
- Positioning: Carefully place the eyes in the correct position to ensure your elephant has a balanced and cute expression. Typically, the eyes are placed symmetrically about halfway down the head. Make sure they’re not too close to the trunk to maintain a natural look.
6. Assembling the Elephant
- Sewing Together: Using a darning needle, begin sewing the ears, trunk, and mouth onto the body. Take your time to ensure each piece is securely attached and properly aligned. The trunk should be centered on the head, with the ears positioned on either side.
- Stuffing: Once all pieces are sewn together, gently stuff the head and body with your choice of stuffing (polyfill or cotton batting) to give your elephant a soft, rounded shape. Be sure not to overstuff, as this could distort the proportions of your amigurumi.
- Final Touches: Now, you can add any finishing details to personalize your crochet elephant. You might stitch a cute smile or add other decorative elements, such as a scarf, bow, or other fun accessories to make your elephant unique.
Tips for Beginners
Crocheting your first elephant might seem like a big challenge, but with these helpful tips, you’ll make your way through the process smoothly and with confidence:
Keep Tension Even
- Consistency is Key: One of the most important things to remember while crocheting is to keep your tension even throughout the project. If your tension is too tight, your stitches will be difficult to work into, and if it’s too loose, gaps will appear between stitches, which can affect the overall look of your elephant.
- Tip: If you notice uneven tension, try to relax your grip on the yarn and hook. This can help you maintain a more consistent stitch size.
Secure the Pieces
- Proper Attachment: Make sure to sew each piece securely, especially the trunk and ears, as these parts can easily become loose over time if not stitched carefully.
- Tip: When attaching the trunk, ears, or mouth, use small stitches to join the parts firmly. Double-check the attachment by gently pulling on the pieces to ensure they’re secure.
Stuffing Tips
- Don’t Overstuff: When stuffing your crochet elephant, you want it to be soft and squishy, not overly firm. Overstuffing can cause the seams to stretch, leading to an uneven or lumpy appearance.
- Tip: Stuff small amounts of stuffing at a time, pushing it into the body and head gently with a blunt tool like a crochet hook or pencil. This will help you achieve a soft, even fill without overstuffing any particular area.
Customizing Your Crochet Elephant
Once you’ve completed your crochet elephant, the fun doesn’t have to stop there! There are plenty of ways to personalize your elephant and make it truly unique. Here are some ideas for customizing your creation:
Color Variations
- Play with Colors: While the classic grey elephant is adorable, why not experiment with different colors for a fun twist? You could try using pastels for a softer, more whimsical look or even create a rainbow-colored elephant for something extra playful and eye-catching. The possibilities are endless, and choosing different yarn colors allows you to make a crochet elephant that suits your personal style or the recipient’s favorite colors.
- Tip: You can also mix different colors for each part of the elephant, such as a light grey body with darker grey ears or a colorful trunk to make your elephant stand out even more.
Accessories
- Adding Personality: One of the easiest ways to make your crochet elephant truly yours is by adding accessories. A cute bow around the elephant’s ear or a tiny scarf can instantly add character. You could even crochet a little blanket for your elephant to carry around or drape over its back.
- Tip: Don’t forget that the accessories you add can make great gifts. Whether it’s for a child’s room or as a personalized gift for a loved one, little details can make all the difference.
Caring for Your Crochet Elephant
Now that you’ve created your beautiful crochet elephant, it’s important to care for it properly to ensure it stays in great condition for years to come. Here are a few simple tips for keeping your amigurumi elephant looking its best:
Washing Instructions
- Gentle Hand-Wash: To keep your crochet elephant clean, gently hand-wash it using mild soap and cool water. Avoid using a washing machine, as the agitation could distort the shape or damage the stitches.
- Tip: Use a soft cloth or sponge to clean delicate areas. If needed, spot clean stains instead of submerging the whole elephant. After washing, lay the elephant flat on a clean towel to dry. Avoid wringing or twisting it, as this could cause the stuffing to shift or the yarn to stretch.
Storing
- Safe Storage: When not in use, keep your crochet elephant in a safe place to prevent it from being squashed or damaged. If it’s a gift or part of a collection, store it in a display case or on a shelf where it’s protected from dust and other environmental factors.
- Tip: If you’re gifting your crochet elephant, consider wrapping it carefully to avoid any damage during transportation. A protective box or wrapping paper can help keep it safe and preserve its shape.
Conclusion
Crocheting your own amigurumi elephant is a fun and rewarding experience, no matter your skill level. This project provides a wonderful opportunity to practice your crochet techniques while creating something adorable that can be cherished for years. The versatility of this pattern makes it perfect for customizing to your own taste, whether by choosing different colors, adding accessories, or giving your elephant a unique personality.
As you work through each step—from crafting the head and body to finishing with those cute little details like the eyes and trunk—this pattern helps you refine your skills in a relaxing, creative way. Plus, there’s nothing quite like the satisfaction of completing a handmade project that you can be proud of, or gifting it to someone special to brighten their day.
Whether you plan to keep your crochet elephant for yourself, use it as a gift for a loved one, or even display it as a charming decoration, we’re sure it’ll bring a smile to anyone who sees it. The small, cuddly size makes it ideal for kids’ rooms, nurseries, or as a fun addition to any crochet collection. Happy crocheting, and enjoy every stitch of this delightful project!