Introduction
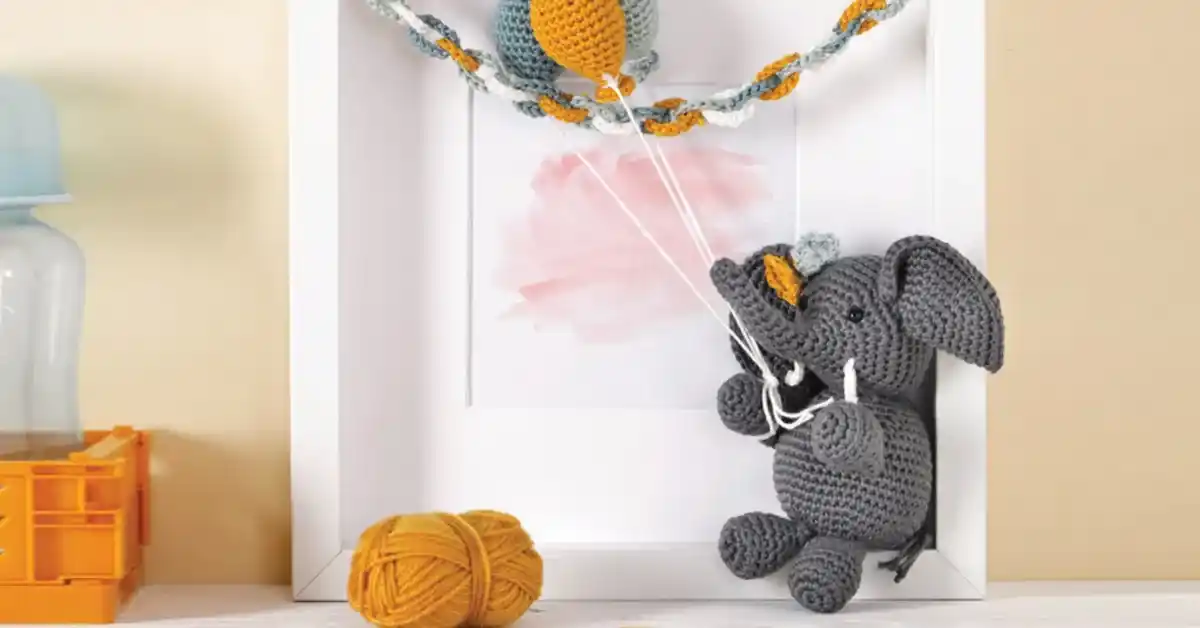
Get ready for a delightful crochet adventure! If you’re seeking a project that’s both enjoyable and simple, you’ve stumbled upon the perfect gem! Today, we’re diving into a charming creation: a crochet elephant in a frame. This adorable design combines the art of amigurumi with stylish crochet wall art, making it a perfect addition to any nursery, playroom, or cozy corner of your home.
Even if you’re a beginner, this project is totally achievable. With a few basic materials like Scheepjes Catona yarn, a simple Ikea RIBBA frame, and some fiberfill stuffing, you’ll be able to bring this sweet little elephant to life. Using simple techniques such as the magic ring (MR) and single crochet (sc) stitches, you’ll learn how to shape, assemble, and display your handmade masterpiece.
Whether you’re crocheting for yourself or crafting a heartfelt gift, this step-by-step pattern will guide you through every part of the process. Let’s get started and create a piece of art that’s sure to make everyone smile!
Table of Contents
- Introduction
- Materials Needed
- Step-by-Step Instructions: How to Crochet the Elephant
- Making and Shaping the Ears
- Crocheting the Body
- Assembling the Crochet Elephant in a Frame
- Helpful Crochet Tips for Beginners
- Why You’ll Love This Crochet Elephant Project
- Conclusion
Materials Needed
Before you begin your crochet elephant in a frame project, make sure you have all the necessary supplies ready. Here’s what you’ll need:
- Scheepjes Catona yarn in the following colors:
- Metal Grey (Color 242)
- Bridal White (Color 105)
- Saffron (Color 249)
- Silver Green (Color 402)
- Silver Blue (Color 528)
- 2.5 mm and 3 mm crochet hooks
- Safety eyes (Ø 6 mm)
- Fiberfill stuffing for shaping the head and body
- Electrical wire (about 17 cm long) for the trunk
- Scissors and a yarn needle for finishing and sewing
- IKEA RIBBA photo frame to display your finished elephant
- Optional: A printed background to place behind the elephant inside the frame
Quick Tip: You can easily find Scheepjes Catona yarn and other supplies online at Scheepjes.com, your favorite local craft store, or major retailers like Amazon.
With these materials in hand, you’re all set to start crocheting your adorable elephant!
Step-by-Step Instructions: How to Crochet the Elephant
Creating this adorable crochet elephant in a frame is easier than you might think. Follow these simple steps to bring your cute elephant to life!
Crocheting the Trunk and Head
Begin your crafting journey by creating a magic ring (MR) with the elegant Scheepjes Catona yarn in a striking Metal Grey. Inside the magic ring, work 6 single crochets (sc) to form a snug foundation. Continue working in the round, gradually increasing the number of stitches to shape the trunk. For example, after the first few rounds, you will increase every few stitches to widen the trunk slightly.
As you continue to crochet, you’ll build up the head by further increasing the stitch count in a controlled manner, eventually reaching about 48 stitches around.
Once you’ve reached the size for the head, it’s time to insert the safety eyes. Place the eyes evenly on either side of the head, positioned carefully between rounds 29 and 30, while the head is still open. This helps secure them properly.
Before closing the head, fold your electrical wire (17 cm) in half and insert it into the trunk. This will allow the trunk to be posed in a gentle curve later. Firmly stuff the head with fiberfill stuffing, making sure the shape stays round and even.
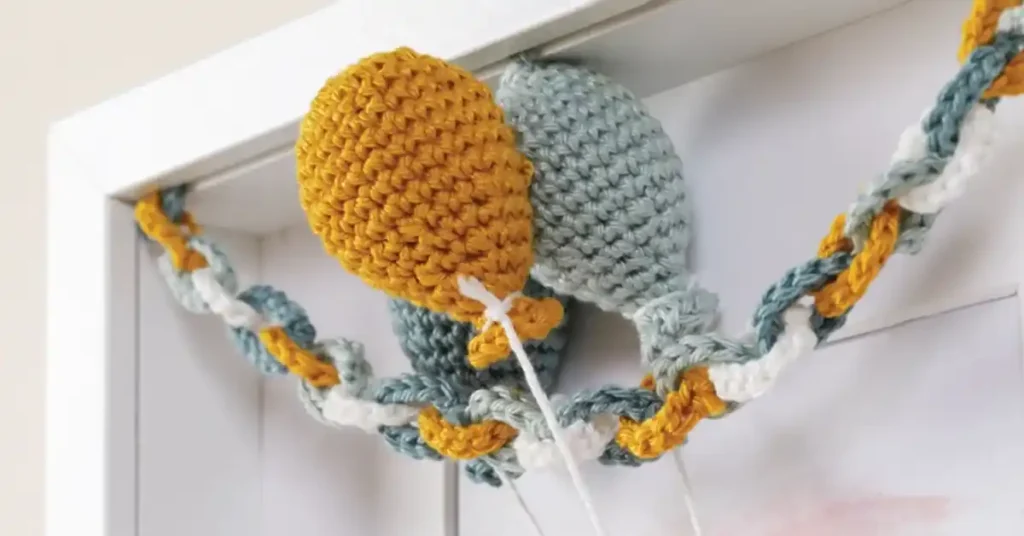
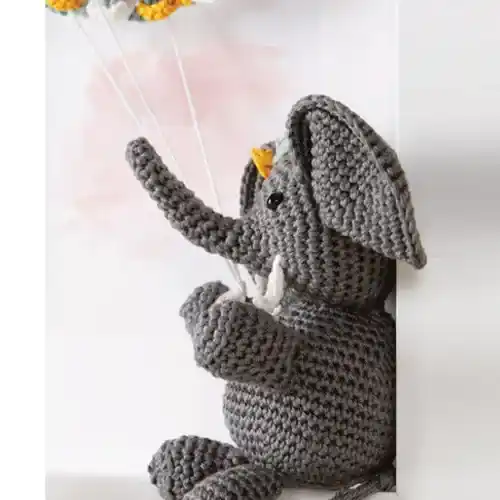
Adding the Tusks
For the tusks, use Bridal White yarn. Crochet two small chain loops — around 6 chains each — and fasten off. These loops will act as the elephant’s tusks.
Sew the tusks neatly onto either side of the trunk, close to its base. The tusks should sit just beneath the safety eyes, giving your elephant its iconic, friendly look.
Making and Shaping the Ears

The elephant’s ears are crocheted separately using the same Metal Grey yarn. Begin again with a magic ring, and work single crochet increases each round to grow the circle larger. As you progress through several rounds, your circle will expand to approximately 54 stitches, resulting in a beautifully wide and floppy ear.
Fold the ear circle in half and crochet along the rounded edge with about 26 single crochets to close it, giving the ear a natural curve. Then, fold down one upper corner slightly and secure it with a single crochet stitch to create a realistic ear shape.
Make two ears and attach them symmetrically on either side of the head, around three rounds above the eyes. Position them carefully to ensure the elephant’s head looks balanced and proportional.
Crocheting the Body

The body is also worked in the round, starting with a magic ring and 6 single crochets. Increase the stitch count evenly each round, just like with the head, until reaching about 48 stitches.
Once you reach the desired size, work several rounds without increasing to form the body’s shape. Then, start decreasing every few rounds to taper off and close the body slightly at the base.
As you continue crocheting, don’t forget to generously stuff the body with fiberfill to ensure it’s nice and firm. This gives the body a soft but solid feel, providing a good base for mounting in the frame. Be careful not to overstuff, which can cause the body to become too rigid or misshapen.
By following these simple steps — and using basic techniques like the magic ring, single crochet (sc), increases, and sc2tog decreases — you’ll create a beautiful crochet elephant that’s perfect for framing. With a little patience and careful stitching, your elephant will be ready to shine as a unique piece of crochet wall art!
Assembling the Crochet Elephant in a Frame
Now that you have completed crocheting all the parts, it’s time to assemble your adorable crochet elephant inside the Ikea RIBBA frame.
Start by carefully positioning the body of the elephant toward the bottom center of the frame backing. Then, place the head slightly overlapping the body so that it appears naturally connected. As you continue crocheting, don’t forget to generously stuff the body with fiberfill to ensure it’s nice and firm.
To ensure your pieces are joined securely, you have two fantastic choices:
- Sewing: Use a strong yarn needle and leftover yarn to stitch the body and head firmly onto the backing material.
- Hot glue gun: Apply small amounts of hot glue to the back of the parts and press them firmly onto the backing. Use the glue sparingly and with care to ensure a clean finish, preventing any unsightly marks that might spoil your masterpiece.
Next, if you wish, add a background print behind the elephant. Choose a soft, complementary color or a fun pattern that highlights the elephant without overpowering it.
Before sealing the frame, make any final adjustments. Fluff the ears and trunk slightly so the elephant “pops” from the frame and has a lively, three-dimensional appearance. Once you’re happy with the placement, close the frame carefully.
Now your beautiful crochet elephant wall art is ready to display or gift!

Helpful Crochet Tips for Beginners
If you’re new to crochet, don’t worry — this project is a fantastic way to build your skills while creating something adorable!
First, master the magic ring technique. It’s essential for starting projects like this elephant, where you want a tightly closed center without a hole. Practice making a firm loop and crocheting your first stitches evenly around it.
Next, focus on single crochet increases and sc2tog decreases. Increases simply mean working two single crochets into one stitch to widen your project, while sc2tog (single crochet two together) helps shape and narrow it. Smooth transitions between these steps will make your elephant’s shape look natural.
Keep your tension consistent throughout. Too loose and your stitches will look messy; too tight and your project could become stiff. Relax your hands and aim for even loops.
Finally, if you’re using electrical wire to shape the trunk, handle it carefully. Fold the ends of the wire inward to avoid sharp edges poking through the yarn, and always insert it gently to maintain the project’s shape without damaging your stitches.
Why You’ll Love This Crochet Elephant Project
This crochet elephant in a frame is the perfect project if you’re looking for something quick, creative, and deeply satisfying. In just a few sessions, you can complete a piece that looks impressive and heartwarming.
It makes a wonderful handmade gift for baby showers, birthdays, or special occasions, and it’s a charming addition to nursery decor or any cozy space in your home. The finished framed elephant adds a personal, handmade touch that you simply can’t find in store-bought art.
Plus, this project is a great way to practice basic amigurumi skills, such as crocheting in the round, making increases and decreases, and assembling stuffed pieces. It’s beginner-friendly but still offers enough challenge to help you grow your skills.
Best of all, it introduces you to the fun world of crochet wall art, combining traditional techniques with modern, creative displays. You’ll love how easy and rewarding it is to create your very own framed crochet masterpiece!
Conclusion
Creating this crochet elephant in a frame is not just a fun project — it’s a joyful experience that lets you blend creativity, skill, and personal touch into a beautiful piece of art. Whether you’re new to crochet or building on your amigurumi skills, completing this framed elephant will leave you feeling proud and inspired.
Don’t forget to share your finished creation online or surprise a loved one with this thoughtful handmade gift! Your personal twist on colors, background prints, or frame style can make every elephant unique.
If you enjoyed this project, be sure to check out other easy amigurumi patterns to continue your crochet journey. A delightful universe of charming creations is just waiting for you to explore!
Now grab your yarn and hook — your next crochet adventure is just a stitch away!