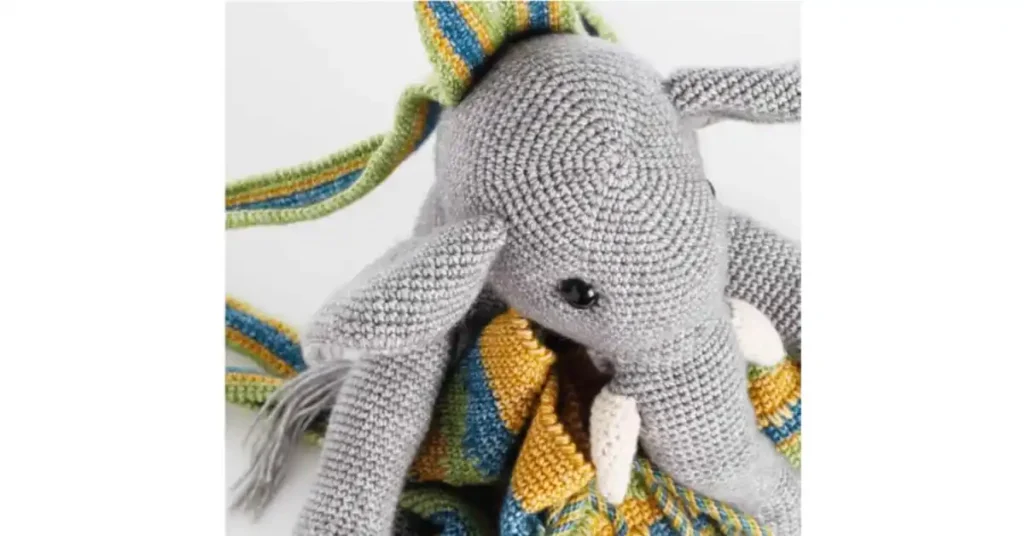
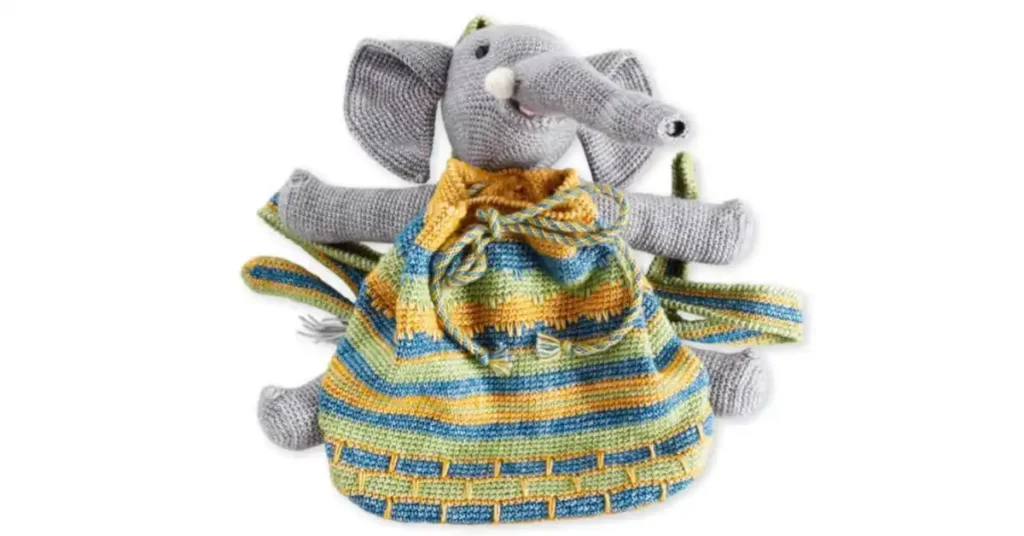
Are you looking for a unique and practical crochet project? This crochet elephant backpack is the perfect combination of functionality and charm! Designed to be both cute and practical, this handmade backpack is ideal for children, elephant lovers, or anyone who enjoys creative crochet accessories. Whether you want a fun school bag, a special gift for a little one, or a stylish handmade accessory, this project is sure to impress.
Crocheting your own backpack not only allows you to customize colors and details but also ensures a durable and one-of-a-kind creation. This free crochet pattern comes with step-by-step instructions, making it beginner-friendly while still being engaging for experienced crocheters. With clear guidelines on materials, stitches, and assembly, you’ll be able to bring this adorable elephant-themed backpack to life with ease.
In this guide, I’ll walk you through:
- The materials and tools needed to create the backpack
- The basic crochet stitches used in the pattern
- Step-by-step instructions to crochet and assemble each part
- Customization ideas to make your backpack unique
- Tips for beginners and troubleshooting common mistakes
By the end of this tutorial, you’ll have your very own handmade crochet elephant backpack that is both cute and functional. So, pick up your yarn and hook, and let’s dive into crocheting!
Table of Contents
- Materials & Tools Needed
- Basic Crochet Techniques & Stitches Used
- Step-by-Step Crochet Instructions
- Customization Ideas & Variations
- Tips for Beginners & Troubleshooting
- How to Care for Your Crochet Backpack
- Conclusion
Materials & Tools Needed
Before you begin crocheting your elephant backpack, make sure you have all the necessary materials and tools ready. Using the right supplies will ensure a sturdy, long-lasting, and adorable finished product.
1. Yarn
Choosing the right yarn is essential for both durability and appearance. Here are some recommendations:
- Cotton yarn – Best for structure and durability, especially for bags.
- Acrylic yarn – Lightweight and budget-friendly, great for a softer feel.
- Wool yarn – Adds warmth but may not hold the backpack shape as well.
- Recommended colors: Gray for the elephant, plus additional colors for details (ears, eyes, or decorative accents).
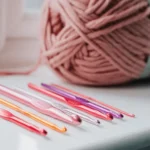
2. Crochet Hook
- Choose the best size based on your yarn weight (usually 3.5mm to 5mm works well).
- A smaller hook creates tighter stitches for a sturdier bag, while a larger hook results in a softer, more flexible backpack.
3. Stitch Markers
- Essential for keeping track of rounds when working in continuous spirals.
- Helps prevent mistakes and ensures even shaping of the elephant parts.
4. Safety Eyes (or Embroidery Alternative)
- Safety eyes (10mm-12mm) give the elephant a cute and lively expression.
- For younger children, opt for embroidered eyes to avoid choking hazards.
5. Zipper or Buttons
- A zipper provides a secure and polished look.
- Buttons with a loop closure can also work as a stylish and easy alternative.
6. Backpack Straps
- Crochet straps for a fully handmade look.
- Adjustable fabric straps (store-bought) for extra durability and comfort.
- Make sure they are securely attached to support weight.
7. Stuffing
- Used to shape the elephant’s head, ears, and trunk to give them a 3D effect.
- Polyester fiberfill is the most common and gives a soft but firm shape.
Having all these materials ready will make the crocheting process smooth and enjoyable. Now, let’s move on to the stitches you’ll need to know for this adorable crochet elephant backpack!
Basic Crochet Techniques & Stitches Used
Before starting your crochet elephant backpack, it’s important to understand some essential crochet stitches and techniques. These stitches will help shape the different parts of the backpack, ensuring a sturdy and well-structured design.
1. Magic Ring (MR)
The magic ring, or magic circle, is a technique for beginning your crochet projects in the round. It creates a tight, adjustable loop that helps avoid gaps in the center of your work.
How to do it:
- Wrap the yarn around your fingers to form a circle.
- Insert the hook through the loop and pull up a loop.
- Chain 1 (if working in single crochet) and begin making stitches into the ring.
- Pull the yarn tail to tighten the ring.
👉 Tip: If you’re new to this, you can use a slip knot and chain 2, then work into the second chain from the hook as an alternative.
2. Single Crochet (SC)
The single crochet (sc) is the most commonly used stitch in amigurumi and bag-making because it creates a tight and dense fabric.
How to do it:
- Insert the hook into the stitch.
- Yarn over and draw up a loop, leaving two loops on your hook.
- Yarn over again and pull through both loops.
3. Increase (INC) – Making the Backpack Wider
An increase (inc) means adding extra stitches to widen your project. This is especially useful for shaping the elephant’s head and ears.
How to do it:
- Work two single crochets into the same stitch.
- This expands your work and gives it a rounded shape.
4. Decrease (DEC) – Creating a Tapered Shape
A decrease (dec) is used to narrow your work, perfect for shaping the elephant’s trunk and ears.
How to do it (Invisible Decrease for a Smoother Look):
- Insert the hook into the front loop of the initial stitch.
- Place the hook into the front loop of the following stitch.
- Yarn over and pull through both front loops (two loops remain on the hook).
- Yarn over and pull through both loops.
👉 Tip: The invisible decrease creates a neater finish without gaps.
5. Slip Stitch (SL ST) – For Joins and Edging
The slip stitch (sl st) is used for joining rounds, finishing edges, or creating decorative details.
How to do it:
- Insert the hook into the stitch.
- Yarn over and pull through both loops on the hook.
This stitch helps create a smooth, polished edge for the backpack’s opening.
6. Working in Continuous Rounds vs. Joined Rounds
- Continuous rounds: Used for amigurumi-style shaping, where you don’t join at the end of each round but instead work in a spiral.
- Joined rounds: Used for more structured shapes like the backpack base, where each round is joined with a slip stitch for a flatter look.
Step-by-Step Crochet Instructions
Now that you’re familiar with the basic stitches and materials, let’s dive into the step-by-step process to create your crochet elephant backpack. This guide will walk you through each section, ensuring that every part is properly shaped and securely attached.
A. Creating the Elephant Head & Ears
The elephant’s head and ears are the standout features of this backpack. We’ll use amigurumi techniques to shape them properly.
Elephant Head (Worked in Continuous Rounds)
Using gray yarn:
- Magic Ring: Start with a magic ring and 6 single crochets (SC) inside. (6)
- Increase: 2 SC in each stitch around. (12)
- Increase: (SC, INC) repeat around. (18)
- Increase: (2 SC, INC) repeat around. (24)
- Continue Increasing: Add 6 stitches per round until you reach 48 stitches.
- Work Even Rounds: SC in each stitch for 10 rounds to build the head.
- Start Decreasing: Gradually decrease until the opening is small. Stuff firmly with fiberfill before closing.
Elephant Ears (Make 2, Worked Flat)
- Chain 6, SC in the second chain from the hook and across.
- Work rows of SC, increasing at each end to form a rounded shape.
- Continue for 10-12 rows to make the ear large enough.
- Fasten off your work and leave a long tail for sewing.
👉 Tip: Lightly steam-block the ears for a smoother shape.
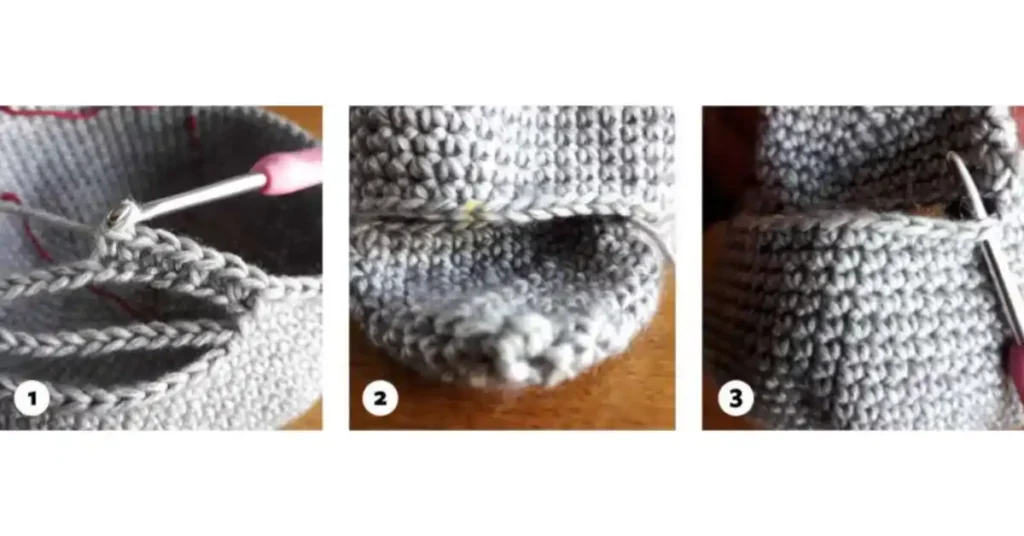
B. Crocheting the Backpack Base & Body
Backpack Base (Worked in Joined Rounds for a Sturdy Bottom)
- Start with a Magic Ring: 6 SC inside. (6)
- Increase Round: 2 SC in each stitch around. (12)
- Continue increasing until the base reaches about 8-10 inches in diameter.
Backpack Body (Worked in Continuous Rounds)
- SC in each stitch around without increasing.
- Continue working evenly for 8-10 inches in height.
- Fasten off and weave in ends.
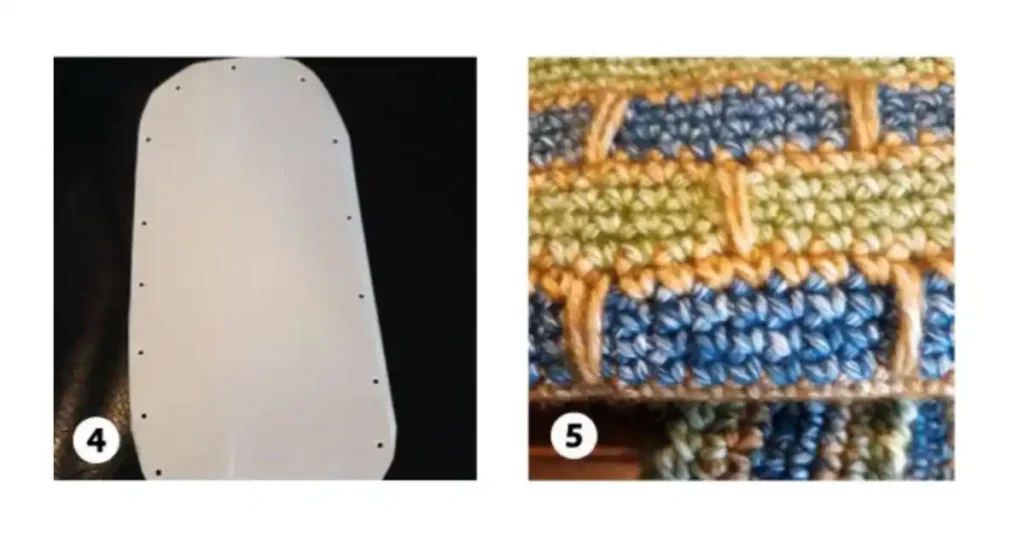
Adding a Secure Zipper or Button Closure
- For a Zipper: Sew it onto the top opening with a tapestry needle and thread.
- For Buttons: Make a flap and sew buttons to secure the bag.
👉 Tip: Line the inside with fabric for extra durability.
C. Attaching the Elephant Head & Ears to the Backpack
Positioning for the Cutest Look
- Place the elephant head at the top center of the backpack.
- Sew securely with a strong yarn thread and backstitch method.
- Sew the ears slightly behind the head to create a natural, floppy look.
Best Sewing Techniques for Secure Attachment
- Use invisible stitches for a seamless look.
- Double-stitch key points for extra durability.
- Ensure the head is firmly stuffed before finalizing the attachment.
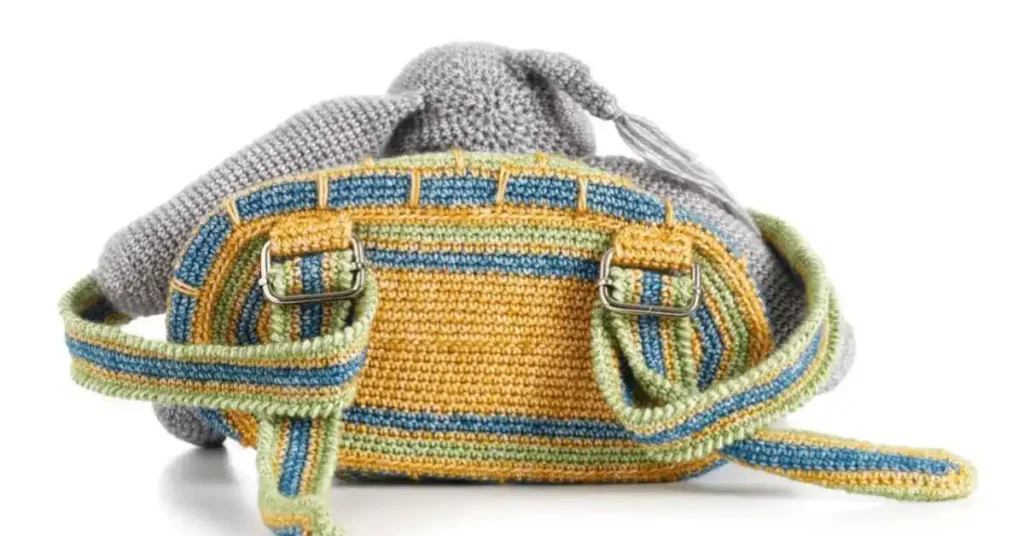
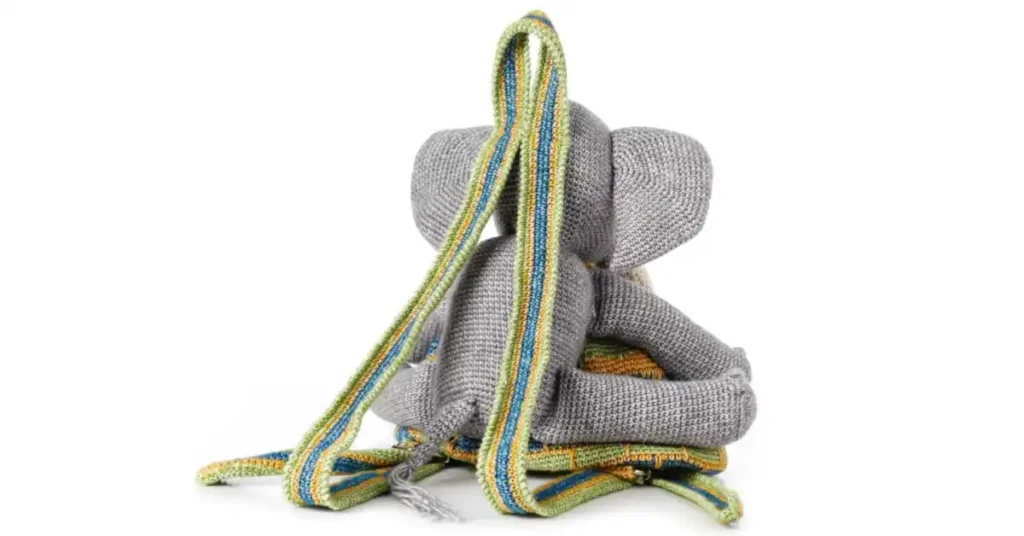
D. Adding Straps to the Backpack

How to Crochet Adjustable Straps (Optional)
- Chain enough length for comfortable wear (about 30 inches).
- Work rows of SC until the strap is about 2 inches wide.
- Attach securely at the top and bottom of the backpack.
Using Fabric Straps for Extra Durability
- Sew or attach adjustable backpack straps with D-rings or buckles.
- Reinforce with extra stitching to prevent breakage.
By following these steps, your crochet elephant backpack will be sturdy, functional, and absolutely adorable! Now, let’s move on to customization ideas to make it even more special.
Customization Ideas & Variations
Make your crochet elephant backpack even more special by adding personal touches! Here are some fun and creative ways to customize your design and make it unique.
1. Different Color Combinations for a Unique Look
While gray is the classic elephant color, you can experiment with playful and vibrant hues to give your backpack a fresh twist.
- Pastel Palette: Soft pink, baby blue, lavender – perfect for a sweet, whimsical look.
- Bold & Bright: Electric blue, hot pink, or neon yellow for a fun and eye-catching design.
- Neutral Elegance: Beige, cream, or charcoal gray for a sophisticated and versatile accessory.
- Two-Tone Elephant: Use one color for the body and a contrasting color for the ears, trunk, or inner lining.
👉 Tip: Use variegated or ombré yarn for a beautiful gradient effect!
2. Adding Embellishments for Extra Charm
Elevate the design by adding decorative accents to personalize the backpack even further.
- Flowers: Crochet small flowers and sew them onto the elephant’s ears or trunk.
- Bows: Add a cute bow between the elephant’s ears or on the straps for a playful touch.
- Initials or Names: Personalize it by embroidering the recipient’s initials or name onto the backpack flap.
- Pockets: Add small side pockets for extra storage and functionality.
- Buttons & Charms: Sew on fun-shaped buttons (stars, hearts, or animal figures) for added flair.
👉 Tip: Use felt pieces for quick, no-crochet embellishments!
3. Turning the Design into a Different Animal Theme
With a few modifications, you can transform the elephant backpack into other adorable animal-themed bags!
- Teddy Bear Backpack: Round the ears and shorten the trunk to create a bear face.
- Bunny Backpack: Replace the trunk with a nose and add long, floppy ears.
- Cat or Dog Backpack: Shape pointy ears and embroider whiskers for a pet-inspired design.
- Dinosaur Backpack: Add small spikes along the back to make a dino-themed bag.
👉 Tip: Keep the base pattern the same and simply adjust the ears, facial features, or accessories.
Customizing your crochet elephant backpack allows you to create a one-of-a-kind accessory that reflects your style or makes a thoughtful handmade gift. Get creative and have fun adding your personal touch!
Tips for Beginners & Troubleshooting
Creating a crochet elephant backpack is an exciting project, but beginners might face some challenges along the way. Here are some helpful tips and troubleshooting solutions to make your crocheting process smoother and more enjoyable!
1. Common Mistakes and How to Fix Them
✅ Mistake: Uneven or Wobbly Shape
Solution:
- Use stitch markers to keep track of rounds.
- Make sure to maintain consistent tension throughout.
- If your stitches are too loose, consider using a smaller crochet hook for a tighter gauge.
✅ Mistake: Gaps Between Stitches in the Elephant’s Head
Solution:
- Make sure you start with a tight magic ring.
- Use invisible decreases instead of regular decreases to prevent holes.
✅ Mistake: Elephant Ears Not Holding Shape
Solution:
- Use a thicker yarn or double-layer the ears for sturdiness.
- Lightly steam-block the ears to set the shape.
✅ Mistake: Loose Backpack Straps
Solution:
- Reinforce the stitching where the straps attach to the backpack.
- If crocheted straps stretch too much, switch to fabric straps or add a lining.
2. Adjusting Size for Different Age Groups
You can easily adjust the size of your elephant backpack to fit different age groups by tweaking a few things:
Toddlers & Small Kids:
- Use lighter-weight yarn (e.g., DK or Sport) for a smaller, more manageable size.
- Reduce the number of increase rounds in the elephant’s head to make it smaller.
- Shorten the straps for a comfortable fit.
School-Age Kids & Teens:
- Stick to worsted weight yarn for a balance of durability and comfort.
- Add extra rows to make the backpack body deeper.
- Reinforce the straps to handle heavier items like books.
Adults or Oversized Look:
- Use bulky yarn for a larger, cozy feel.
- Add more increase rounds to the base and body.
- Make longer, adjustable straps for a comfortable fit.
3. Ensuring a Sturdy, Long-Lasting Design
Since this is a functional crochet backpack, you’ll want to make sure it’s strong enough for daily use. Here’s how:
Use Durable Yarn:
- Choose cotton or acrylic yarn since they hold their shape well.
- Avoid delicate fibers like wool if you want a washable and sturdy bag.
Secure Your Seams & Attachments:
- Double-stitch all seams, especially where the straps attach to the bag.
- Use a backstitch or whipstitch when sewing on parts like the elephant’s head and ears.
Add a Lining for Extra Strength:
- Sewing a fabric lining inside the backpack can prevent stretching and increase durability.
- Use a soft, lightweight cotton fabric that complements your crochet work.
Reinforce High-Stress Areas:
- The bottom of the bag and the strap joints are the most stress-prone areas.
- Consider adding extra rows or reinforcement stitches in these spots.
By following these tips, even beginners can create a strong, well-shaped, and adorable crochet elephant backpack that will last a long time. Now, let’s move on to how to care for your handmade backpack!
How to Care for Your Crochet Backpack
To keep your crochet elephant backpack looking fresh and durable, proper care is essential. Since handmade crochet items require gentle handling, follow these tips for washing, drying, and storing your backpack.
1. Washing & Drying Tips
Hand-Washing (Best Method)
- Fill a sink or basin with lukewarm water and add a small amount of mild detergent (preferably for delicate fabrics).
- Gently submerge the backpack and let it soak for 5–10 minutes.
- Lightly swish the bag around—avoid wringing or twisting to prevent stretching.
- Wash thoroughly with fresh water until all traces of soap are gone.
Machine Washing (Only if Necessary)
- To protect the backpack, place it in a mesh laundry bag or a pillowcase before washing.
- Use the gentle or delicate cycle with cold water.
- Wash separately from heavy items like jeans or towels to avoid damage.
Drying Instructions
- Lay flat on a clean towel, reshaping the backpack while it dries.
- Avoid hanging it since this can stretch the stitches.
- Never use a dryer, as high heat can shrink or damage the yarn.
👉 Tip: If the elephant ears or trunk lose their shape, lightly steam-block them to restore their original form.
2. Storage Recommendations to Maintain Shape
Stuff It to Hold Its Shape
- When not in use, lightly stuff the backpack with tissue paper or soft fabric to prevent it from collapsing.
- This helps maintain the 3D structure of the elephant’s head and ears.
Store in a Cool, Dry Place
- Keep the backpack in a dust-free area, away from direct sunlight to prevent color fading.
- Avoid damp places to prevent mold or mildew growth.
Use a Fabric Pouch or Storage Bag
- If storing for a long time, place it inside a breathable cotton bag to keep it clean.
- Avoid plastic bags, as they trap moisture and can lead to odors.
By following these care tips, your crochet elephant backpack will stay clean, fresh, and in perfect shape for years to come!
Conclusion
Creating your own crochet elephant backpack is not just a fun and rewarding project—it’s also a practical and adorable accessory! This backpack is perfect for kids, elephant lovers, or anyone who enjoys handmade, personalized items. Plus, by using the free pattern and step-by-step guide, you can easily customize it with different colors, embellishments, and strap options.
By making this backpack, you’ll:
- Improve your crochet skills while working on a fun and functional project
- Create a one-of-a-kind handmade gift for a loved one
- Delight in the joy of creating something both beautiful and functional.
Happy crocheting, and I can’t wait to see what you create! 💖