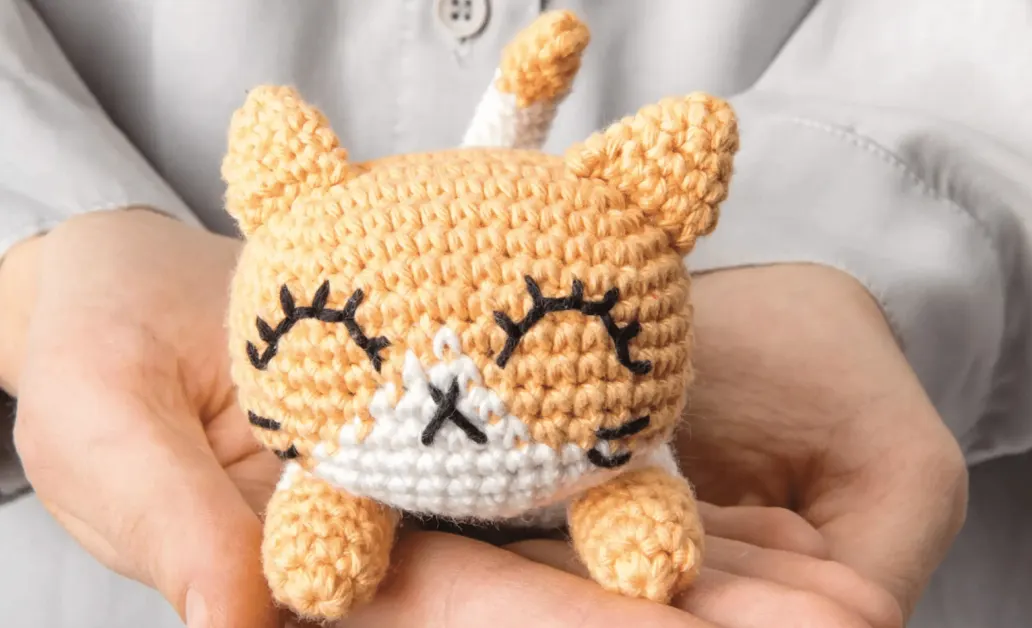
If you love crochet and cute handmade plushies, then this crochet cat amigurumi pattern is perfect for you! Amigurumi, the Japanese art of crocheting small stuffed creatures, has gained immense popularity among crafters due to its adorable designs and endless customization options. And what could be cuter than a tiny crochet cat to add to your collection?
Crochet cat projects are not only fun but also relaxing and rewarding. Whether you’re making it for yourself, as a gift for a cat lover, or even selling your creations, this DIY crochet cat is a must-try! With just a few simple materials like Rico Ricorumi yarn, a crochet hook, and fiberfill stuffing, you’ll be able to bring your own little feline friend to life.
This pattern is designed to be beginner-friendly, providing a step-by-step guide with clear instructions. Whether you’re new to amigurumi crochet or have some experience, you’ll find this pattern easy to follow. So grab your crochet hook and let’s get started on creating an adorable crochet cat!
Table of Contents
- 1. Making the Legs
- 2. Joining the Legs & Crocheting the Body
- 3. Creating the Arms
- 4. Crocheting the Head
- 5. Making the Ears & Tail
- Ears (Make 2)
- Tail
- Finishing & Assembly
- 1️⃣ Attaching the Head to the Body
- 2️⃣ Attaching the Ears
- 3️⃣ Attaching the Tail
- 4️⃣ Weaving in Loose Ends
- Final Look & Adjustments
- Tips for Customizing Your Crochet Cat
- 1. Experiment with Different Yarn Colors
- 2. Change the Size with Yarn & Hook Variations
- 3. Add Safety Eyes for a More Realistic Look
- 4. Attach a Small Bell or Ribbon for Extra Charm
- 5. Create Different Cat Breeds & Personalities
- Get Creative & Make It Your Own!
- Conclusion
Materials Needed
Before we begin crocheting our adorable crochet cat, let’s gather all the materials you’ll need. Using the right supplies ensures that your amigurumi cat turns out neat, well-shaped, and easy to assemble.
Yarn
For this pattern, we will be using Rico Ricorumi yarn, which is a soft and lightweight cotton yarn, ideal for amigurumi projects. The required colors are:
- Apricot (070) – For the main body, head, arms, legs, and tail.
- Cream (002) – For the stripes and detailing.
- Black (060) (Scraps) – For embroidering the facial features (eyes, nose, and whiskers).
You can also experiment with different colors to create a custom crochet cat in your favorite shades!
Tools & Equipment
To crochet and assemble the cat, you will need:
3mm crochet hook – This hook size works best with Ricorumi yarn for tight, well-shaped stitches.
Stitch markers – Helps keep track of rounds while working in spirals.
Needle – For sewing parts together and embroidering the facial features.
Fiberfill stuffing – Gives the amigurumi cat its soft, plush look.
Scissors – For cutting yarn neatly.
Crochet Techniques Used
If you’re familiar with basic crochet stitches, this pattern will be easy to follow! Here are the essential techniques used:
- Magic Ring (MR): A seamless way to start crocheting in the round.
- Single Crochet (sc): The main stitch used throughout the pattern.
- Increase (inc): Making two stitches in the same stitch to shape the body.
- Decrease (dec): Joining two stitches together to create a curve or taper.
- Slip Stitch (sl st): Used to join stitches and finish off parts neatly.
Having these materials and techniques ready will make the crochet process smooth and enjoyable. Now that we’re set up, let’s start crocheting the legs and body of our amigurumi cat!
Step-by-Step Crochet Cat Pattern
Now that we have our materials ready, let’s dive into crocheting this adorable amigurumi cat! Follow this step-by-step guide to create a soft, cuddly, and customizable crochet cat.
1. Making the Legs
Each leg is crocheted separately and later joined together to form the body.
Instructions:
1️⃣ Start with a Magic Ring (MR) and crochet 7 single crochets (sc) into the ring.
2️⃣ Work in spirals and increase stitches in the next rounds:
- Round 1: 2 sc in every 2nd stitch (10 sc).
- Rounds 2-4: Continue working 10 sc in each round.
3️⃣ Slip stitch (sl st) into the next stitch to finish the first leg. Cut the yarn and weave in the ends.
4️⃣ Repeat the same process for the second leg, but do not fasten off the yarn after finishing. Instead, continue to the body.
2. Joining the Legs & Crocheting the Body
Now, let’s connect the legs and build the striped body.
Instructions:
1️⃣ Slip stitch into the next stitch of the second leg and chain 5.
2️⃣ Align both legs so they are facing forward. Insert your hook into a stitch from the first leg and slip stitch to join.
3️⃣ Continue crocheting around the first leg (9 sc), then across the 5 chain stitches (5 sc), then around the second leg (10 sc), and back along the other side of the 5 chains (5 sc). Total: 30 stitches.
4️⃣ Work Rounds 6-7: 30 sc in each round.
5️⃣ Begin creating striped rounds by switching colors between Apricot and Cream:
- Alternate every 2 rounds to form stripes.
- Carry the cream yarn beneath the Apricot stitches.
- Break the Apricot yarn at the end of each round.
6️⃣ Keep crocheting in spirals up to Round 19, shaping the body while maintaining the stripe pattern.
7️⃣ Stuff the legs and lower body firmly with fiberfill.
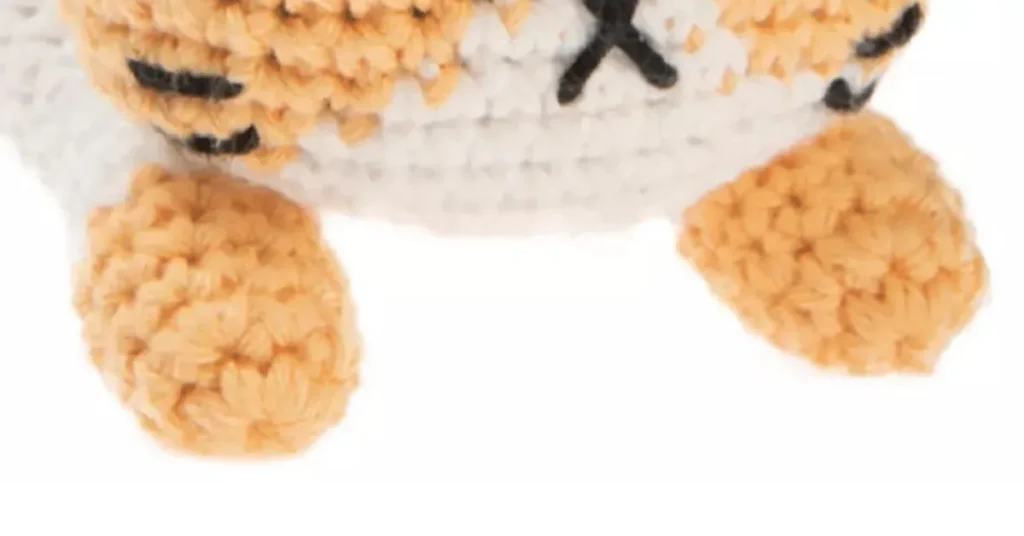
3. Creating the Arms
The arms are smaller and will be attached to the sides of the body.
Instructions:
1️⃣ Start with a Magic Ring (MR) and crochet 7 sc into it.
2️⃣ Increase to 10 sc in the next round by working 2 sc into some stitches.
3️⃣ Continue crocheting Rounds 2-8: 10 sc per round.
4️⃣ Slip stitch to finish and leave a long tail for sewing.
5️⃣ Lightly stuff the arms before attaching them to the body.
6️⃣ Sew the arms into the openings on the sides of the body (7 stitches of the body + 4 stitches of the arm).
4. Crocheting the Head
The head is shaped differently from the body, using a foundation chain instead of a magic ring to create an oval shape.
Instructions:
1️⃣ Chain 10 ch, then work around the chain in spirals.
2️⃣ Round 1: 3 sc in the 2nd chain from the hook, 8 sc across, 3 sc in the last chain. Turn and crochet 8 sc on the other side of the chain. (22 sc total)
3️⃣ Round 2: Increase in 3 sc on both ends, keeping the sides even. (28 sc)
4️⃣ Round 3: Continue shaping with gradual increases. (34 sc)
5️⃣ Rounds 5-6: Maintain 40 stitches.
6️⃣ Start adding color stripes in the same pattern as the body (Apricot and Cream).
7️⃣ Rounds 7-11: Switch colors according to the pattern, using Cream to create a stripe across the face.
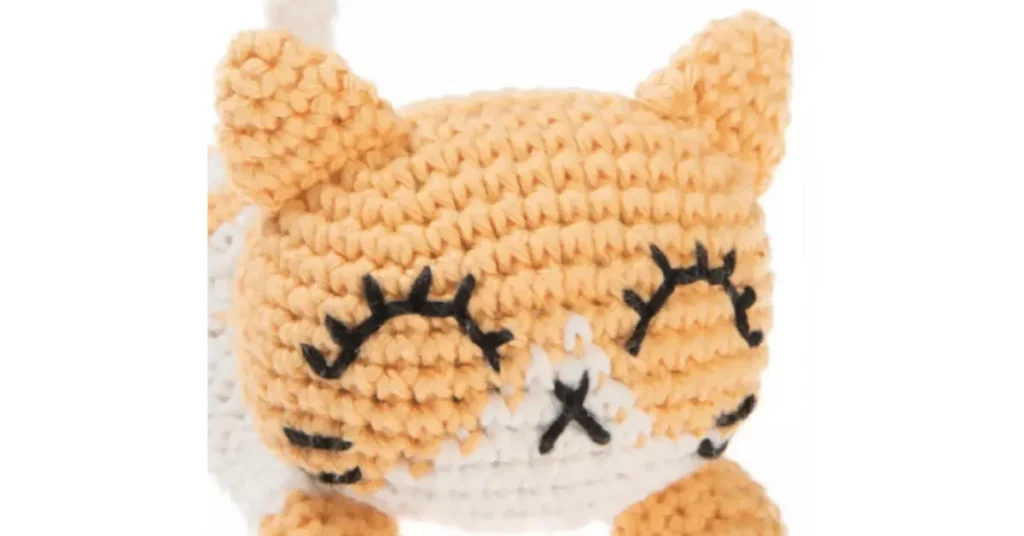
8️⃣ Embroider facial features:
- Eyes: Embroider black eyes at Rounds 5-8, leaving 5 stitches between them.
- Nose & Mouth: Stitch an X shape for the nose at Rounds 8-10. Extend whiskers 3 stitches wide under each eye.
9️⃣ Rounds 12-16: Gradually decrease the stitches to close the head while stuffing it firmly.
🔟 Finish by pulling the yarn through the last 6 stitches, tightening firmly.
5. Making the Ears & Tail
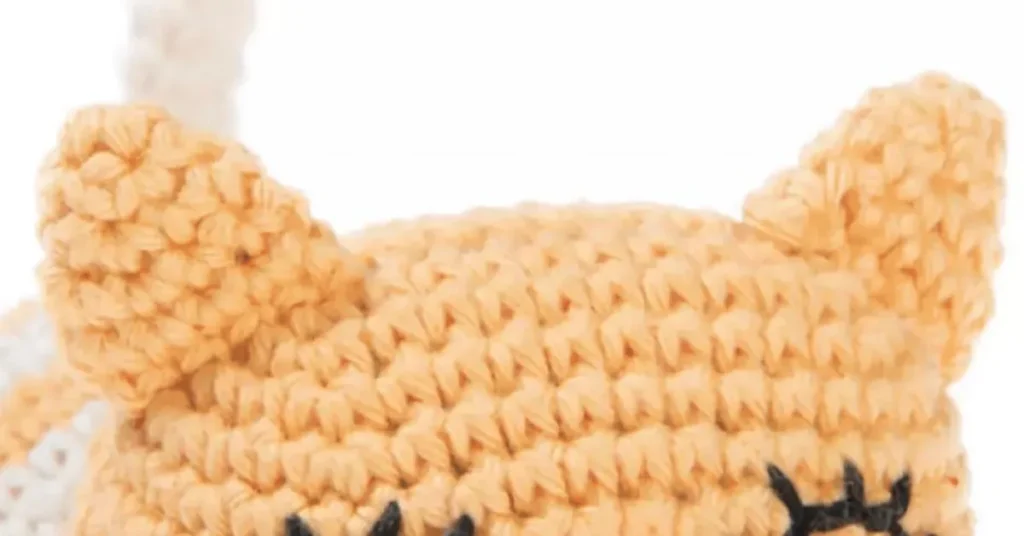
Ears (Make 2)
1️⃣ Start with a Magic Ring (MR) and crochet 4 sc into it.
2️⃣ Increase gradually:
- Round 1: Increase in 1st & 3rd stitches (6 sc).
- Round 2: Increase in 1st & 4th stitches (8 sc).
- Round 3: Increase in 1st & 5th stitches (10 sc).
3️⃣ Round 4: Work 10 sc around.
4️⃣ Leave a long tail for sewing and attach the ears to the top of the head at Rounds 1-4.
Tail
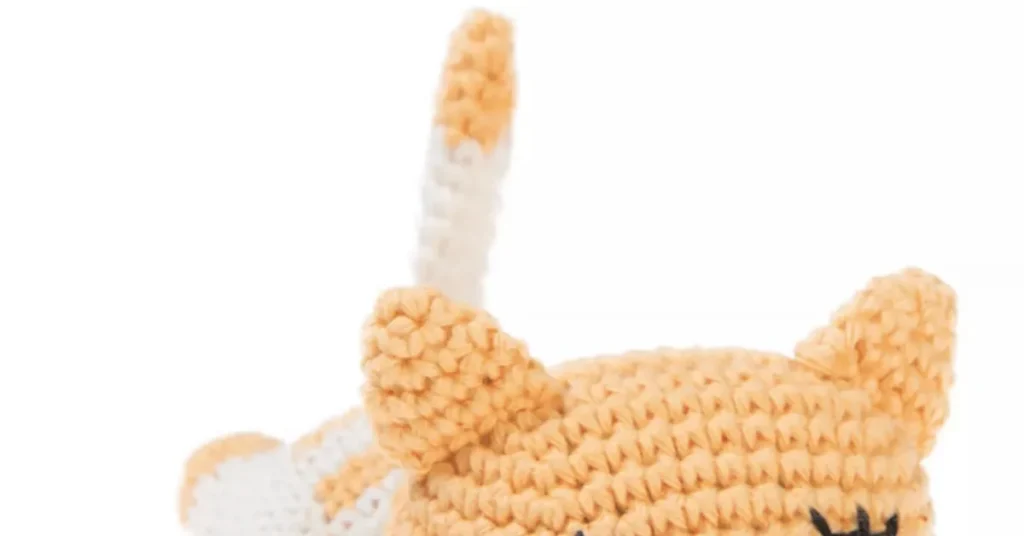
1️⃣ Start with a Magic Ring (MR) and crochet 4 sc into it.
2️⃣ Gradually increase to 7 sc while forming a long, flexible tail.
3️⃣ Switch colors to Cream for striped details.
4️⃣ Crochet Rounds 4-14: Maintain 7 sc per round.
5️⃣ Fold the tail in half and sew it together with 3 sc through both layers for a slight curve.
6️⃣ Attach the flattened end of the tail to the back of the body at Rounds 8-9.
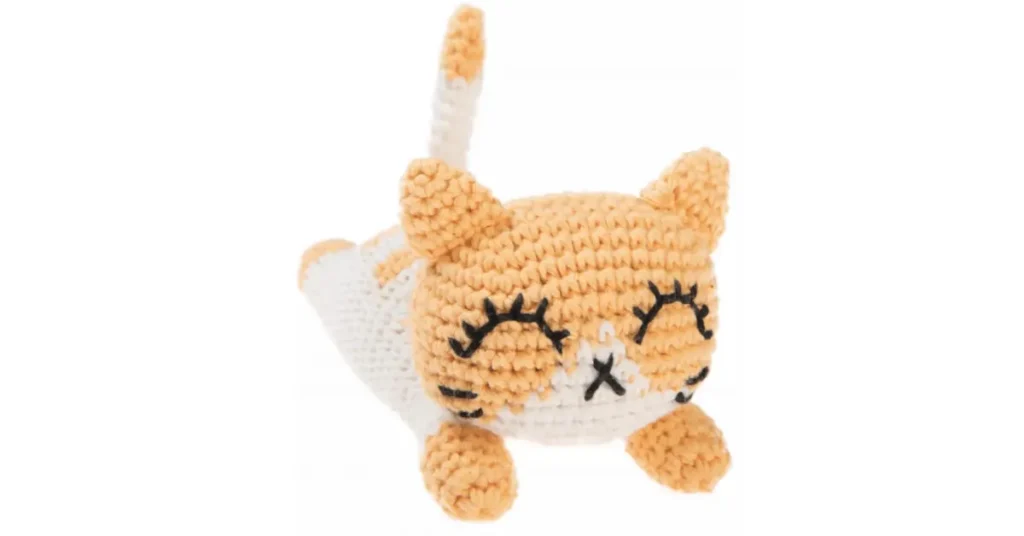
And that’s it! You’ve now crocheted an adorable amigurumi cat with a cute striped body, soft paws, and a playful tail! In the next section, we’ll go over the final assembly and finishing touches to bring your crochet cat to life.
Finishing & Assembly
Now that you’ve completed all the individual pieces of your crochet cat, it’s time to assemble them and bring your adorable amigurumi to life! Proper assembly is essential to ensure your cat is well-shaped, balanced, and securely attached.
1️⃣ Attaching the Head to the Body
The head is one of the most important parts, so take your time aligning and sewing it securely.
✔ Positioning:
- Place the head so that Round 11 of the head touches Round 22 of the body.
- Make sure the embroidered face is centered and facing forward.
✔ Sewing:
- Use the long yarn tail from the head and a needle.
- Stitch around the edges of the head and the top of the body, ensuring firm attachment.
- Add extra stuffing as needed before completely closing the gap to maintain shape.
2️⃣ Attaching the Ears
The ears give your crochet cat its cute and expressive look, so place them carefully!
✔ Positioning:
- Flatten the ears slightly and sew them on top of the head, between Rounds 1-4.
- Keep a small space between the ears for a natural look.
✔ Sewing:
- Use the long yarn tail from each ear to stitch them onto the head.
- Sew through both layers of the ears to keep them flat.
3️⃣ Attaching the Tail
✔ Positioning:
- Flatten the end of the tail and position it at Rounds 8-9 of the back of the body.
- Ensure it sits slightly to one side or in the center, depending on your preference.
✔ Sewing:
- Use the yarn tail from the tail to stitch it onto the body securely.
- Make a few stitches through multiple layers to ensure durability.
4️⃣ Weaving in Loose Ends
Use a needle to weave in any remaining yarn tails.
Hide yarn ends inside the body to prevent them from unraveling.
Trim excess yarn carefully to give your amigurumi a clean and polished look.
Final Look & Adjustments
- Shape your crochet cat by gently pressing and adjusting the fiberfill stuffing.
- Tug and adjust the limbs and tail to ensure proper alignment.
- If needed, use a fine brush or lint roller to remove any stray yarn fibers.
Your adorable crochet cat is now complete!
Now, you have a handmade amigurumi cat that’s cute, cuddly, and full of personality. You can place it on your desk, gift it to a friend, or even make a whole collection in different colors!
Tips for Customizing Your Crochet Cat
Want to make your crochet cat unique? Here are some creative customization ideas to personalize your amigurumi cat and make it truly one-of-a-kind!
1. Experiment with Different Yarn Colors
Try different color combinations to create a cat that matches your style or resembles a real pet.
Use solid colors for a sleek look or mix multiple shades for a tabby cat effect.
Consider using variegated yarn for a marbled fur pattern.
2. Change the Size with Yarn & Hook Variations
Use a thicker yarn (like worsted weight) and a larger hook (4mm-5mm) for a bigger, plushie-style crochet cat.
Use finer yarn (like lace or sport weight) with a smaller hook (2mm-2.5mm) for a miniature version.
Adjust the fiberfill stuffing amount to change the firmness and squishiness of the cat.
3. Add Safety Eyes for a More Realistic Look
Instead of embroidered eyes, use plastic safety eyes to give your crochet cat a shiny and lifelike appearance.
Choose different eye colors like blue, green, or amber to match different cat breeds.
If making this cat for young children, embroidered or felt eyes are safer.
4. Attach a Small Bell or Ribbon for Extra Charm
Tie a ribbon or bow around your cat’s neck for an elegant touch.
Sew on a tiny bell to add a playful element.
Try adding a mini crochet collar with a little heart, star, or name tag.
5. Create Different Cat Breeds & Personalities
Adjust the ear shape to create pointy-eared breeds like Siamese or rounded ears for a Scottish Fold.
Use longer yarn strands (brushed out) to make a fluffy, Persian-style crochet cat.
Embroider unique facial expressions to give your cat a playful, sleepy, or curious look.
Get Creative & Make It Your Own!
The best part of crochet amigurumi is that you can personalize every detail to suit your style! Whether you make a tiny keychain cat, a soft plushie, or a colorful fantasy cat, the possibilities are endless.
What will your crochet cat look like? Try these ideas and bring your feline creation to life!
Conclusion
Congratulations! 🎉 You’ve now learned how to make an adorable crochet cat step by step. From creating the legs, body, and head to adding the ears, tail, and finishing touches, this amigurumi cat is a fun and rewarding project for any crochet lover.
Whether you’re making this cute feline friend for yourself, gifting it to a cat lover, or adding it to your handmade collection, this project is beginner-friendly and easy to customize. You can experiment with different yarn colors, sizes, and accessories to make a truly unique crochet cat!
Now it’s your turn!
Try this pattern and share your crochet cat creations!
Tag us on social media if you make one—we’d love to see your handmade kitties!
Looking for more beginner-friendly amigurumi projects? You might enjoy making a crochet bunny, teddy bear, or tiny puppy!
Got any questions about the pattern? 🤔 Drop a comment below, and I’ll be happy to help! Happy crocheting!