Introduction
When it comes to crochet, nothing beats a project that’s both cute and quick. Whether you’re squeezing in a little creative time during a busy week or looking for a fun weekend activity, crochet accessories like these charming mice are always a win. They’re small, satisfying to make, and perfect for gifting, decorating, or simply brightening up your craft corner.
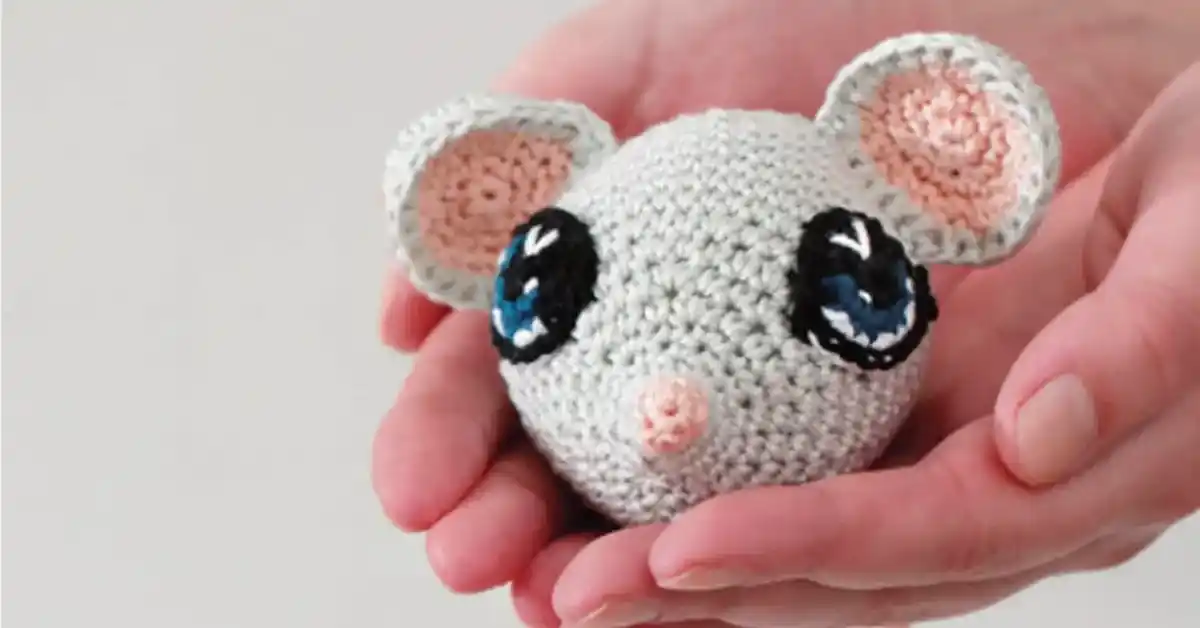
In this post, you’ll find a delightful pattern for not one but two adorable crochet mice: the Mini Mouse and the Maxi Mouse. These cheerful little characters are guaranteed to put a smile on your face. With their sweet round heads, oversized ears, curly tails, and bright eyes, they’re the kind of cute crochet project that everyone will fall in love with.
This pattern is crafted to be accessible for crocheters at every skill level. If you’re new to amigurumi, you’ll appreciate the step-by-step breakdown and simple stitch work. If you’re more experienced, this will be a satisfying, low-stress make—perfect for using up scrap yarn or practicing detail work. It’s the definition of a beginner-friendly crochet project that delivers a charming result every time.
The Maxi Mouse is made with soft and sustainable Scheepjes Organicon yarn, while the Mini Mouse is crocheted using the sleek, vibrant Katia Capri yarn. Both versions use simple tools and stitches, making this a flexible pattern that you can truly make your own.
Ready to bring these little buddies to life? Read on for the full free crochet pattern, complete with materials list, instructions, and helpful finishing tips. Try one, try both—or create a whole family of mice in every color!
Table of Contents
- Introduction
- Why Crochet Accessories Are So Popular
- Materials You’ll Need
- Step-by-Step Crochet Pattern
- Customization Tips
- Crochet Tips for Beginners
- How to Use Your Finished Mice
Why Crochet Accessories Are So Popular
Crochet accessories have become a favorite among crafters for good reason—they’re quick, versatile, and endlessly fun to make. Whether you’re creating for yourself, for someone special, or for your handmade shop, these small projects offer big creative rewards without the time commitment of larger items like blankets or garments.
One of the most exciting aspects of crochet accessories is the variety. From adorable toys and keychains to personalized bag charms and whimsical shelf décor, there’s no shortage of ideas to explore. Projects like our Mini and Maxi Mouse pattern fall under the charming category of crochet animal accessories, which are especially popular for kids, nurseries, and gifting.
For beginners, these small patterns are the perfect way to practice stitches, shaping, and finishing techniques. For more experienced crocheters, they offer a fun way to use up leftover yarn or experiment with colors and textures. Plus, the satisfaction of completing a project in one sitting is incredibly motivating!
DIY crochet accessories are also ideal for craft fairs and gift-giving. Their compact size and visual appeal make them easy to display and sell, while their handmade charm gives them heartfelt value.
Whether you’re looking to make something cute and quick, practice your amigurumi skills, or craft a thoughtful gift, crochet accessories like this sweet mouse duo are a wonderful place to start.
Meet the Mice: Mini & Maxi Crochet Mouse Designs
Say hello to two of the cutest little companions you’ll ever crochet—the Mini Mouse and the Maxi Mouse! These adorable amigurumi mice are designed to bring a touch of handmade charm to your space, and they’re just as fun to make as they are to display.
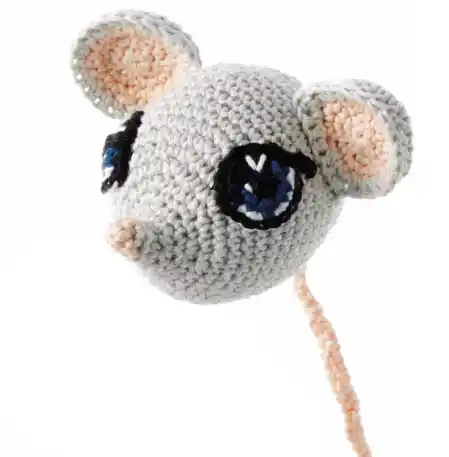
The Maxi Mouse is made using a 2 mm crochet hook and soft, sustainable Scheepjes Organicon yarn, giving it a slightly larger, plushier feel. This version is perfect as a small soft toy, a shelf decoration, or a cuddly bedtime buddy for little ones. Its larger size also makes it ideal for adding tiny details or accessories, like a bow, scarf, or even a tiny outfit.
On the other hand, the Mini Mouse is crocheted with a 1.5 mm crochet hook and smooth Katia Capri yarn, resulting in a more delicate, pocket-sized version. This little cutie is perfect for keychains, bag charms, or as part of a handmade gift set. Despite their size difference, both versions follow the same simple pattern, making it easy to switch between them or create a matching pair.
Whether you’re crafting for fun, gifting, or decorating, this mini crochet mouse pattern and maxi crochet mouse pattern offer endless possibilities. They’re a great way to explore amigurumi mouse designs without feeling overwhelmed by a large project.
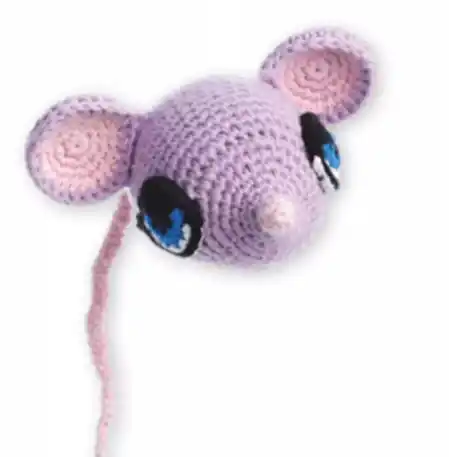
Want to take it a step further? Make a full set in various colors or even a themed family—pastel mice for spring, red-and-green for Christmas, or classic neutrals for a minimalist touch. However you style them, these sweet little mice are guaranteed to steal hearts.
Materials You’ll Need
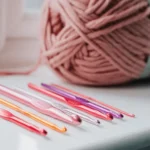
Before you get started on your Mini or Maxi crochet mouse, make sure you’ve gathered all the tools and materials you’ll need. Here’s a clear breakdown for each version:
Maxi Mouse
- Yarn:
– 30g Scheepjes Organicon in gray (color 203)
– 10g Scheepjes Organicon in pink (color 206)
– Small scraps of black, white, and blue yarn (for eyes) - Hook: 2 mm crochet hook
- Stuffing: Fiberfill
- Notions:
– Stitch marker or scrap yarn (to keep track of rounds)
– Embroidery needle
– Scissors
– Pins (for positioning parts)
Mini Mouse
- Yarn:
– Katia Capri yarn (colors of your choice) - Hook: 1.5 mm crochet hook
- Stuffing & Notions:
– Same as Maxi Mouse: fiberfill, stitch marker, scissors, embroidery needle, and pins
Whether you’re making one or both, these materials will help bring your amigurumi mouse to life. Don’t forget—you can customize colors and yarn brands to suit your style or use up leftovers from your stash!
Step-by-Step Crochet Pattern
If you’re wondering how to crochet a mouse, this easy-to-follow guide will walk you through every step. From the head and body to the finishing touches, this cute crochet project is perfect for those looking to create something small, cheerful, and beginner-friendly. Whether you’re crafting the Mini or Maxi Mouse, the process is the same—just be sure to use the correct yarn and hook size, as mentioned earlier.
Stitch Abbreviations
- sc – single crochet
- hdc – half double crochet
- sl st – slip stitch
- sc2tog – single crochet two stitches together (decrease)
- MR – magic ring
- … – repeat the sequence within asterisks
- ( ) – Total stitch count upon completing the round.
Head and Body
Start with pink yarn and create a magic ring (MR).
- Rnd 1: 4 sc in MR (4)
- Rnd 2: 2 sc in each sc, 1 sc; repeat 2 times (6)
Switch to gray yarn. - Rnds 3–4: 6 sc
- Rnd 5: 2 sc in next sc, 1 sc; repeat 3 times (9)
- Rnd 6: 3 sc, 2 sc in next sc, 1 sc; repeat 3 times (12)
- Rnd 7: 12 sc
- Rnd 8: 1 sc, 2 sc in next sc; repeat 6 times (18)
- Rnd 9: 1 sc, 2 sc in next sc; repeat 6 times (24)
- Rnd 10: 6 sc, 1 sc, 2 sc in next sc, 1 sc; repeat 6 times (30)
- Rnd 11: 8 sc, 4 sc, 2 sc in next sc; repeat 4 times, 2 sc (34)
- Rnd 12: 15 sc, 2 sc in next sc, 2 sc, 2 sc in next sc, 15 sc (36)
- Rnd 13: 5 sc, 2 sc in next sc; repeat 6 times (42)
- Rnds 14–21: 42 sc
Start decreasing:
- Rnd 22: 25 sc, sc2tog; repeat 6 times (36)
- Rnds 23–24: 36 sc
- Rnd 25: 2 sc, sc2tog, 2 sc; repeat 6 times (30)
- Rnd 26: 30 sc
- Rnd 27: 3 sc, sc2tog; repeat 6 times (24)
- Rnd 28: 1 sc, sc2tog, 1 sc; repeat 6 times (18)
🧸 Tip: Now is the time to firmly stuff the body with fiberfill. Make sure it’s full but not over-packed.
- Rnd 29: 1 sc, sc2tog; repeat 6 times (12)
- Rnd 30: sc2tog; repeat 6 times (6)
Break the yarn and use your embroidery needle to close the opening with small stitches.
Inner Ear (Make 2)
Use pink yarn and begin with a magic ring.
- Rnd 1: 6 sc in MR (6)
- Rnd 2: 2 sc in each st (12)
- Rnd 3: 2 sc in next st, 1 sc; repeat 6 times (18)
- Rnd 4: 1 sc, 2 sc in next st, 1 sc; repeat 6 times (24)
Fasten off and weave in the ends.
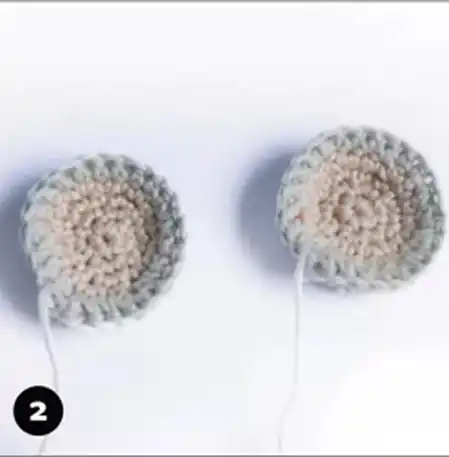
Outer Ear (Make 2)
Use gray yarn and create a magic ring.
- Rnd 1: 6 sc in MR (6)
- Rnd 2: 2 sc in each st (12)
- Rnd 3: 2 sc in next st, 1 sc; repeat 6 times (18)
- Rnd 4: 1 sc, 2 sc in next st, 1 sc; repeat 6 times (24)
- Rnd 5: 16 sc, 8 hdc (24)
🧵 Tip: Place the inner ear piece on top of the outer piece, wrong sides together. Then crochet:
- Rnd 6: 1 sc in each st through both layers (24)
Fasten off, leaving a long tail for sewing.
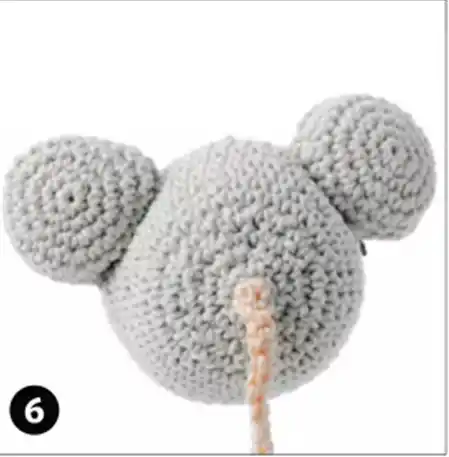
Tail
Use pink yarn.
- Chain 80
- Turn and crochet along the chain using 2 sl st and 1 sc repeatedly
Continue until you reach the end of the chain. Leave a long tail for sewing.
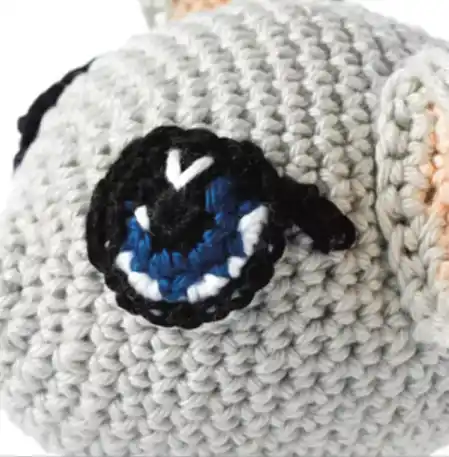
Eyes (Make 2)

Use black yarn and a magic ring.
- Rnd 1: 6 sc in MR (6)
- Rnd 2: 2 sc in each st; repeat 3 times, change to blue yarn halfway (12)
- Rnd 3: Change to black: 2 sc in next st, 1 sc; repeat 2 times. Change to white yarn: 1 sc, 2 sc in next st; repeat 3 times. End with 1 black sc (18)
- Rnd 4: 18 sl st. Then:
– Chain 4, turn, sl st into 2nd chain from hook and next 2 chains
– Add 2 more sl st into the round
For the second eye:
– Sl st 9, chain 4, turn, sl st in next 3 ch, sl st remaining 11 (20 + 4 ch)
Leave a long tail for sewing.
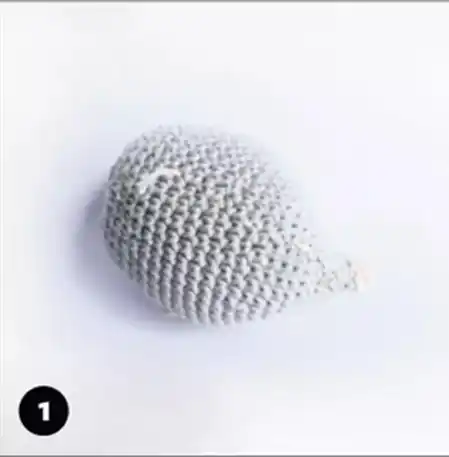
Finishing Touches

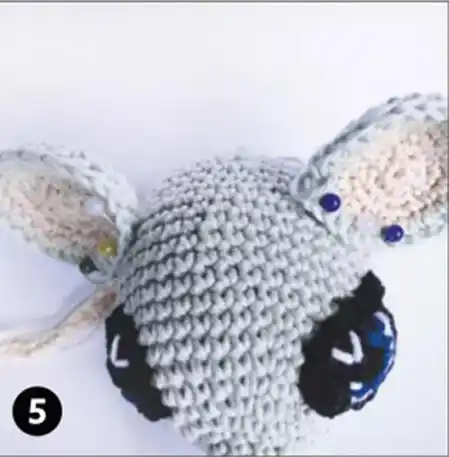
It’s time to assemble your amigurumi mouse!
- Eyes: Position the eyes between Rounds 10–17, about 7 stitches apart. Sew in place.
- Ears: Attach the ears at Round 20, about 8 stitches apart. Make sure the hdc section faces upward.
- Tail: Sew to the back of the body at Round 30.
💡 Tip: Use pins to hold each part in place before sewing. This helps with alignment and balance—especially if you’re planning to display your mouse or turn it into a keychain or shelf accessory.
Customization Tips
One of the best parts about working with an easy crochet animal pattern like this is how fun it is to personalize. You can play with different yarn types and colors to give each mouse a unique look. For the Maxi Mouse, if you don’t have Scheepjes Organicon on hand, try using other soft organic cotton yarns in DK weight. For the Mini Mouse, Katia Capri can be swapped with any sport-weight mercerized cotton that holds its shape well.
Want to take your mouse to the next level? Add charming accessories like a tiny bow, mini hat, or embroidered whiskers. These little extras can turn your project into the perfect handmade crochet decoration or heartfelt gift.
For the eyes, feel free to use small safety eyes if you’re not making the mouse for very young children. Alternatively, embroider the eyes with black and white yarn for a softer, stitched look.
Personal touches like these make every mouse your own—and even more adorable!
Crochet Tips for Beginners
If you’re new to making beginner-friendly crochet projects, this cheerful mouse duo is the perfect way to learn some essential amigurumi techniques. Here are a few tips to help you along the way:
1. Mastering the Magic Ring (MR):
Most amigurumi patterns start with a magic ring, which allows you to close the center of your work tightly without leaving a hole. To create one, loop the yarn into a circle, insert your hook through the loop, pull up a loop, and chain one. Then, crochet the required number of single crochets (sc) into the loop and pull the tail to tighten.
2. Stuffing for Shape:
Use small amounts of fiberfill at a time to gently shape the mouse’s body. Overstuffing can stretch the stitches or make the mouse too firm. For a soft, cuddly finish, keep the filling light but even.
3. Use Stitch Markers:
Keep track of your rounds with a stitch marker or a scrap piece of yarn. Place it in the first stitch of each round to avoid losing your place.
4. Prevent Yarn Splitting:
Working with fine hooks and cotton yarn can sometimes split the yarn. Crochet slowly, and make sure to insert your hook cleanly under both loops of each stitch.
These little tips will make your project smooth and enjoyable—plus, these mice make quick crochet gift ideas for friends and family!
How to Use Your Finished Mice

Once you’ve completed your Mini or Maxi Mouse, there are so many fun and creative ways to use them! These adorable crochet accessories can brighten up any space or become thoughtful handmade gifts.
Display Ideas:
Place your small crochet accessories and toys on bookshelves, nursery dressers, or even your work desk for a daily dose of cuteness. They also make sweet additions to seasonal décor or themed room setups.
Gift Ideas:
Looking for a unique baby shower or birthday present? These mice are perfect as soft, safe toys for little ones—or as keepsakes for new parents. The mini version can be easily turned into a keychain or DIY mouse plushie charm for backpacks and handbags.
Craft Fair Favorites:
If you sell at markets or craft fairs, these cheerful mice are ideal quick makes. They’re budget-friendly, eye-catching, and loved by all ages—perfect for adding variety to your stall of crochet accessories.
Whether you gift them, keep them, or sell them, these handmade mice are sure to bring a smile wherever they go!
Frequently Asked Questions (FAQ)
1. Can I use different yarn for this free crochet mouse pattern?
Yes! You can substitute with any cotton or cotton-blend yarn in similar weights. Just keep in mind that changes in yarn type or hook size may affect the final size and texture of your amigurumi mouse.
2. How long does it take to make each version?
The Mini Mouse can usually be finished in 1–2 hours, while the Maxi Mouse might take 3–4 hours, depending on your pace. These quick projects are great for relaxing afternoons or weekend crafting.
3. Can I wash the finished mice?
Yes, if you’ve used machine-washable yarn and secured all parts tightly. It’s best to hand-wash your DIY mouse plushie gently and let it air dry to maintain its shape.
4. Is this safe for babies?
Yes, if you embroider the facial features, avoid using safety eyes or small parts. This ensures your soft toy is safe for little hands.