
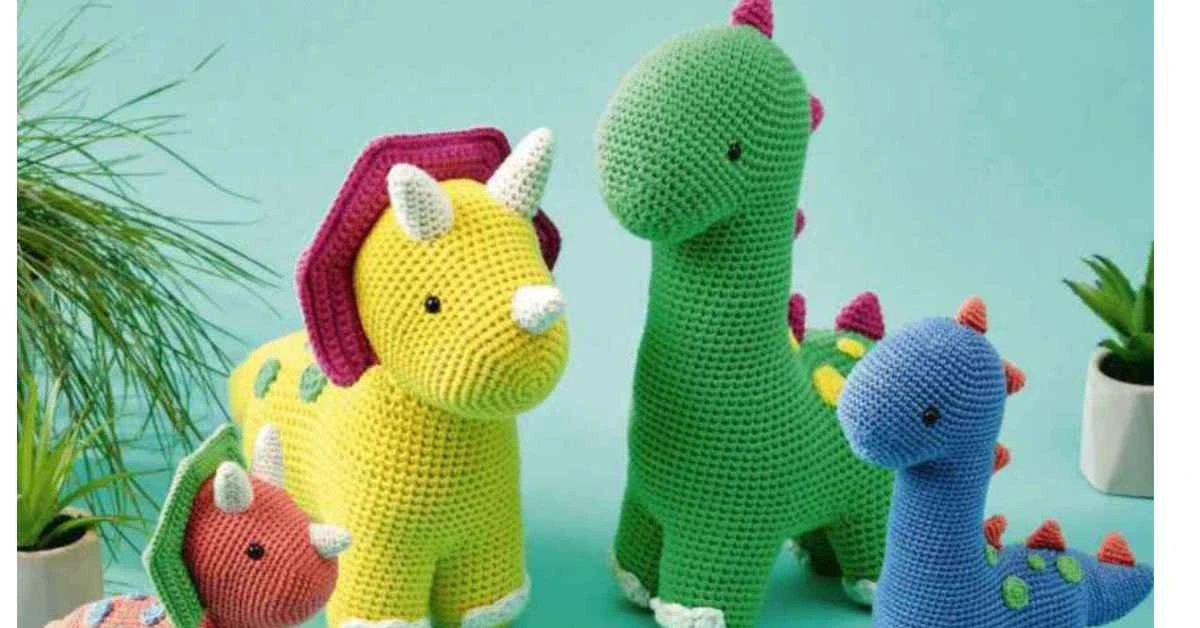
Using a Crochet Dragon Pattern Free is a magical and rewarding experience, allowing you to bring mythical creatures to life with just a hook and some yarn. Whether you’re a beginner or an experienced crocheter, this amigurumi dragon pattern is a fun way to improve your skills while creating an adorable handmade companion.
Amigurumi dragons are perfect for a variety of uses. They make wonderful gifts for kids and fantasy lovers, charming decorations for nurseries or themed rooms, and unique collectibles for crochet enthusiasts. Plus, with the right pattern, you can customize your dragon’s colors, size, and features to make it truly one-of-a-kind!
In this post, you’ll find a Crochet Dragon Pattern free that is both beginner-friendly and enjoyable for advanced crocheters. I’ll walk you through everything you need to know, from the materials and stitches required to step-by-step instructions and creative customization ideas. By the end, you’ll have your own handmade dragon ready to spread its wings!
Materials & Tools Needed
Before you start crocheting your adorable dragon, gathering the right materials and tools is essential. Choosing high-quality supplies will ensure that your dragon turns out soft, durable, and well-shaped. Here’s what you’ll need:
1. Yarn
For a soft and cuddly dragon, it’s best to use:
- Cotton yarn – Holds its shape well and gives a clean, defined look.
- Acrylic yarn – Soft, lightweight, and budget-friendly, making it great for plush toys.
- Velvet or chenille yarn – Creates an ultra-soft, fluffy dragon with a luxurious feel.
👉 Recommended Yarn Weight: DK (Double Knit) or worsted weight for a balanced size and texture.
2. Crochet Hook Size
The right hook size depends on your chosen yarn:
- For DK yarn → Use a 3.0 mm – 3.5 mm crochet hook.
- For worsted weight yarn → Use a 4.0 mm – 4.5 mm crochet hook.
- For fluffy yarn (velvet, chenille) → Use a 5.0 mm – 6.0 mm crochet hook to avoid snagging.
🔹 Tip: Choose a smaller hook than usual to keep stitches tight and prevent stuffing from showing through!
3. Stuffing
- Polyester fiberfill – The best option for creating a soft, squeezable dragon.
- Cotton stuffing – An eco-friendly choice but slightly firmer.
- Scrap yarn or fabric – Can be used as a budget-friendly alternative.
🔹 Tip: Stuff firmly but not too tightly to maintain shape without stretching the stitches.
4. Safety Eyes or Embroidery Floss
- Safety eyes (6mm-12mm) – Great for a polished, professional look, but not recommended for small children.
- Embroidery floss (black or colored) – Perfect for embroidered eyes, adding a cute handmade touch.
🔹 Tip: If making for children under 3 years old, always opt for embroidered eyes to avoid choking hazards!
5. Tapestry Needle & Stitch Markers
- Tapestry Needle – Needed for sewing parts together and weaving in ends.
- Stitch Markers – Essential for keeping track of rounds in amigurumi projects.
6. Optional Embellishments
Get creative with extra decorations!
- Felt pieces – For added details like wings or belly scales.
- Sequins or beads – To give your dragon a magical, sparkling touch.
- Wire (optional) – For poseable wings or tails.
With these materials in hand, you’re all set to start crocheting your adorable amigurumi Crochet Dragon Pattern free!
Understanding the Crochet Stitches Used
Before starting your amigurumi Crochet Dragon Pattern free, it’s important to be familiar with the basic crochet stitches that will help shape its body. If you’re new to crochet, don’t worry! These stitches are simple to learn and essential for making any amigurumi project.
1. Magic Ring (Adjustable Loop)
The magic ring is the foundation of most amigurumi patterns. It creates a tight, adjustable loop, allowing you to start crocheting in the round without leaving a hole in the center.
How to make a magic ring:
- Wrap the yarn around your fingers to form a circular shape.
- Place your hook into the loop, wrap the yarn over the hook, and draw it through.
- Chain one (if needed), then work the required stitches into the ring.
- Gently tug on the yarn tail to secure the loop firmly.
🔹 Tip: If the magic ring is tricky, you can start with a chain 2 and work stitches into the second chain from the hook.
2. Single Crochet (SC)
The single crochet stitch is the foundational stitch commonly used in amigurumi. It creates a tight fabric, preventing stuffing from showing through.
How to single crochet:
- Insert the hook into the stitch.
- Yarn over and pull through (2 loops on the hook).
- Yarn over again and pull through both loops.
3. Increase (INC) & Decrease (DEC)
To shape your dragon’s body, you’ll need to increase and decrease stitches.
- Increase (INC): Work two single crochets into the same stitch to make the piece wider.
- Decrease (DEC): Combine two stitches into one to make the piece narrower.
- For a cleaner look, use the invisible decrease: Insert the hook into the front loops only of the next two stitches, yarn over, pull through both loops, then yarn over and pull through the last two loops.
4. Slip Stitch (SL ST)
Slip stitches are used for joining rounds, finishing edges, or adding decorative details.
How to slip stitch:
- Insert the hook into the stitch.
- Yarn over and pull through both the stitch and the loop on the hook in one motion.
5. Chain Stitch (CH)
Chains are used for starting a project, making decorative details, or creating parts like wings or horns.
How to chain:
- Wrap the yarn over your hook and pull it through the loop that’s on your hook.
- Repeat for the number of chains needed.
6. Working in Rounds (Continuous & Joined)
Amigurumi dragons are typically crocheted in rounds to create seamless 3D shapes. There are two main ways to work in rounds:
- Continuous Rounds (Spiral Method)
- No joining after each round—just keep crocheting in a spiral.
- Always use a stitch marker to keep track of the first stitch in each round.
- Joined Rounds
- Each round ends with a slip stitch and a chain 1 before starting the next round.
- Creates a more structured shape but leaves a visible seam.
🔹 Tip: Most amigurumi patterns use continuous rounds to avoid seams and give a smoother look.
By mastering these stitches and techniques, you’ll be ready to crochet your very own adorable amigurumi Crochet Dragon Pattern free! 🐉✨
Step-by-Step Crochet Dragon Pattern Free
Now that you have your materials ready and understand the essential stitches, it’s time to start crocheting your adorable amigurumi Crochet Dragon Pattern free! Follow this step-by-step guide to create each part of your dragon, and by the end, you’ll have a magical handmade companion.
A. Head & Body
The head and body of the dragon are crocheted as a single or connected piece using seamless amigurumi techniques to give a smooth, rounded shape.
Instructions for the Head:
- Start with a magic ring and work 6 single crochets (SC) into the ring.
- Increase rounds: Continue increasing evenly until you reach the desired head size.
- Maintain the shape: Work several rounds without increases for a more rounded head.
- Decrease rounds: Gradually decrease to taper the shape, leaving an opening for attaching the body.
Instructions for the Body:
- Start a new magic ring and follow the same steps as the head, but make it slightly larger.
- After reaching the widest part, work several rounds evenly to elongate the body.
- Gradually decrease to shape the bottom.
- Stuff firmly but evenly to prevent a lumpy shape.
🔹 Shaping Tip: Use a stitch marker to keep track of rounds and adjust stuffing as you go to avoid gaps.
B. Legs & Arms

The dragon’s limbs should be sturdy but flexible to help it stand or sit properly.
Legs:
- Make two magic rings, starting with 6 SC inside.
- Increase rounds to widen the legs.
- Work even rounds to give the legs some length.
- Stuff lightly and close the opening.
Arms:
- Follow the same steps as the legs, but make them slightly thinner and shorter.
- Leave the top open for easy attachment to the body.
🔹 Placement Tip: Position the legs evenly on the bottom sides of the body for balance. Attach the arms slightly forward for a natural pose.
C. Tail & Wings
The tail adds character to your dragon, while the wings bring it to life!
Tail:
- Start with a magic ring and increase rounds to widen the base.
- Continue working even rounds, gradually decreasing towards the tip.
- Leave it lightly stuffed or unstuffed for flexibility.
Wings (Choose a Style):
- Flat wings: Simple triangular or oval shapes using single crochet and chains.
- Textured wings: Add ribbing with front post and back post stitches.
- Layered wings: Crochet multiple pieces and attach them for a 3D effect.
🔹 Attachment Tip: Sew the wings slightly angled backward for a dynamic look.
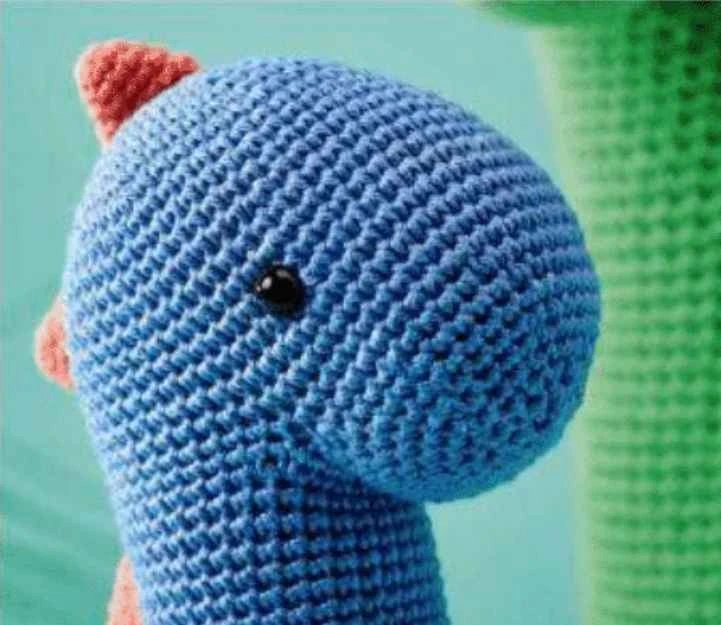
D. Ears, Horns & Facial Features
Small features add personality to your dragon!
Ears:
- Crochet small ovals or triangles in two layers for a sturdy shape.
- Attach to the sides of the head.
Horns (Optional):
- Crochet tiny cones, starting with a magic ring and working increase rounds at the base.
- Leave them slightly curved for a playful look.
Eyes & Mouth:
- Safety Eyes: Insert them before closing the head for a polished finish.
- Embroidered Eyes: Use black embroidery floss for cute stitched expressions.
- Mouth & Nose: Add tiny stitches for a smiling or fierce look!
Assembly & Final Touches
Once all parts are ready, it’s time to bring your dragon to life!
Attaching the Pieces:
- Sew the head to the body using a tapestry needle and matching yarn.
- Attach the legs and arms, making sure they are evenly positioned.
- Sew the tail and wings securely for balance and structure.
- Attach ears, horns, and other features for final detailing.
Stuffing Tips:
- Stuff firmly but not too tightly to maintain shape without stretching stitches.
- Shape while stuffing, pressing lightly to create a natural curve.
Adding Final Details:
- Use embroidery or fabric paint for extra facial expressions.
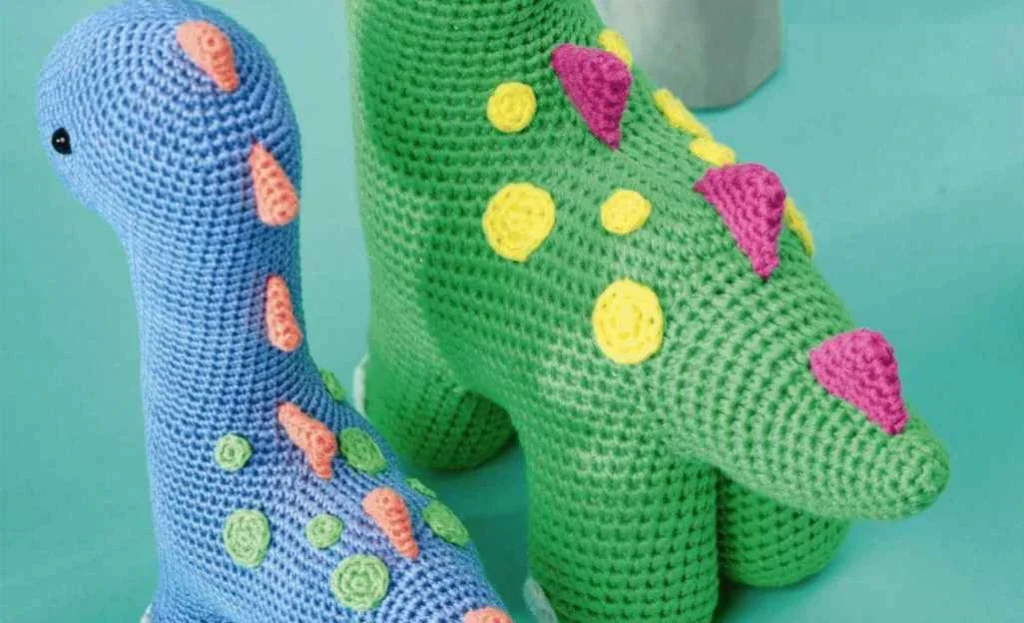
- Sew or glue felt pieces for belly scales or wing patterns.
- Add tiny beads or sequins for a magical sparkle effect.
By following these steps, you’ll have an adorable and fully customized amigurumi dragon ready to be displayed, gifted, or cuddled!
Customization Ideas
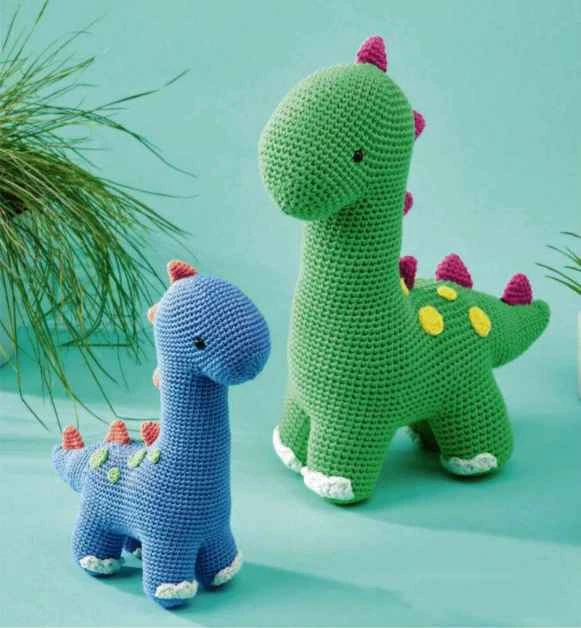
One of the best things about crocheting your own amigurumi dragon is that you can customize it in countless ways to make it truly unique! Whether you want a fierce fire dragon, a cool ice dragon, or a soft pastel baby dragon, here are some fun ideas to personalize your creation.
1. Themed Dragons: Bring Your Imagination to Life!
Changing the yarn colors and adding small details can transform your dragon into a whole new character.
- Fire Dragon: Use shades of red, orange, and yellow for a fiery look. Add flame-shaped felt for a dramatic effect.
- Ice Dragon: Use light blue, white, and silver yarn. Consider sparkly yarn for an icy shimmer.
- Forest Dragon: Green and brown shades work great. Add leafy wings or vines for a nature-inspired style.
- Pastel Baby Dragon: Soft pink, lavender, mint, or baby blue for a cute, gentle look. Perfect for gifts or nurseries!
- Galaxy Dragon: Deep purples, blues, and blacks with silver or glittery specks for a cosmic effect.
🔹 Tip: Mixing ombre or gradient yarn can give your dragon a beautifully blended look!
2. Adjusting Size: Make a Tiny or Giant Dragon!
You can easily make your dragon bigger or smaller by adjusting the yarn weight and hook size.
- Mini Pocket Dragon:
- Use sport or fine-weight yarn with a 2.0 mm – 2.5 mm hook for a small, adorable dragon.
- Perfect for keychains, charms, or tiny desk companions.
- Jumbo Plush Dragon:
- Use super bulky or chenille yarn with a 6.0 mm – 8.0 mm hook for a large, cuddly plush.
- Great for snuggly bedtime friends!
🔹 Tip: Keep stitch counts the same; only change yarn and hook size to resize your dragon.
3. Adding Accessories for Extra Charm
Give your dragon some personality with fun little accessories!
- Mini Scarves & Hats: Perfect for a cozy winter dragon. Use contrasting yarn colors for a cute effect.
- Tiny Glasses or Goggles: Great for a wise scholar dragon or a steampunk-themed look.
- Bows & Ribbons: Add to the head or neck for a soft, friendly appearance.
- Mini Wings: Instead of large wings, try tiny fairy-like wings for a unique style.
- Spikes & Scales: Use crocheted bobbles or felt cutouts to give your dragon extra texture.
🔹 Tip: Attach accessories with sewing or a small drop of fabric glue to keep them secure.
With these customization ideas, you can create a dragon that’s truly your own, whether it’s fierce, cute, magical, or completely one-of-a-kind! Which theme are you excited to try first?
Care Instructions for Your Crochet Dragon
Taking proper care of your amigurumi dragon will keep it looking fresh, clean, and well-shaped for years to come. Here are some washing, maintenance, and storage tips to help your handmade creation stay in perfect condition.
Washing & Cleaning Tips
Since amigurumi dragons are made of yarn and stuffing, they require gentle cleaning methods to avoid damage.
For Light Cleaning:
- Use a lint roller or soft brush to remove dust and pet hair.
- Treat stains by gently blotting them with a damp cloth and a touch of mild soap.
- Avoid using harsh detergents or bleach, as they can weaken yarn fibers.
For a Full Wash:
🔹 Hand Washing (Best Method):
- Fill a bowl with lukewarm water and mix in a few drops of mild detergent.
- Gently submerge the dragon and squeeze lightly to remove dirt (avoid twisting or wringing).
- Rinse thoroughly with clean water.
- Press out excess water with a towel and reshape the dragon.
- Let it air dry completely on a flat surface.
🔹 Machine Washing (Only if Necessary):
- Place the dragon in a mesh laundry bag or pillowcase for protection.
- Select the gentle cycle with cold water and a mild detergent for washing.
- Do not use a dryer—air dry only to prevent misshaping.
2. Storage Tips
Proper storage helps prevent your crochet dragon from getting stretched, dusty, or damaged over time.
- Keep in a dust-free space like a sealed box, fabric bag, or display shelf.
- Avoid direct sunlight to prevent yarn colors from fading.
- Use lavender sachets or cedar blocks in storage areas to keep moths away.
- Do not hang by the limbs or wings, as this can stretch the stitches over time.
🔹 Long-Term Storage Tip: If storing for months, wrap the dragon in acid-free tissue paper to keep it fresh and protected.
With these simple care tips, your handmade crochet dragon pattern free will stay soft, clean, and beautifully shaped for years to come!
Conclusion
Congratulations! You’ve now learned how to create your very own adorable amigurumi dragon from start to finish. Whether you followed the pattern exactly or added your own creative touches, your handmade dragon is a one-of-a-kind masterpiece!
Crocheting amigurumi is not only a fun and rewarding hobby, but it also allows you to craft unique gifts, decorations, or collectibles that will be cherished for years. If this is your first time making a crochet dragon, don’t worry—practice makes perfect, and every stitch helps improve your skills!
I’d love to see your finished dragons!
- Feel free to share your photos in the comments or tag me on social media!
- Let me know if you tried any of the customization ideas or came up with your own.
- Follow for more free amigurumi patterns and crochet inspiration!
Happy crocheting, and may your dragon bring a little magic to your world!

