

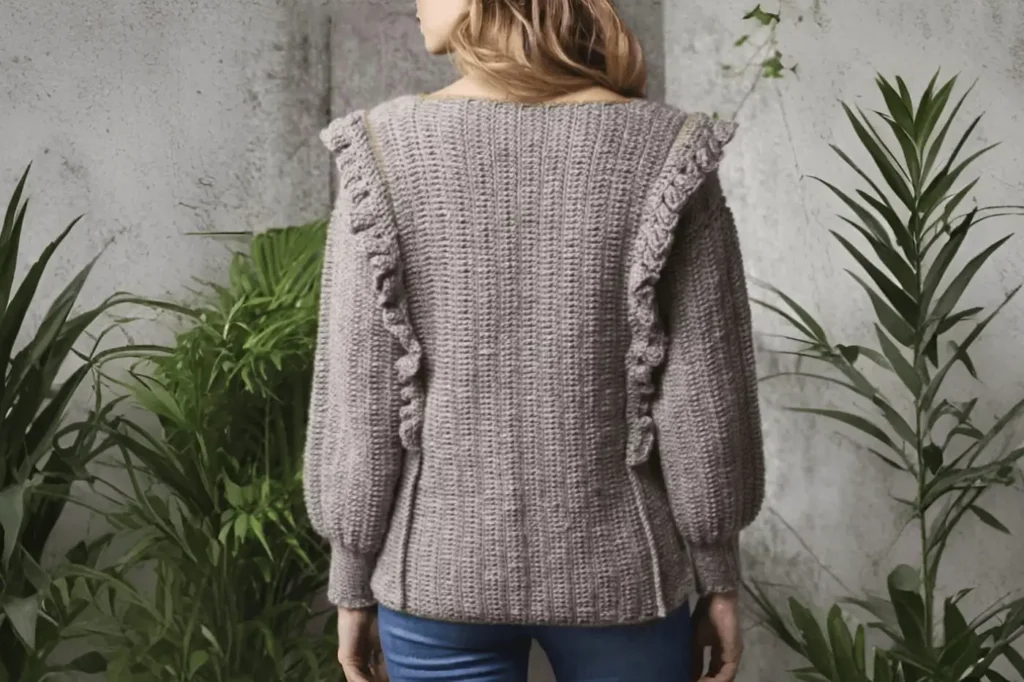
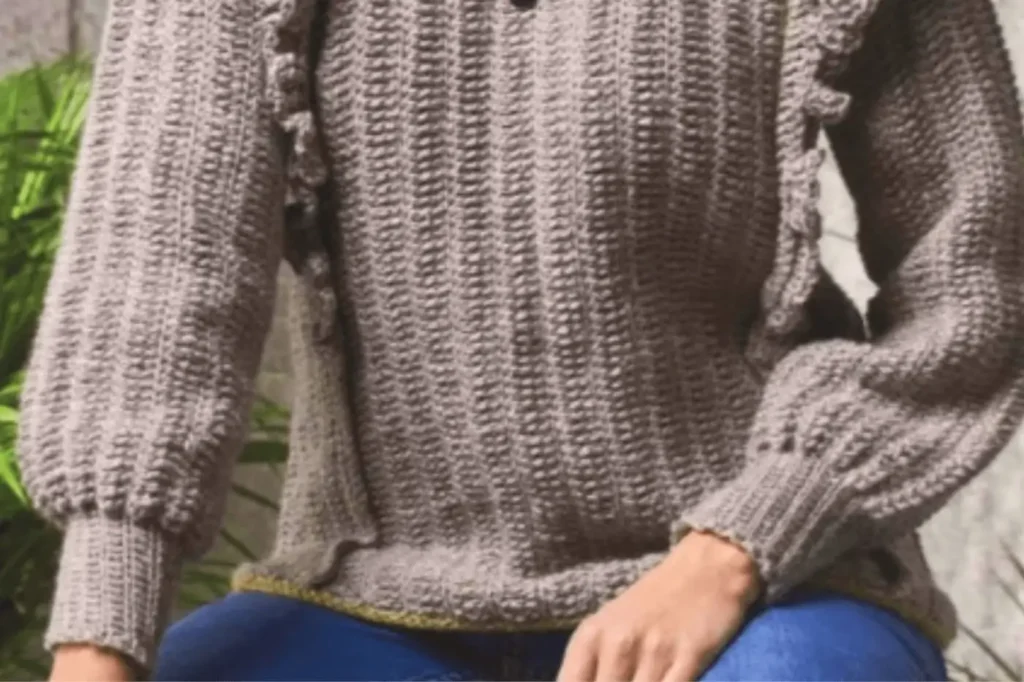
Are you ready to create a stunning, catwalk-inspired piece that’s both stylish and versatile? In this crochet dress tutorial, I’ll show you how to crochet a stylish ruffled sweater using beautiful tweed yarn. This project is perfect for anyone looking to add a touch of elegance to their wardrobe, whether you’re dressing it up for a special occasion or keeping it casual for everyday wear.
The ruffled sweater featured in this tutorial is not only fashionable but also functional, thanks to its unique side-to-side construction and the use of Rowan Hemp Tweed yarn, which ensures the fabric stays in shape without stretching. With its delicate ruffles and cozy tweed texture, this sweater is sure to become a favorite in your collection.
Whether you’re a beginner or an intermediate crocheter, this step-by-step guide will walk you through the entire process, from choosing the right materials to adding the final decorative touches. So, grab your crochet hook and let’s get started on creating a sweater that’s as fun to make as it is to wear!
Perfect for beginners and intermediate crocheters alike! Let’s dive into the world of crochet and create something truly special.
Materials Needed
Before diving into this crochet dress tutorial, let’s gather all the materials you’ll need to create your stylish ruffled sweater. Here’s a detailed list to ensure you’re fully prepared:
Yarn
- Primary Yarn:
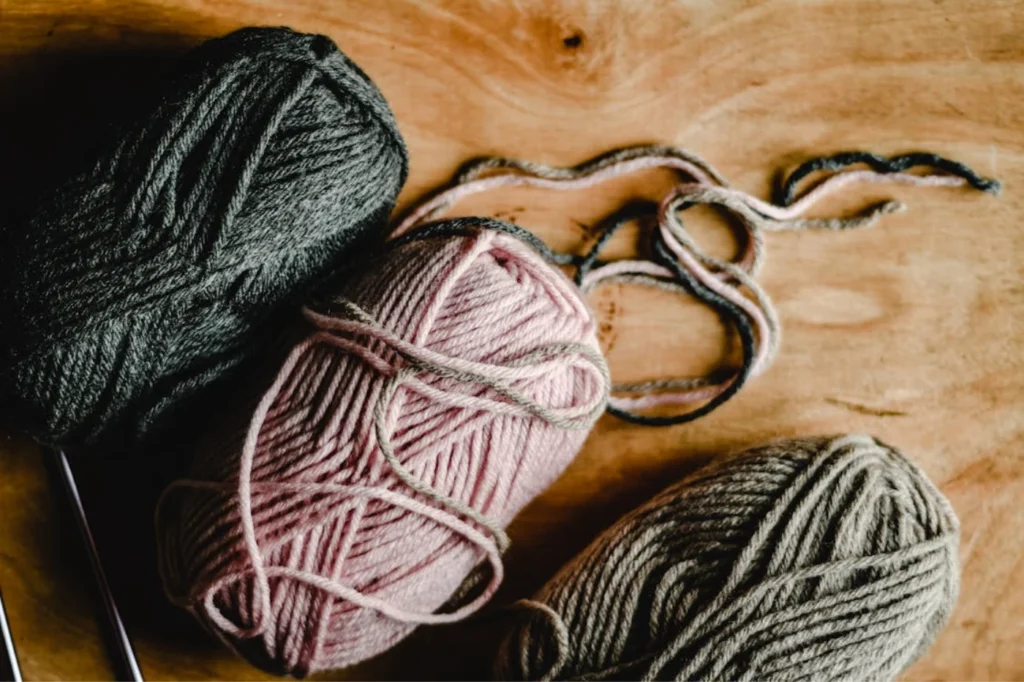
- Rowan Hemp Tweed (75% wool, 25% hemp, 50g/95m) in the following shades:
- Pumice (138) – for the main body of the sweater.
- Willow (146) – for the decorative ruffles and edging.
- This yarn is perfect for the project because the hemp content prevents the fabric from stretching, ensuring your sweater retains its shape.
- Rowan Hemp Tweed (75% wool, 25% hemp, 50g/95m) in the following shades:
- Budget-Friendly Alternative:
- If you’re looking for a more affordable option, try KnitPicks Wool of the Andes Tweed in shades like Thirst Heather (25450) or Dill Heather (25456).
- Tip: If substituting yarn, always check the hook size, tension, and ball length to ensure the finished sweater matches the pattern’s measurements.
Crochet Hook
- 4.5mm (US 7) crochet hook – This is the recommended hook size for achieving the correct tension and stitch definition with the suggested yarns.
Other Tools
- Scissors – For cutting yarn.
- Tapestry Needle – For weaving in ends and sewing seams.
- Stitch Markers – To help keep track of important stitches or sections, especially when working on the neckline or armholes.
Importance of Checking Tension
- Before starting, it’s crucial to check your tension to ensure your sweater turns out the right size. The pattern specifies 8 rows and 17 stitches to measure 10x10cm (4x4in) using a 4.5mm hook.
- If your tension doesn’t match, adjust your hook size accordingly.
Yarn Substitutions
- If you choose to use a different yarn, make sure it has a similar weight and fiber content to achieve the same look and feel. Always swatch first to confirm the gauge matches the pattern requirements.
With these materials in hand, you’re all set to start crocheting your ruffled sweater. In the next section, we’ll cover the skill level required and some helpful tips to prepare for this project!
Skill Level and Preparation
This ruffled sweater crochet tutorial is designed to be accessible for beginners to intermediate crocheters. If you’re new to crochet, don’t worry—this project is a great way to build your skills while creating something beautiful. For more experienced crocheters, the unique construction and decorative ruffles offer a fun challenge.
Key Techniques Used in the Pattern
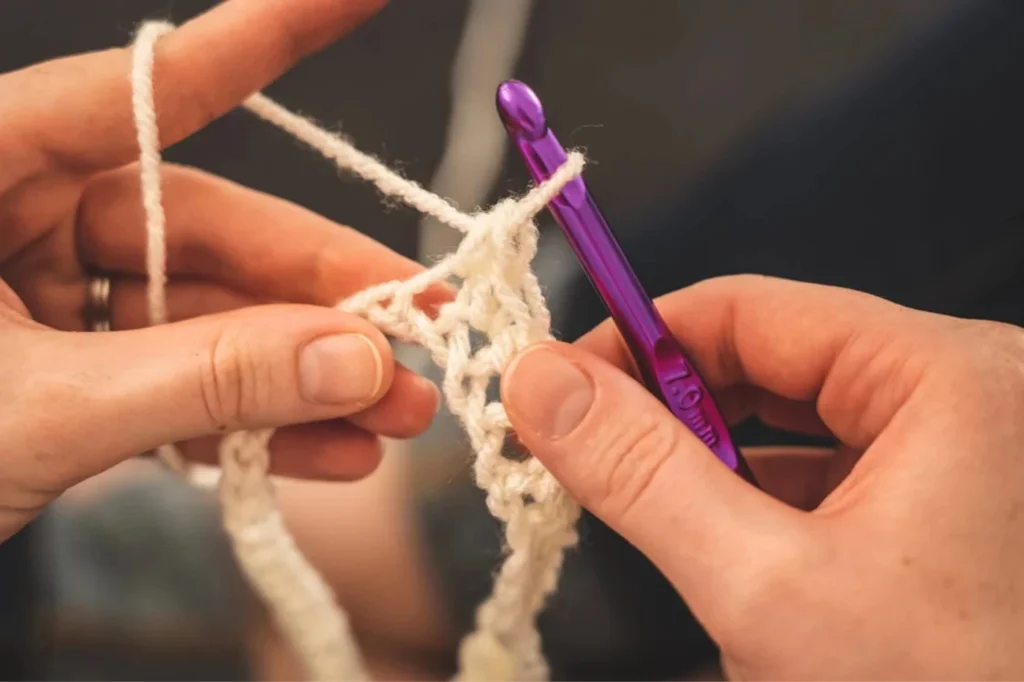
To successfully complete this sweater, you’ll need to be familiar with a few essential crochet techniques. Here’s a breakdown of the stitches you’ll use:
- Double Treble Crochet (dtr):
- This is a taller stitch that creates a looser, more open fabric. It’s used extensively in the body of the sweater to achieve the desired drape and texture.
- How to do it: Yarn over twice, insert the hook into the stitch, yarn over and pull through (4 loops on the hook). Yarn over and pull through 2 loops, repeat until 1 loop remains.
- Slip Stitch (ss):
- This stitch is used for joining pieces, creating seams, and adding edging. It’s also used in the pattern to create a neat, flat finish.
- How to do it: Insert the hook into the stitch, yarn over, and pull through both the stitch and the loop on the hook.
- Chain Stitch (ch):
- The foundation of most crochet projects, chain stitches are used to start rows and create spaces for other stitches.
- How to do it: Yarn over and pull through the loop on the hook.
Tips for Beginners
If you’re new to crochet or need a refresher, here are some tips to help you prepare for this project:
- Practice Basic Stitches First:
- Before starting the sweater, spend some time practicing the double treble crochet (dtr), slip stitch (ss), and chain stitch (ch). This will help you get comfortable with the techniques and ensure your tension is consistent.
- Check Your Tension:
- Tension is crucial for achieving the correct size and fit. Make a small swatch using the recommended hook and yarn to ensure your stitches match the pattern’s gauge (8 rows and 17 stitches = 10x10cm / 4x4in).
- Use Stitch Markers:
- Stitch markers can be a lifesaver, especially when working on the neckline or armholes. Use them to mark the beginning of rounds or important sections.
- Take It Step by Step:
- This pattern is worked in sections (side panel, back, front, sleeves, and ruffles), so focus on one part at a time. Don’t rush—enjoy the process!
- Watch Tutorials if Needed:
- If you’re unsure about any stitches or techniques, there are plenty of video tutorials online that can help. Visual guides can make learning new stitches much easier.
With these techniques and tips in mind, you’re ready to tackle this stylish ruffled sweater! In the next section, we’ll dive into the step-by-step instructions for creating the side panel and back of the sweater. Let’s get started!
Step-by-Step Crochet Instructions
In this section, we’ll break down the instructions into clear, manageable steps for each part of the sweater. Follow along to create your stylish ruffled sweater!
Side Panel and Back
The sweater is worked from side to side, starting with the side panel and back. This unique construction gives the sweater its distinctive shape and allows for easy customization.
- Starting the Side Panel:
- With Pumice yarn, chain 195 (199: 205: 209) depending on your size.
- Row 1 (RS): Slip stitch (ss) into the second chain from the hook and each following chain across. Turn. You should have 194 (198: 204: 208) stitches.
- Row 2: Chain 4 (counts as a double treble crochet, dtr), then work 1 dtr into the front loop of each stitch across. Turn.
- Row 3: Chain 1, then work 1 ss into the front loop of each stitch across. Turn.
- Setting the Pattern:
- Repeat Rows 2 and 3 to establish the pattern.
- Continue repeating these rows 3 (4: 5: 6) more times, depending on your size.
- After completing these rows, you should have 10 (12: 14: 16) rows in total.
- Working the Back:
- Row 1 (RS): Chain 1, then work 1 ss into the front loop of the first 97 (99: 102: 104) stitches. Turn.Row 2: Chain 4, then work 1 dtr into the front loop of the next 96 (98: 101: 103) stitches. Turn.Repeat Rows 1 and 2 seven more times to complete the back section.
Front Panel
The front panel includes shaping for the neckline, giving the sweater a flattering fit.
- Starting the Front:
- With the right side (RS) facing, join a new ball of Pumice yarn to the next unworked stitch of the last row of the side panel.
- Row 1 (RS): Chain 1, then work 1 ss into the front loop of the next 97 (99: 102: 104) stitches. Turn.
- Neckline Shaping:
- Row 2: Chain 4, then work 1 dtr into the front loop of the next 80 (82: 85: 87) stitches. Work a dtr2tog (double treble crochet 2 together) to shape the neckline. Turn, leaving the remaining stitches unworked.Continue following the pattern for the front panel, working decreases and increases as instructed to shape the neckline.
Sleeves
The sleeves are worked separately and then attached to the armholes for a seamless finish.
- Starting the Sleeves:
- With Pumice yarn, chain 77.
- Row 1: Work 1 ss into the second chain from the hook and each following chain across. Turn. You should have 76 stitches.
- Sleeve Pattern:
- Row 2: Chain 1, then work 1 dc (double crochet) into the front loop of the first 17 stitches. Work 1 dtr into the front loop of each remaining stitch. Turn.
- Row 3: Chain 1, then work 1 ss into the front loop of each stitch across. Turn.
- Repeat Rows 2 and 3 for a total of 26 (28: 30: 32) rows, depending on your size.
- Attaching the Sleeves:
- Seam the long edge of the sleeve using a slip stitch (ss) seam in the front loops only.
- Sew the sleeves into the armholes, ensuring a neat and secure fit.
Ruffles and Edging
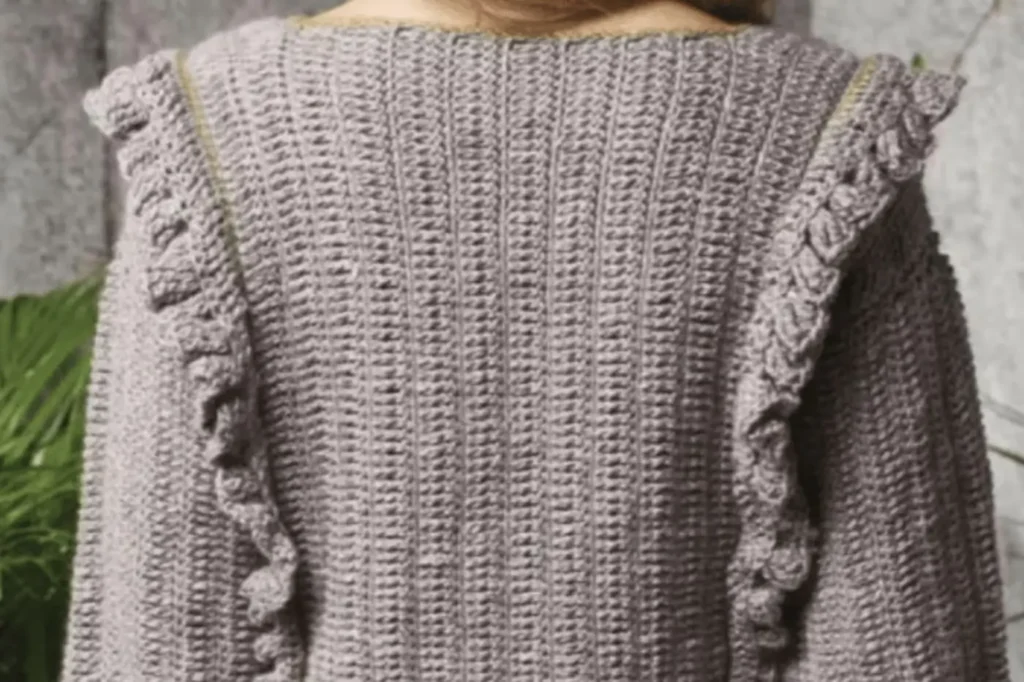
The ruffles and edging add a decorative touch to the sweater, making it truly special.
- Left Ruffle:
- With the right side (RS) facing, join Pumice yarn to the remaining loop of the slip stitch row at the front hem.
- Row 1 (RS): Chain 1, then work 1 dc into each stitch across. Leave the yarn attached and return to the beginning of the row, joining Willow yarn.
- Row 2 (RS): Chain 1, then work 1 ss into each stitch across. Fasten off Willow yarn, turn, and pick up Pumice yarn again.
- Continue following the pattern to create the ruffled effect.
- Right Ruffle:
- Repeat the same steps as the left ruffle, starting at the back hem.
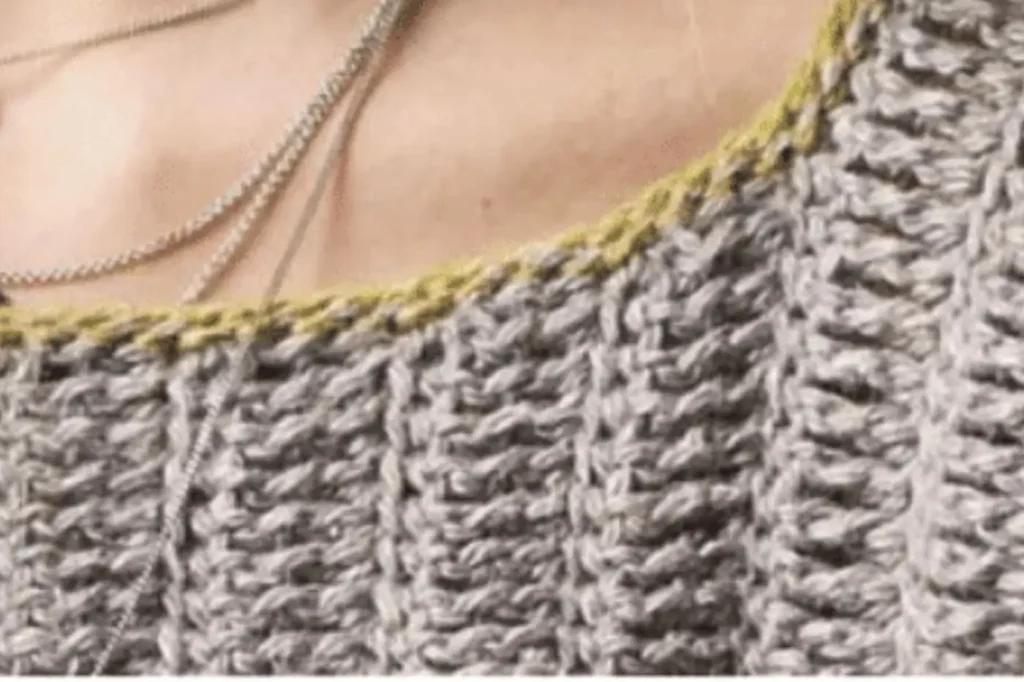
- Edging:
- Work around the bottom of the sweater and the neckline using Willow yarn in continuous rounds.
- Round 1: With the wrong side (WS) facing, work 1 ss into each chain and stitch around.
- Round 2: Work 1 ss into the back loop of each stitch around, then join with a slip stitch to the first stitch.
With these step-by-step instructions, you’ll have a beautiful ruffled sweater in no time! In the next section, we’ll cover sizing and adjustments to ensure your sweater fits perfectly
Sizing and Adjustments
To ensure your ruffled sweater fits perfectly, it’s important to follow the sizing guide and make any necessary adjustments. Below, you’ll find a detailed table with measurements for different sizes, as well as tips for customizing the pattern to suit your body.
Sizing Table
Here’s a breakdown of the measurements for each size, along with the corresponding yarn quantities:
| Size | 8-10 | 12-14 | 16-18 | 20-22 |
|---|---|---|---|---|
| To Fit Bust | 81-86 cm | 91-97 cm | 102-107 cm | 112-117 cm |
| 32-34 in | 36-38 in | 40-42 in | 44-46 in | |
| Actual Bust | 90 cm | 100 cm | 110 cm | 120 cm |
| 35½ in | 39¼ in | 43¼ in | 47¼ in | |
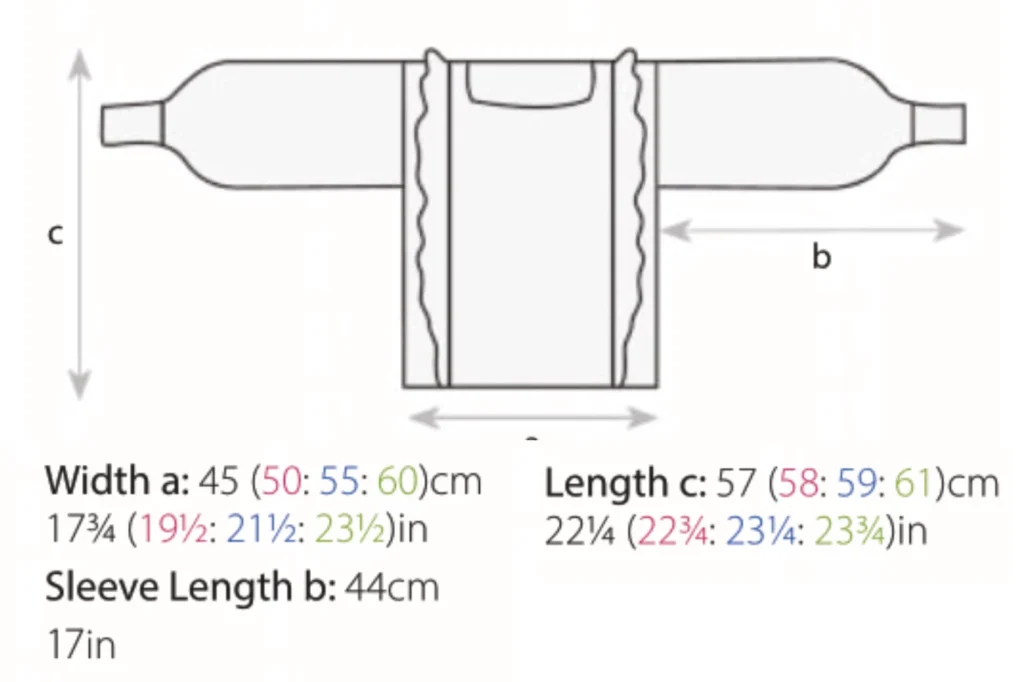
| Length | 57 cm | 58 cm | 59 cm | 61 cm |
| 22¼ in | 22¾ in | 23¼ in | 24 in | |
| Sleeve Length | 44 cm | 44 cm | 44 cm | 44 cm |
| 17 in | 17 in | 17 in | 17 in | |
| Pumice Yarn | 12 balls | 13 balls | 15 balls | 16 balls |
| Willow Yarn | 1 ball | 1 ball | 1 ball | 1 ball |
How to Adjust the Pattern for a Custom Fit
If you need to customize the sweater to fit your measurements, here are some tips:
- Adjusting the Bust Size:
- To make the sweater larger or smaller, adjust the number of starting chains for the side panel.
- For example, if you need a larger bust size, add more chains in multiples of the pattern repeat. Conversely, remove chains for a smaller size.
- Changing the Length:
- To make the sweater longer or shorter, simply add or remove rows from the side panel, back, and front sections.
- Keep in mind that the ruffles will add extra length, so factor that into your adjustments.
- Customizing the Sleeves:
- If you prefer longer or shorter sleeves, adjust the number of rows in the sleeve section.
- For a tighter or looser fit, modify the number of chains at the start of the sleeve.
- Neckline Adjustments:
- If you want a deeper or higher neckline, adjust the number of stitches you work in the front panel.
- For a wider neckline, leave more stitches unworked when shaping the neck.
- Swatching for Gauge:
- Always make a swatch to check your tension before starting. If your gauge doesn’t match the pattern (8 rows and 17 stitches = 10x10cm / 4x4in), adjust your hook size accordingly.
With these sizing guidelines and adjustment tips, you can create a ruffled sweater that fits you perfectly. In the next section, we’ll share some tips and tricks to make the crocheting process even easier!
Tips and Tricks
Crocheting a stylish ruffled sweater can be a fun and rewarding project, especially when you have a few tricks up your sleeve! Here are some tips to help you work with tweed yarn, maintain tension, and customize your sweater to make it uniquely yours.
Tips for Working with Tweed Yarn
- Handle with Care:
- Tweed yarn, like Rowan Hemp Tweed, can be slightly textured due to the hemp content. Work gently to avoid splitting the yarn.
- Use a 4.5mm (US 7) hook or adjust as needed to ensure smooth stitching.
- Maintain Consistent Tension:
- Tension is key to achieving the correct gauge (8 rows and 17 stitches = 10x10cm / 4x4in).
- If your stitches are too tight, switch to a larger hook. If they’re too loose, use a smaller hook.
- Practice your tension on a swatch before starting the project.
- Prevent Stretching:
- The hemp content in the yarn helps the fabric retain its shape, but avoid pulling too tightly when working on the ruffles or edging.
- Weave in Ends Securely:
- Tweed yarn can be slightly slippery, so take extra care to weave in your ends securely to prevent unraveling.
Ways to Customize Your Sweater
- Add More Ruffles:
- If you love the frilly look, consider adding extra ruffles to the hem, sleeves, or even the neckline.
- Use Willow yarn or a contrasting color to make the ruffles stand out.
- Change the Neckline:
- For a scoop neck, work fewer decreases in the front panel.
- For a higher neckline, add more rows to the front panel before shaping the neck.
- Experiment with Yarn Colors:
- Try using different shades of Pumice or Willow for a gradient effect.
- Alternatively, use a bold, contrasting color for the ruffles to make them pop.
- Adjust the Sleeves:
- Make the sleeves shorter for a spring/summer look or longer for extra warmth in colder months.
- Add bell sleeves by increasing the number of stitches at the cuff.
- Add Pockets:
- Crochet two small rectangles and sew them onto the front of the sweater for functional and stylish pockets.
Finishing and Care Instructions
Once you’ve completed your stylish ruffled sweater, it’s time to give it a polished finish and learn how to care for it properly. These steps will ensure your sweater looks professional and lasts for years to come.
How to Finish a Crochet Sweater
- Weave in Ends:
- Utilize a tapestry needle to carefully secure all loose ends.
- Thread the yarn through the back of several stitches, following the direction of the yarn to keep it hidden.
- Trim any excess yarn carefully to avoid fraying.
- Block the Sweater:
- Blocking is essential for giving your sweater a neat, professional finish.
- Place the sweater flat on a clean towel or a blocking mat.
- Gently stretch it to the desired measurements, pinning it in place if necessary.
- Lightly spray it with water or use a steam iron (on low heat) to set the stitches.
- Allow it to dry completely before unpinning.
- Seam and Join Pieces:
- Use a slip stitch (ss) or mattress stitch to join the side seams and attach the sleeves.
- Ensure the seams are even and secure for a polished look.
Crochet Sweater Care Tips
- Hand Washing:
- To preserve the quality of your tweed yarn sweater, always hand wash it in cool water with a mild detergent.
- Avoid wringing or twisting the sweater, as this can distort the shape.
- Drying:
- Spread the sweater flat on a clean towel to allow it to dry. Reshape it gently to maintain its dimensions.
- Steer clear of hanging the sweater, as it may lead to stretching and distortion.
- Storing:
- Carefully fold the sweater and keep it in a cool, dry location for storage.
- If storing for a long time, place it in a breathable fabric bag to protect it from dust and moths.
- Pilling Prevention:
- Tweed yarn can develop small pills over time. Use a fabric shaver or a sweater comb to gently remove them.
- Avoiding Stretching:
- The hemp content in the yarn helps prevent stretching, but it’s still important to handle the sweater with care.
- Avoid pulling on the ruffles or edging when putting on or taking off the sweater.
Bonus Tip: Refresh Your Sweater
- If your sweater loses its shape over time, gently block it again to restore its original dimensions.
With these finishing and care instructions, your ruffled sweater will look stunning and stay in perfect condition for years to come. In the next section, we’ll wrap up with a conclusion and some final thoughts!
Conclusion
Congratulations! You’ve reached the end of this crochet dress tutorial, and by now, you should have all the tools and knowledge you need to create your very own stylish ruffled sweater. Let’s take a moment to recap what makes this project so special:
- Unique Design: The ruffles add a touch of elegance and flair, making this sweater perfect for both casual and dressy occasions.
- Tweed Yarn: Using Rowan Hemp Tweed (or a budget-friendly alternative) ensures your sweater is not only beautiful but also durable and resistant to stretching.
- Side-to-Side Construction: This innovative technique gives the sweater a unique shape and makes it easier to customize for a perfect fit.
This project is a fantastic way to challenge your crochet skills while creating something truly wearable and fashionable. Whether you’re a beginner or an experienced crocheter, this ruffled sweater is sure to become a cherished piece in your wardrobe.
Share Your Creation!
We’d love to see your finished sweater! Share your progress and final results on social media using the hashtag #RuffledSweaterCrochet or leave a comment below with your thoughts and photos. Your creativity might inspire others to pick up their hooks and start crocheting too!
Ready to start your own ruffled sweater? Grab your yarn, hook, and this pattern, and let’s get crocheting! Whether you’re making it for yourself or as a gift, this sweater is sure to impress. Happy crocheting!
Thank you for following along with this tutorial. If you enjoyed this project, don’t forget to subscribe to our blog for more crochet patterns and tips. Until next time, keep those hooks busy! 🧶✨

